Friday, February 27, 2015

Not Your Ordinary Block!


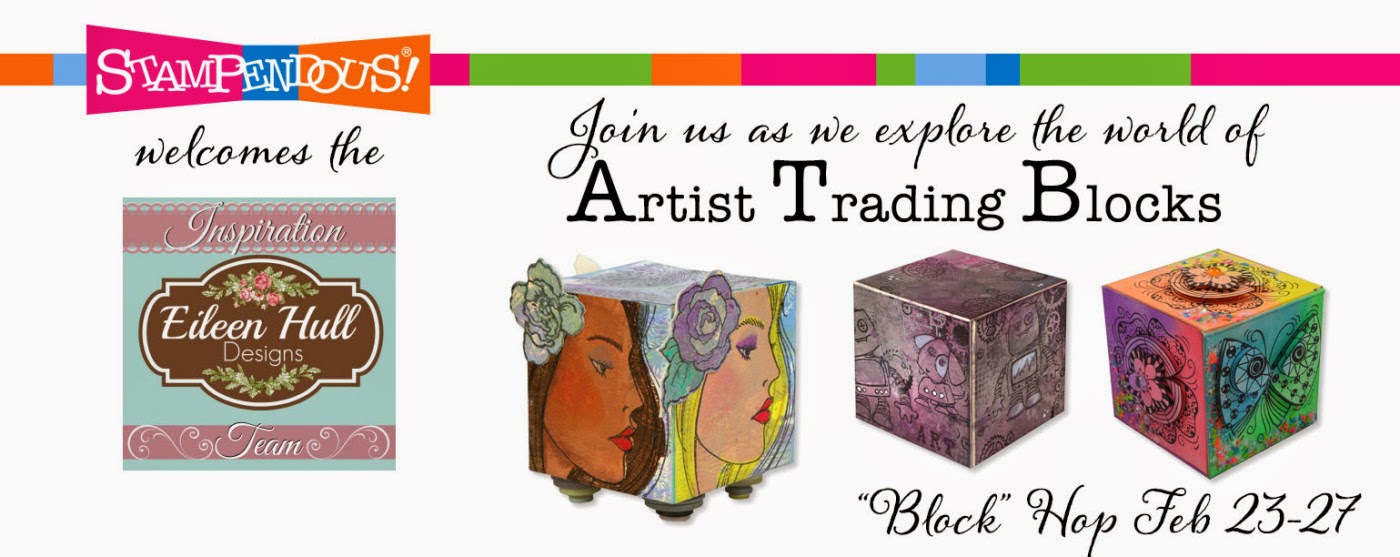
We are thrilled to bring you a blog hop today with more amazing artist trading block projects! Our designers have created some fabulous projects for today and we know you are excited to see them.  Here's my project for today's hop:


Here's what I used to create this ATB:

Archival Ink™ Pads in Coffee, Sap Green and Aquamarine
Memento Ink™ Pad in Teal Zeal
Tim Holtz® Distress Ink in Frayed Burlap
Scor-Tape™
Copic® Markers: E23, 41, 42; BG00, 01; W1, 4, 7
Faber-Castell® PITT Pens in Raw Umber, Warm Grey III and Cobalt Green
Build UR Beads Wooden Beads
Bronze Tulle
White Feather

I loved creating my projects for yesterday and today.  Yes, I did some thinking outside the box and in the box and all around the box!  This was a truly fun collaboration.  

Here are today’s participating designers:

Lea Kimmel (me)


PRIZE INFO:

We know this form of crafting will spark your interest and give your mojo a serious boost! That’s why we have prizes!!!  We’ll choose three winners at random from the comments on all blogs in the hop. Then from those three we’ll randomly pick a GRAND PRIZE winner! Two of the winners will receive Stampendous PenPattern Petal and PenPattern Flutter cling stamps, just like you’ll see on Kristine Reynolds amazing ATB sample. They’ll also receive enough pre-cut, premium matboard from Sizzix to make two boxes of your own, plus some extra pieces for fiddly bits! The Grand Prize winner will receive the stamps as above, a whole package of matboard, AND the Sizzix die to cut your own ATB boxes! Uh, WOW! If that weren’t enough, eligibility for these amazing prize packages has expanded to include our international fans too!


We know you won’t want to miss a single creation in this hop, and the Eileen Hull Designs Inspiration Team has several members that live outside the United States, so it took a while for them to get their products from us. We need to give them time to post and you time to comment, so the comment deadline will be Sunday, March 8th. A whole extra week! We will continue posting links as we receive them from the Inspiration Team, so be sure to keep checking back. You get one entry for every comment, so you don’t want to miss the chance to leave a thoughtful comment on each project. For those who tend to get lost, we’ll post a “cumulative” link list of links so far on Saturday, February 28th and Saturday, March 7th. Then you can check your progress.

We want to thank Eileen Hull, her amazing team and the fabulous products we were able to use this week. The idea of creating an artist trading block has changed our way of creating with new excitement. Even though we traditionally end our product partner weeks on a Friday the inspiration will continue as more projects come in and will be posted in a cumulative list at the end of each week.  Down below I have a list of links you may find helpful.  Thanks so much for stopping by on your crafty travels!  I hope you enjoy the hop, we've all enjoyed creating our projects for your inspiration.  Have a wonderful day and a fabulous weekend!

Hugs,
Lea

*New* Social Media Links

Stampendous Links:
Follow Stampendous:  Facebook Twitter * Pinterest * Instagram

Eileen Hull Links:  
Follow Eileen Hull: Facebook * Twitter * Pinterest * Google +* Instagram

The Artists on the Block Links:
Follow The Artists on the Block: Facebook * Twitter * Pinterest

Thursday, February 26, 2015

Altered State!

Creativity has many dimensions.  Artist trading blocks provide a multi-dimensional canvas for your artistic expression.  It’s never been easier to create, collect and share your style with Stampendous stamps and Essentials!  Here's what I've created to share with you today:


Here's what I used to create this ATB:


DecoArt® Americana® Multi-Surface Satin™ in Dolphin
DecoArt® Americana® in Grey Sky
Memento™ Tuxedo Black Ink Pad
Archival Ink™ Jet Black Ink Pad
Solid Oak Steampunk™ Gears
BuildURBeads Wooden Beads 
Copic® Markers:  E95, 97, 99; C1, 3, 5, 7
Spellbinders® Labels Two Die Set
Spellbinders® Sprightly Sprockets Die Set
Golden® Extra Heavy Gel Medium - Matte
Acetate, Wire, Bottle Cap from my crafty stash


Here are today’s participating designers:


Lea Kimmel (me)


We know this form of crafting will spark your interest and give your mojo a serious boost! That’s why we have prizes!!!  We’ll choose three winners at random from the comments on all blogs in the hop. Then from those three we’ll randomly pick a GRAND PRIZE winner! Two of the winners will receive Stampendous PenPattern Petal and PenPattern Flutter cling stamps, just like you’ll see on Kristine Reynolds amazing ATB sample. They’ll also receive enough pre-cut, premium matboard from Sizzix to make two boxes of your own, plus some extra pieces for fiddly bits! The Grand Prize winner will receive the stamps as above, a whole package of matboard, AND the Sizzix die to cut your own ATB boxes! Uh, WOW! If that weren’t enough, eligibility for these amazing prize packages has expanded to include our international fans too!

We know you won’t want to miss a single creation in this hop, and the Eileen Hull Designs Inspiration Team has several members that live outside the United States, so it took a while for them to get their products from us. We need to give them time to post and you time to comment, so the comment deadline will be Sunday, March 8th. A whole extra week! We will continue posting links as we receive them from the Inspiration Team, so be sure to keep checking back. You get one entry for every comment, so you don’t want to miss the chance to leave a thoughtful comment on each project. For those who tend to get lost, we’ll post a “cumulative” link list of links so far on Saturday, February 28th and Saturday, March 7th. Then you can check your progress.
Thanks so much for stopping by today!  I hope you've enjoyed my crazy creation!  I've provided you with some handy links below, please be sure to check them out!  See you again tomorrow.  Until then, have a wonderful day!

Hugs,
Lea

*New* Social Media Links

Stampendous Links:
Shop Stampendous 
Eileen Hull Links:  
The Artists on the Block Links:
The Artists on the Block Blog
Follow The Artists on the Block: Facebook * Twitter * Pinterest

Wednesday, February 25, 2015

Wicked Wednesday and 2Cute Ink

Hi folks!  It's Wicked Wednesday ATC Challenge Blog time and this week our sponsor is 2 Cute Ink with a theme of Cute Creatures!  I'm using Owl You Need Is Love on my ATC for today and it is just the cutest little owl!


Here's what I used to create this ATC:

Miscellaneous Sentiment Stamp
Neenah® Classic Crest Solar White CS
Prismacolor® Pencils 
Gamsol
Memento® Paris Dusk Ink Pad
Beacon® 3-in-1 Glue

Here's what I did to create this ATC:

Print image and trim to ATC size
Draw branch for owl to "perch" on
Color with pencils and blend with gamsol
Stamp sentiment, trim and edge with darkest blue pencil used on ATC
Adhere sentiment to ATC

This was probably one of the easiest ATCs I've ever created.  I went old school and broke out the pencils for this one.  I haven't colored an image with just pencils in a long, long time.  I have to admit, it felt good!

We would love for you to join us this week, this is a super easy theme and it's pretty much wide open!  There's lots of cute creatures out there in stamp land!  Thanks so much for stopping by today!  I'll have a post for you on Thursday and Friday, as well, so, be sure to drop by for another visit.  In the meantime, have a wonderful day!

Hugs,
Lea 

Thursday, February 19, 2015

February Froufrou

Break out the froufrou! For the month of February, the Dream Team is going Frilly and Fabulous! Vintage, retro, or modern, adding extra charm with fun Fran•táge products from Stampendous, ribbons and lace from May Arts, buttons, crystals, charms, or even creating your own dimensional decor! A snippet or a pile, whatever your creative heart desires! Remember to link your creations using the Inlinkz tool on the Dream It Up! blog for a chance to win the stencil of your choice! Bonus points for using Dreamweaver and/or Stampendous product in your work of heart.

Here's what I've been playing with:


Here's what I used to create this card:


Here's what I did to create this card:

  1. Create a card base from aqua cardstock
  2. Trim a panel of natural white 4"x 5.25"
  3. Spritz with Copic® reinker mixed with alcohol
  4. Spritz with Peacock Feathers reinker mixed with water
  5. Drip on acrylic ink
  6. Spritz with coffee
  7. Stamp border along bottom
  8. Paste feather and set aside to drive
  9. Stamp sentiment and trim closely as shown
  10. Distress edges of sentiment with paper distresser, ink edges with distress ink and spritz with inks and coffee like the background panel
  11. Trim a piece of seam binding and spritz with inks, set aside to dry
  12. Once paste has dried, go over feather with Brushed Corduroy ink and Peacock Feathers ink
  13. Using markers, add lines to feather
  14. Create bow with ribbon and twine
  15. Using scrap of crochet ribbon, fold into a "v" and adhere to panel
  16. Adhere bow to panel over the crochet ribbon scrap and trim twine ends
  17. Adhere sentiment to card
  18. Add any additional drips as needed

I love doing these mixed media style cards!  It's really a lot of fun to spritz and paste and drip and then add a touch of girlie-ness to it!  For more frilly fun, visit the rest of the "A" team: 
Thanks for stopping by!  I hope you like my card and found a little inspiration here today.  If so, I would love for you to leave me a comment and tell me what you think.  If you're not one of my followers, I would love for you to consider following my blog.  I love sharing my creations!  Hope to see you again soon!

Hugs,
Lea


Wednesday, February 18, 2015

Wicked Wednesday with Squigglefly

It's time for another Wicked Wednesday ATC Challenge Blog post and this week our sponsor is Squigglefly.  Sadly, Squigglefly has closed their shop but we wanted to go ahead as planned and create with the adorable images sent to us.  This is "A Good Catch Maddie" and I think she's super cute!  From what I've read, there are a couple of artists from Squigglefly moving to Sweet Pea Stamps so maybe this little cutie will become available there.  Our theme this week is Fishing Fun, show us what you've got!


Here's what I used to create this ATC:

Squigglefly™ A Good Catch Maddie
Neenah® Classic Crest™ Solar White Cover Stock
Little Yellow Bicycle® Splash 6x6 Paper Pad
Tim Holtz® Distress Inks in Tumbled Glass and Stormy Sky
Beacon® Adhesive 3-in-1 Advanced Craft Glue
Copic® Markers in:  YG00, 01, 03, 05, 93, 95; B91, 93, 95, 97; YR15, 16, 18; R14, 17, 20; E21, 41, 42, 43, 50, 51, 53
3L® Scrapbook Adhesives® 3D Foam Mounting Squares

Here's what I did to create this ATC:

Print image and color
Trim patterned paper to ATC size
Determine where you need to trim image to fit ATC as shown and trim
Adhere image to ATC base
Add distress ink with tumbled glass on upper portion and lower portion and storm sky on lower portion only
Cut out a small fish and mount onto ATC as shown

We would love for you to play along with us and show us your best fishiest, funnest ATC!  In the meantime, have a wonderfully blessed day and I'll see you again soon!  Thanks so much for stopping by!

Hugs,
Lea

Wednesday, February 11, 2015

Wicked Wednesday with Kith & Kin

Hi folks!  It's Wicked Wednesday ATC Blog Challenge time and our sponsor this week is Kith & Kin Digital Stamp Company.  The images I've used are Rory Fairy and Fairy Certain, they're perfect together!


Here's what I've used to create this ATC:

Copic Markers
atyouSpica Glitter Pens
Faber-Castell Black PITT Pen, Small
My Mind's Eye 6x6 Paper Pad
Neenah Classic Crest Solar White Cover Stock
Beacon Adhesive 3-in-1 Advanced Craft Glue

Here's what I did to create this ATC:

Print fairy image and color, fussy cut image
Print sentiment, trim closely and set aside
Trim base of ATC
Create banner pieces and glue to base
Draw "string" holding banner
Ink sentiment and attach in lower right corner
Adhere fairy 

This was super simple with lots of sparkle on her wings!  I think she's a cutie!  Thanks for stopping by today and I'll see you again soon.  Have a wonderful day!

Hugs,
Lea

Friday, February 6, 2015

Got Heart?

It's all about love this week at Stampendous as we celebrate our theme of "Be Mine, Valentine."  It wouldn't be a Valentine without a heart so for my card today, I've used Gothic Heart.  I'm so in love with this gorgeous stamp!  It's perfect for creating a vintage or shabby chic Valentine for your special loved one.  Have you got heart?


This is what I used to create this card:

Stampendous® Gothic Heart
Stampendous® Vintage Note
Stampendous® Detail Copper Embossing Powder
Stampendous® Aged Copper Embossing Enamel
Stampendous® Tea Stained Mica Fragments
Stampendous® Boss Gloss Embossing Ink with Dauber
Stampendous® Jumbo Perfectly Clear™ Acrylic Handle

VersaMarker™ Pen by Tsukineko®
Cardstock by Bazill Basics Paper®
Union Square Paper by My Mind’s Eye™
StazOn™ Spiced Chai Midi Ink by Tsukineko®
Tim Holtz® Tea Dye Distress Ink by Ranger®
Hug Snug Seam Binding
Key Embellishment
Tim Holtz® Paper Distresser
Paintbrush
Heat Tool
Zip Dry™ Paper Glue by Beacon Adhesives


This is what I did to create this card:
  1. Ink heart stamp with Boss Gloss, stamp on patterned paper, add a mix of embossing powder and embossing enamel, heat.
  2. Trim patterned paper to desired size, distress edges, brush on distress ink, mist corners, roll with paint brush, heat to set curl.
  3. Create card base for a standard A-2 card with a tent fold.
  4. Trim patterned paper for background as shown, stamp word stamp over design with StazOn, distress edges, brush on distress ink around edges, mist corners, roll slightly with paint brush, heat to set curl.
  5. Cut strip of seam binding and dye with distress ink, heat to dry, cut a piece about 3″ in length off and set aside.
  6. Knot ribbon on right side and wrap ends around background paper and adhere to back.
  7. Adhere background paper to card base.
  8. Adhere embossed heart piece to card.
  9. Using VersaMarker, add ink around edges in a random manner, add copper embossing powder, heat.
  10. Add glue to attach mica flakes as shown, shake off excess flakes.
  11. Using additional piece of dyed ribbon, attach key to ribbon
I really enjoyed creating this card.  I love doing the vintage style cards with the cool mica fragments and embossing powders scattered here and there.  I find them very inspiring artistically.  

Thanks for stopping by today!  I'll see you next week with more fun creations designed to provide you with a little inspiration.  Have a wonderful weekend!

Hugs,
Lea

Thursday, February 5, 2015

Key to My Heart

Break out the froufrou! For the month of February, the Dream Team is going Frilly and Fabulous! Vintage, retro, or modern, adding extra charm with fun Fran•táge products from Stampendous, ribbons and lace from May Arts, buttons, crystals, charms, or even creating your own dimensional decor! A snippet or a pile, whatever your creative heart desires! Remember to link your creations using the Inlinkz tool on the Dream It Up! blog for a chance to win the stencil of your choice! Bonus points for using Dreamweaver and/or Stampendous product in your work of heart.

Here's what I've been playing with:


Here's what I used to create this card:

Bo Bunny® Love Letters 6x6 Collection
Key Charm from Stampin' Up!®
Miscellaneous Brads

Here's what I did to create this card:

  • Die cut heart from Bo Bunny® paper
  • Add a thin layer of gesso over entire die cut heart
  • Tape stencil in center of heart and paste emboss with silver paste
  • Set aside heart to dry
  • Create 5x5 square card base with a tent fold
  • Trim wood grain paper to fit in background as shown
  • Once paste is almost dry, heat with heat gun allowing some areas to bubble up, this gives a rough, worn look
  • Once paste has cooled, replace stencil over paste and buff on Metallic Lustre™ all over 
  • Using PITT pen, outline the entire pasted design and color the keyhole
  • Punch three holes and add brads
  • Adhere heart to background paper
  • Stamp sentiment on wood grain paper and layer onto green mat as shown
  • Trim ribbon to fit across the front of background paper, wrap ends under each side
  • Loop twine through top of key charm and attach to ribbon as shown with knot on back of ribbon
  • Attach sentiment with foam squares as shown
  • Using PITT pen, ink key to reduce shine and age key slightly

I love the shabby chic feel of my card.  For more frilly fun, visit the rest of the "A" team: 
Thanks for stopping by!  I hope you like my card and found a little inspiration here today.  If so, I would love for you to leave me a comment and tell me what you think.  If you're not one of my followers, I would love for you to consider following my blog.  I love sharing my creations!  As a matter of fact, I'll have another card on my blog tomorrow.  Hope to see you again soon!

Hugs,
Lea

Wednesday, February 4, 2015

Wicked Wednesday with A & T Emerald Faeries

It's Wicked Wednesday ATC Blog Challenge and our sponsor this week is A & T Emerald Faeries with a theme of "Bookworm" or "Things with Wings."  I chose two of the sweetest little faeries, Willy & Mia, for my ATC.  I decided to keep this one super simple and keep the main focus on the cute faeries sharing a sweet kiss.


Here's what I used to create this ATC:

  • A & T Emerald Faeries© Willy & Mia
  • Neenah® Classic Crest™ Solar White Cover Stock
  • Pale Green Cardstock by Bazzill Basics Paper®
  • Copic® Markers:  E50, 51, 21, 11, 93, 40, 41, 42; YR14, 18, 19, 61, 65, 68; Y21, 13, 15, 18, 38; G0000, 000, 00, 02, 03; YG11, 13, 17; BG0000, 53, 57, 49; B0000, 000, 00, 91, 93, 95, 97; RV0000, 000; BV0000, 000
  • atyouSpica™ Glitter Pens: Lilac, Blossom, Peach, Mint, Baby Blue and Clear
  • Memento™ Toffee Crunch Ink Pad by Tsukineko®
  • Beacon® 3-in-1 Glue


Here's what I did to create this ATC:

  • Print image and color with markers, trim to desired size
  • Add glitter to wings and hearts
  • Stamp sentiment
  • Trim card base to ATC size
  • Adhere image to ATC base

We would love for you to join us in our weekly challenge!  You never know, you might just win!  Thanks for stopping by to visit today.  I'll have another post for you tomorrow so come back by and check it out, too!  Hope to see you then!  In the meantime, have a wonderful day!

Hugs,
Lea


Tuesday, February 3, 2015

With Tails Entwined

With Tails Entwined from Stampendous' House-Mouse Designs collection, you just feel the love in the air!  Sitting by the light of the moon, these two cuties are over the top adorable!  All week long, Stampendous is sharing the love with a theme of "Be Mine, Valentine."  We would love to inspire you to make your own Valentine feel the love with a sweet handmade card by YOU!  Here's my project:


Here's what I used to create this card:

Stampendous® Tails Entwined
Stampendous® Life Words Perfectly Clear ™Stamps
Memento™ Tuxedo Black Ink by Tsukineko®
Stampendous® Jumbo Perfectly Clear™ Acrylic Handle

Cardstock by Bazill Basics Paper®
Happy Haunting Collection Jolly Jack-O-Lantern by Graphic 45®
Copic® Markers  (B93, B95, B97, B99; Y000, Y11, Y15, Y21, Y23; E40, E41, E42, E43, E50, E51, E53, E93; W0, W1, W4, W7; YG93, YG95; C0, C1, C3, C6)
Star Punch by EK Success®
Hole Punch 1/16th by EK Success®
Miscellaneous Blue Craft Wire
3D Foam Mounting Squares by Scrapbook Adhesives
Zip Dry™ Paper Glue by Beacon Adhesives


Here's what I did to create this card:
  1. Stamp image, color and trim to desired size.
  2. Create A-2 card base with a tent fold.
  3. Trim a mat for image from Bazzill cardstock.
  4. Trim patterned paper as shown.
  5. Adhere all layers as shown.
  6. Stamp sentiment on Bazzill and trim to desired size, punch two holes as shown and add wire.
  7. Punch out star.
  8. Hang sign on star and adhere to star.
  9. Attach star to card with foam squares.
Thanks so much for stopping by today!  I do hope you like my little card, I sure had fun creating it.  I'm going to have a busy week with a post on Wednesday, Thursday and Friday, too, so be sure to stop back by.  Have a wonderful day!

Hugs,
Lea