Showing posts with label Cuttlebug. Show all posts

Friday, June 13, 2014

Stampendous and Core'dinations Hop

If you're looking for the Dreamweaver / Imagine Crafts Hop, here's the link:  http://ink-positive.blogspot.com/2014/06/dreamweaver-and-imagine-crafts-hop.html


2014_06_coredinations 

Hope you've enjoyed the terrific collaboration between Stampendous products and Core'dinations' gorgeous papers! We have been thrilled to bring it to you! Today is the final day!! Of course there are prizes! We'll give away three packs of goodness! The Prize Package includes the Lovely Garden Stamp Set; the Matching Lovely Garden Cutting Dies from Stampendous; a Sand It Kit from Core'dinations which includes a sanding block, replacement sandpaper, and a "must-have" Dust Buddy clean up cloth; Core'dinations will also be sending the lucky winners some of their fantastic 6" X 6" paper pads. PLUS an extra special bonus - our friends at Dreamweaver Stencil will be adding the gorgeous Stone Wall stencil that Jamie Martin used in her terrific card she'll be posting this week (you can see a peek of it on this blog hop banner!)  In the meantime, here's my project:
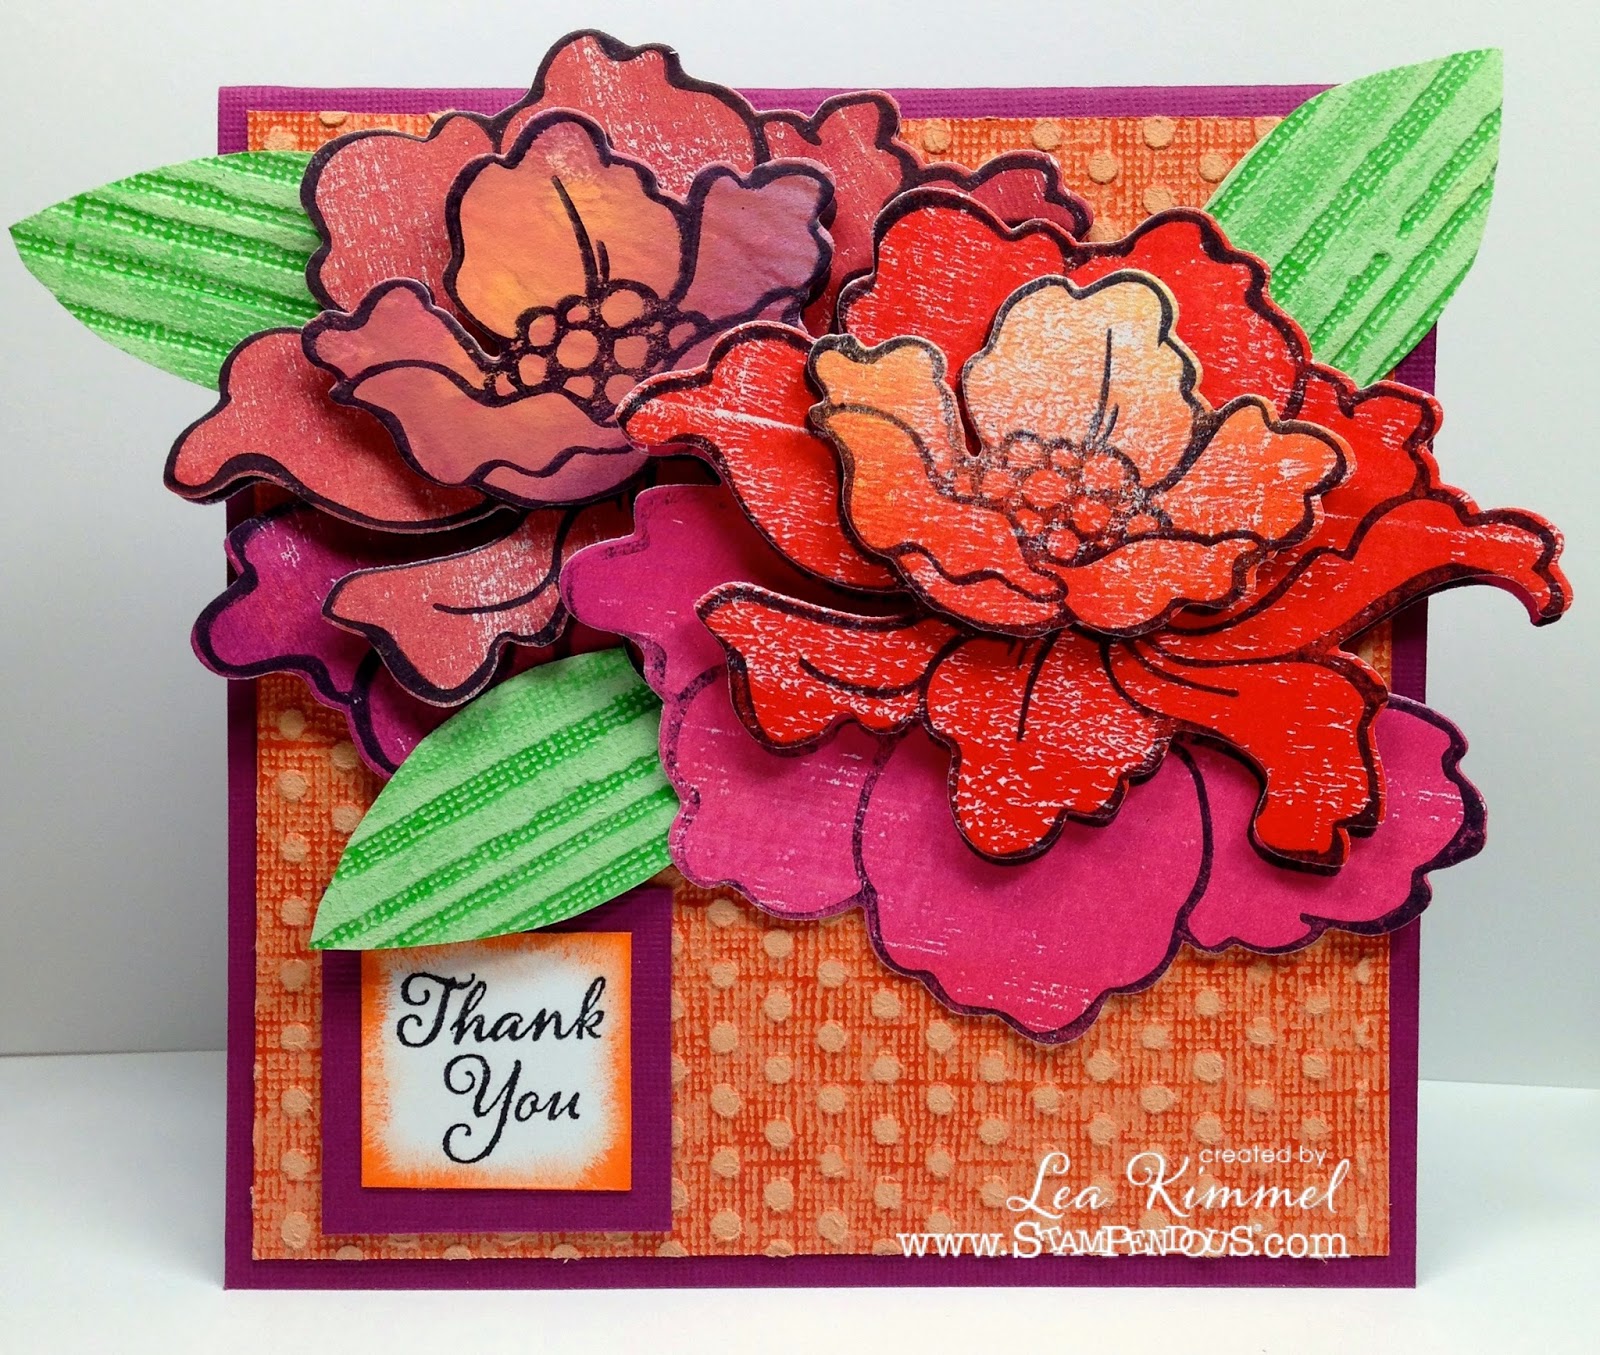

Here's what I used to create this card:

Core'dinations® Sand It Kit
DecoArt® Paints
Bazzill® Cardstock
Neenah® Classic Crest™ Solar White
VersaFine™ Onyx Black Stamp Pad
Imagine Crafts StāzOn™ - Orange Zest
Cuttlebug™ Folder - Dots
Sizzix® Tim Holtz® Embossing Folder - Stripes
Beacon Adhesive® Zip Dry™
Foam Mounting Squares


Here's what I did to create this card:

Using the Creative Palette and paints, I created my papers for the flowers
Stamp the flower three times for each flower
Using the dies, cut out the pieces to create two flowers
Create card base
Trim orange paper and green paper to desired sizes
Run both through machine to dry emboss and sand
Add dot paper to card base
Put together flower layers and adhere to card
Freehand cut three leaves and add to card
Stamp sentiment, trim and sponge ink around edges
Trim a mat for sentiment and adhere the two
Adhere sentiment to card

It was a really fun and easy card to create but it looks like it was way more complicated!  I love how the colors pop on this one!  So, on to bigger and better...

LET'S GET HOPPIN'! The official rules are HERE. You still need a U.S. mailing address to win, but we sure want to hear your comments anyway! You have until the end of Sunday, June 15th to finish your comments. If you missed any previous posts here they are for TUESDAY, WEDNESDAY, and THURSDAY. We'll draw three random blog posts from all the posts this week. Then we'll choose one comment from each. Of course we'd be super grateful if you pin our projects to your Pinterest Boards, or if you Tweet, or Share on Facebook, follow us, like our pages. You know the drill! Here's who is posting today!

Core Blog

Debbie Standard

Kristine Reynolds

Krissy Fossmeyer

Tobi Crawford

Rhea Weigand

Trine Brandt Lassen

Tenia Nelson

Lea Kimmel

Jamie Martin

Thanks so much for stopping by today!  I hope you've enjoyed the hop and have left lots of comments to better your chances of winning a prize!  I'll see you again soon!  Have a blessed day!

Hugs,
Lea


***Blog Hop Hint - if you click on a link that takes you to a page saying something like, "Sorry this page cannot be found," just click on the header at the top of the blog (usually a picture, or the blog's name), and it will take you to that blog's most recent post. That post *should* be our hop. If not, you can probably scroll down a short way to find the hop post. When in doubt type Stampendous in the search box to find the most recent post about our products.

Thursday, October 10, 2013

Going Batty...

...for all things SPOOKY!  Are you ready to be spooked, mystified and magically transported to the land of Halloween and holidays? Hop on board the Dream Team train as we journey through all things Mysterious and Magical through the month of October. Our guest "engineer" is Miss Eerie herself, Alison Heikkila. October promises to be a very bumpy ride...

Here's my project for this week:


I love, love, love Halloween!  It's so creepy and cool!  Kinda like my card!  I knew what I wanted to do as soon as October hit!  For starters, I airbrushed my background on to a piece of Neenah starting with some greens for grass.  I just quickly cut a paper "stencil" to create my hills.  Next using a Copic, I added my moon using a Spellbinders Circle Die as a template.  I added a little light halo around the moon with a lighter yellow Copic.  Next I airbrushed a variety of grays creating my spooky sky.  Rather than spray on some Iridescent Memories Mists, I brushed it on with a paint brush.  I was really going for a misty, foggy kind of look.  I then stenciled my bat on using Stencil  LL 525 Bats with a Gold Brush and a Memento Tuxedo Black Ink Pad.  There are three bats on the stencil but I just wanted the smallest one.  Once I had that done, I used DX 7020 Leafless Tree Die and cut a tree out of black cardstock and then I cut the tree in half with my paper trimmer.  I set the pieces of tree aside and hand cut three "tombstones" out of white cardstock, colored them with Copics and added a little Prismacolor Pencil for my definition.  I glued the tombstones on with Zip Dry, added a little grass with a Copic and then airbrushed a little "mist" over them.  I glued my tree pieces on and then attached the whole thing to a black card base.  Voila!  Creepy card complete!

Now it's time to check out the rest of the team's projects.  Be afraid, be very afraid!  Bwahahahaha!  Your next stops can be found here:


Thanks for stopping by today!  Enjoy the chills and thrills of October!  I'll see you again soon!

Hugs,
Lea

Tuesday, November 29, 2011

Spaghetti Christian

Hi there!  Today we are previewing the Simply Betty Stamps image Spaghetti Christian from the new Teen Scene Kitchen Fun collection.  He's so cute in his chef hat that when I saw this paper I knew I had to use it!  My image is on Neenah and colored with Copics.  The base of my card is Bazzill.  The cute chef paper is Karen Foster's Chef Accessories.  I've combined that with Bo Bunny Walnut Gingham and a Lasting Impressions check.  I thought they were both very "chef-like" and they went perfectly with the Karen Foster. I used a Retro Kitchen Cuttlebug folder to add a little texture.  I finished it off with some Doodle Twine from Doodlebug Designs and my sentiment is one I did myself in MS Word.


It's a simple card but I think it's cute.  Anyway, I hope you like it and I sure appreciate you taking time to stop by and look.

Buon appetito!

Sunday, August 28, 2011

City Cousin, Country Cousin


I fell in love with this stamp from Great Impressions when I saw it because it reminded me of my cousin, Marcella, and myself when we young girls.  I lived in the city and Marcella lived on a farm in"the country" as we called it.  We loved to visit together and some of the best weekends of my life were spent in the country with her.  I can still taste the sweet Muscadine grapes that grew wild; we would pick and eat as many as we could!  Anyway, I colored these two cuties on Neenah paper with my Copics (E00, E30, E21, R02, E23, E25, E27, Y11, Y21, Y23, Y26, BG10, YG23, YG25, RV10, RV11,  BG000, C0), drew a line with my Copic Multiliner SP, and colored the "floor" I created.  I cute them out with a Spellbinder's square die, rounded the corners and mounted them on the scalloped die I cut out of Lasting Impressions paper.  My base is Bazzill and the first layer is "Chloe" paper from Three Bugs in a Rug as well as the two rectangle pieces I have layered under the image.  The plaid piece and the polka dot piece were both embossed with Cuttlebug folders just to add a little texture.  I created a flower using the Carnation Spellbinder's die with some of the Bazzill I used for the base.  My brad in the center of the flower was white so I colored it with YG23 to match my papers.  I had white ribbon to use but it was boring so I colored it with RV11.  I put all my elements together into a little card I aptly named City Cousin, Country Cousin!  Aren't they cute?

Sunday, August 14, 2011

Meee-ooowww


Here's a little card I created for a challenge on iCopic this week to color fur.  I colored my kitty with E50, W2, W6, W8 and then I used a little piece of grosgrain ribbon spritzed with blender solution to add a little texture.  I liked using the ribbon because it kept the fur "laying" in the right direction.  I'm currently at the beach so it was hard to create a card with the limited supplies at hand so I was just happy to get it done!  I used my Copics, Bazzill CS for the base, Neenah for my stamped image, and Basic Grey for the other layers, one that I embossed with a Sizzix embossing folder and my Cuttlebug.  I colored my white ribbon with R08 and sponged a little Memento London Fog around the edge of my image.  Easy peasy and cute to boot!

Tuesday, June 21, 2011

Stampendous Jumbo Rose


This is a card done with the new Stampendous Jumbo Rose Cling stamp.  Papers are Bazzill for the base, My Mind's Eye and Basic Grey.  Colored the rose with Copics.  I also used a Martha Stewart Edge Punch, Spellbinder's Nestabilities, misc buttons and ribbons.  I hope you like it.