Showing posts with label Glossy Accents. Show all posts

Thursday, August 22, 2013

Have yourself...

...a merry little kiss-mas!  Who doesn't like a little smooch under the mistletoe?  Did you know this tradition began in 16th century England?  Seems kind of strange for a plant that's a parasite!  It's a pretty parasite, but a parasite, none the less!  Still, it's got a fascinating history for a plant, mythology and folklore has surrounded this plant dating back to the 13th century.  But, enough about that!  LOL!  You're here for a card, not a history lesson!


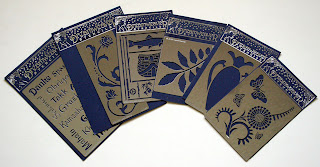
For my card today I used Dreamweaver Stencil LL 387, Mistletoe.  I paste embossed it with white embossing paste and colored it with Copics once it was dry.  I went over the mistletoe berries with Copic Opaque White and went that dried, I added Inkssentials Glossy Accents to round them off and give them even more dimension.  When the Glossy Accents dried (notice there's a lot of drying time going on here!?), I trimmed my image down to size and edged it with Tim Holtz distress ink in barn red.  For my sentiment I couldn't find one that had a kissing theme so I made my own on my PC!  I printed it off, trimmed it down to size and edged it with more barn door.  I created my card base from Bazzill and used Bo Bunny's Rejoice Collection for my patterned paper.  I added some red May Arts ribbon and layered two pieces of ribbon that I dove-tailed behind the matted embossed piece and sentiment to mimic the ends of the bow on the mistletoe.  So there you have it!  Really very simple but kind of cute!  Oh, and if you look, you'll see that the bottom row of letters on the patterned paper spells mistletoe!  Kinda cool, huh!?

Here's the complete list of all the team members playing along today with some Christmas inspiration just for you.


Thanks for stopping by today and I'll see you here again real soon!  Happy stenciling!

Hugs,
Lea

Saturday, July 14, 2012

Howdy 'Tex!

EnviroTex, that is!  I hope you are enjoying your Saturday! We've had so much fun crafting with our stamp images and EnviroTex Jewelry Resin from Environmental Technologies. A huge thank you to Carmi Cimiata of the Resin Crafts Blog, she has helped us learn how this product works and just what it can do. We're so appreciative of her and the folks at ETI who sent us all some resin to play with. {big round of applause!}  

Today I have three projects to share with you before you hop along to the next designer's blog.  Here's my first project.  This is just a simple little magnet for the fridge.  It started out as an oversized button that was a very bright, almost neon, orange.  The first thing I did was cut some paper out for the center of the button.  I flipped the patterned paper I chose over and cut a smaller square for the middle.  I stamped my image from the set, From The Kitchen Perfectly Clear™ Stamps on Neenah, colored it, cut it out and coated it with Glossy Accents.  I snipped three small pieces of wire for my "steam" and adhered it to the back of the cup.  Next I poured my resin over the whole thing.  This was one of the first pieces I actually did so I learned very quickly that I should have coated the whole insert, not just the cup I colored with Copics.  The resin changed the vibrancy of the paper I used.


Next I did a card using Grasshopper Fluffles, Foliate Quad Cube and a really cute cheetah bottle cap that Carmi sent.  This just begged for something fun and from the jungle!  Sweet little Fluffles is daydreaming of being a wild jungle cat!  I really like how this came out!  For the resin piece, I colored the image with Copics, added a coating of Glossy Accents and when that dried, I poured resin on top.  The papers are Bazzill, Neenah and Reminisce.  I also added a little Tim Holtz distress ink around the edges of both stamped pieces.


Here's a side view of the bottle cap!  Pretty cool!


My last project for today is one that I decided to create at the last minute!  This is a bit of a sneak peak of one of our new fall/Halloween images.  This one is called Raven Background and it's so new you can't even find it on our web site just yet!  How cool is that!?  I stamped my image on a clear piece of acetate with Staz-On ink in Jet Black.  I had this neat little wooden piece that had been sent to me a short while back.  I hadn't known at the time what I could do with it but this one just popped into my noggin!  I used some Tea Dye distress ink to stain the piece of wood.  I laid my piece of acetate with my image on it down and then covered that piece with another piece of acetate creating a kind of sandwich.  Next I took Gilded Mica Fragments, Tea Stained Mica Fragments, Bronze Crushed Glass Glitter and Black Crushed Glass Glitter, mixed them all up and glued them around the edge of the board with Glossy Accents.  Once that had dried I added my resin.  There are still a few areas where the fragments stick out of the resin but I love how it turned out!  I hope you like the projects I created to share with you today.
The rest of the design team has prepared some fantastic projects to inspire you today. We hope you'll run over to your local Michaels or other craft store and pick up some resin and some Stampendous stamps and get playing. If you make something fun, please take a picture and put it on our Facebook page! We'd love to see what you're doing! As you visit each blog, you'll be entered in our drawing for a great prize package when you leave a comment! If you don't tell us you were there by commenting, we can't include you in the drawing! We'll pick a winner from today's comments separate from the commenters throughout the week. Get hoppin!

Lea Kimmel (that's me!)
NATURALLY you want to hear about the Prizes!! Carmi has 3 prize packages that can be won by our fans in Canada where she lives. She will draw three Canadian winners from the comments on her blog all week. We have 3 prize packages for our friends with US mailing addresses.
  • We'll draw one winner from the weekly comments on our blog.
  • We'll draw one winner from the comments on Saturday's Big Blog Hop
  • We'll draw one winner from Facebook - You need to SHARE one or more of our posts about this project on your Timeline **
Each prize package from us will include a Jewelry pack of Resin, a bottle cap, bezel and button to try, and the Stampendous Charm Collection Perfectly Clear Stamps - perfect jewelry sized stamps for your crafting pleasure! ** Why do I need to SHARE the post ? Because Facebook has changed the way they show posts from a Page to that Page's fans. (There are millions of posts a day now!) When you "share" a post it lets Facebook know you want to see posts from us. It also tells your friends what we're up to and extends our "reach". Maybe they will come like us, too! That IS why we're doing this, to meet more people! How do I SHARE a post? Visit our page on Facebook - Stampendous - We'll keep an EnviroTex post pinned at the top this week - just find it and click on SHARE underneath the post, it's blue. It will pop up a window that says Share On Your Own Timeline. You can write a message in the box if you like then click Share This Link. That's it...easy!!

Thanks for hopping with us today!

Hugs,
Lea

Thursday, July 12, 2012

Resin-ating with EnviroTex!

Hey everybody!  This week those of us on the design team for Stampendous are playing with EnviroTex Craft Resin. Carmi over at the Resin Crafts Blog generously sent us some jewelry resin to create with and has shown us some cool techniques to try out. We've all jumped in with both feet and created some awesome things to inspire you to try this craft yourselves. The possibilities are infinite with all the wonderful micas, glitters, etc in the Fran•táge Essentials Collection.  Stampendous images are just perfect for jewelry and home decor, from the really big ones right down to the little bitty ones! Here's what I've created!


My first project here was created using a fragment charm from Tim Holtz for a base.  I stamped my piece using my Jet Black Staz-On pad and three stamps from the Charm Collection Perfectly Clear Stamp Set from Stampendous.  I punched out a small heart with red Bazzill paper and adhered it to the back side with Glossy Accents.  Next it was time for Resin!  On the front side, I added a little sprinkle of Black Crushed Glass Glitter and added my resin.  Once that side cured, I flipped it over and added a layer of Multi Ultra Fine Crystal Glitter then covered it with resin.  When that side cured I added a jump ring, some black satin cord and a few more charm findings from Michael's.  This is going to be a really cool necklace to wear!  My next project was equally fun to create using a bezel sent by Carmi. First I put down a layer of Royal Ultra Fine Jewel Glitter for my water, then I added a little Taupe Color Fragments for my sand.  Next I stamped just the seahorse from the Cling Mermaid Kiddo stamp on Neenah Classic Crest with Memento Tuxedo Black ink by Tsukineko.  Next I colored it with Copic markers, cut it out and added a layer of Glossy Accents to keep the ink from blotching.  Once my Glossy Accents were good and set, I place the seahorse where I wanted it, added three seed beads for "bubbles" and added my resin.  Once cured, all it needed was a jump ring and a chain to wear it with!


Yet another cute piece of jewelry I can wear for years to come.  Just knowing I created it myself will make it that much more special!


Come see what the others playing along today have done!  Visit them, leave some love! Win cool stuff! If you get brave and try this, leave a photo on our Facebook Page so we can see what you've done!

Lea Kimmel (that's me!)
NATURALLY there are Prizes!! Carmi has 3 prize packages that can be won by our fans in Canada where she lives. She will draw three Canadian winners from the comments on her blog all week. We also have 3 prize packages for our friends with US mailing addresses.
  • We'll draw one winner from the weekly comments on our blog.
  • We'll draw one winner from the comments on Saturday's Big Blog Hop
  • We'll draw one winner from Facebook - You need to SHARE one or more of our posts about this project on your Timeline **
Each prize package from us will include a Jewelry pack of Resin, a bottle cap, bezel and button to try, and the Stampendous Charm Collection Perfectly Clear Stamps - perfect jewelry sized stamps for your crafting pleasure! ** Why do I need to SHARE the post ? Because Facebook has changed the way they show posts from a Page to that Page's fans. (There are millions of posts a day now!) When you "share" a post it lets Facebook know you want to see posts from us. It also tells your friends what we're up to and extends our "reach". Maybe they will come like us, too! That IS why we're doing this, to meet more people! How do I SHARE a post? Visit our page on Facebook - Stampendous - We'll keep an EnviroTex post pinned at the top this week - just find it and click on SHARE underneath the post, it's blue. It will pop up a window that says Share On Your Own Timeline. You can write a message in the box if you like then click Share This Link. That's it...easy!!

Don't forget to come back on Saturday for more eye candy and more chances to win as the entire team is playing along.  Woohoo!  Now, leave me some love! Your comment might just be the winning comment.

Hugs,
Lea

Friday, May 4, 2012

Cannon Ball!

Hey y'all!  Guess what?  Betty, from Simply B Stamps, has a new collection out called Teen Scene Summer Fun.  Let's say hello to Pool Time Miller!  He's our first image for your previewing pleasure!  Doesn't he look like he's having a lot of fun? 


You may notice I gave him just the teeniest bit of sunburn.  I couldn't resist!  As hot as it is in my stamp room right now, I'm wishing I had a pool to go jump into and cool off.  This whole collection is just awesome and I know you're going to want every one!

Products used:

Simply B Stamps Pool Time Miller
Neenah Classic Crest
Bazzill
Echo Park
Copic Markers
Glossy Accents
Creative Imaginations Stick On


Directions:

Stamp image and color with Copics
Trim image to desired size and adhere onto trimmed Bazzill layer, set aside
Cut card base to desired size from Bazzill
Cut bottom layer of patterned paper to size and adhere to card base
Cut strip of patterned paper and adhere to card base and layer
Adhere layered image to card base
Add stick on
Add Glossy Accents to water in pool and on ground and allow to dry

Don't forget to check out the SBS Blog and see what the rest of the design team created and be sure to leave the ladies some love!  See you tomorrow for the next awesome image!  Who's up for a water balloon fight?

Hugs,
Lea

Sunday, April 22, 2012

Who wants cake?

It's time for another new release at Simply B Stamps and boy do we have cute kids for you!  Jude and the Rockers are back in a new collection called Just for Fun.  All the little darlings are trying out future careers or just playing dress up.  All those fun things we used to do as kids!  First up is Chef Ariel.  She's adorable as always and has baked a gorgeous cake.  I'm actually going to a birthday party today and I'm hoping they have cake because coloring this image has brought out that craving for some yummy cake and ice cream!  Keep your fingers crossed for me!


Products used:

Simply B Stamps Chef Ariel
Bazzill Paper
Best Creation's Mom's Kitchen Paper
Bo Bunny Orange Citrus Dot Paper
Neenah Classic Crest Paper
Copic Markers
Memory Box Die
Offray Ribbon
Glossy Accents
Diamond Stickles

Instructions:

1.  Cut Bazzill card base to size desired
2.  Cut patterned papers for layers and set aside
3.  Cut colored image to size and layer on cut Dot paper
4.  Create bow with peg bowmaker leaving tails long enough to wrap around edges of patterned paper bottom layer
5.  Using Memory Box die, cut piece of Bazzill and adhere to patterned paper for bottom layer
6.  Adhere ribbon with bow to patterned paper over the center of die cut
7.  Add pop dotted image to card base
I hope you like Ariel and will come back tomorrow to see who's next.  I could tell you but it's a secret!  Be sure to stop by the blog and check out the other cool cards made by the rest of the team.  Thanks for stopping by!

Hugs,
Lea


Saturday, April 21, 2012

More Trash to Treasure!

The stupendous Stampendous gals are at it again this week...recycling, repurposing, and reusing for the month of April! Nothing hits the "round file" this month, and everything is fair game to be stamped, cut, encrusted, and Frantaged!


I have yet another metal item I salvaged from the "trailer of treasures."  I'm all about recycling cool found items.  What may look like junk to one person could become all sorts of things in my crafty claws!  Here's the cool piece I'm using for this week.  I have no idea what this was in its previous life!


Today it has become the Surf Shack!  I think it's much cuter as a surf shack than it was as a, well, whatever it was!  Here's my card:


This was so fun to create and so easy!  Here are the details:

Products used:

Stampendous Cling Changito Surfer
Stampendous Golden Sand Embossing Powder
Bazzill
Neenah
Memento Tuxedo Black Ink
VersaMark Pad
Copic Markers
Tim Holtz Brad
Doodlebug Twine
Ultra Fine Flower Soft
Glossy Accents

Instructions:

1.  Cut Bazzill base and fold in half
2.  Cut Neenah paper to fit on Bazzill
3.  Stamp
Cling Changito Surfer and color (I used Copic Markers)
4.  Color background (again using Copics)
5.  Stamp three surf boards only, color and cut out, set aside
6.  Cut metal into "shack" pieces (side and roof), adhere to image piece
7.  Punch hole for brad, hand written sign with twine
8.  Using VersaMark pad, add Stampendous embossing powder in Golden Sand
9.  Attach surf boards with glue dots
10. Using Glossy Accents, adhere Ultra Fine Flower Soft in Sand
11. Attach hand written and layered sentiment

Easy peasy, right!?  And, he's just so darn cute!  I hope you like my project this week for the April Challenge.  Be sure to check back next week for another trash to treasure project.

Check out what the other players for this week have been up to:


You have until Thursday, May 3, 2012 at 11:59 PM EST to add your direct link to our collection at the end of this post (or on the Stampendous blog). You do not have to use Stampendous products, but we sure love it when you do! As an extra incentive for playing along, one lucky crafter (drawn at random) will receive this fabulous newly released Mother's Love Perfectly Clear Stamp Set .


Due to shipping restrictions, the winner must have a US address. We hope you have a chance to play along with us (you may enter as many times as you'd like!) this month...Happy Crafting!


Hugs,
Lea

Pin It

Saturday, April 14, 2012

Dreampendous and Challenge time!


Get ready to be inked, pasted, encrusted, stenciled and stamped! This week, the Dreamweaver Stencils' Dream Team and the Stampendous Design Teams have had so much fun sharing "Dream-pendous" inspiration with you, and today we wrap things up with a terrific blog hop! You'll see how to mix and mingle your creativity...if you are a stenciler, you will be fascinated at combining stamps with your first love. If you are a stamper, you will be wowed at how stencils can add to your impressions.

And since this hop falls on a Saturday, some of the Stampendous team members are combining their amazing Dreamweaver Stencils projects with the monthly Stampendous challenge. This month, in honor of Earth Day, we are challenging ourselves (and you) to make something that uses product(s) that are recycled, re-purposed, or reused in some way.
Here's what I found for recycling.  This came off of a filter on a truck.  I could see a lot of possibilities as soon as I picked it up!  Of course one of the things I thought of was chicken wire.  It has that look to it.  Well the more I looked at it, the more I realized that what it really made me think of is fish scales.  Well, in my world, fish scales = mermaid.  I pulled out my Stampendous Cling Mermaid and set out to create this card.


I stamped my image on Neenah with Memento and colored it with my Copics.  I cut it out with a Spellbinders Nestie and set it aside.  Next I started on my base of Bazzill, Echo Park Splash patterned paper, wire mesh, twine, shells, gilded mica fragments and powder blue fragments.  I really do enjoy the whole Fran•táge look.  It's so fun to play with and mix up.  I love it!


Here's a pic of just the card:


I really like the way it turned out.  It was almost exactly what I had in mind!  I hope you like it too!


Be sure to leave comments as you tour the blogs (with your email addy!) for a chance to win one of these sets:


Here's the entire Dreamweaver Stencils/Stampendous party train for the hop today:


Stampendous Monthly Challenge only:


Don't forget - we want YOU to play along in our monthly challenge! You have until Thursday, May 3, 2012 at 11:59 PM EST to add your direct link to our collection at the end of this post (or on the Stampendous blog). You do not have to use Stampendous products, but we sure love it when you do! As an extra incentive for playing along, one lucky crafter (drawn at random) will receive this fabulous Mother's Love Perfectly Clear Stamp Set. Available in stores now, it will be on the website for purchase soon!


Due to shipping restrictions, the winner must have a US address. We hope you have a chance to play along with us (you an enter as many times as you'd like!) this month...Happy Crafting!

Hugs,
Lea

Pin It


Saturday, March 31, 2012

How's your Saturday shaping up?

Mine is shaping up nicely with Stampendous on the last Saturday of their March shaped card challenge.  This was a fun challenge! I'm so appreciative of the invitation to play along with such awesome talent as the Stampendous Design Team.  For my card I used the SSC1112-R Daisy Thanks Perfectly Clear™ Stamps set.  I'm a huge fan of daisies even though I colored these to look like Black-eyed Susans.  This is a sweet set with two simple sentiments.

I created my easel card by cutting out three pieces of Bazzill using the Spellbinders Nestabilities Label 10 die.  I used the next to the largest die for my basic card and two of the smaller sizes for my sentiment.  I stamped my images on Neenah and colored them with Copics.  I cut out my flowers and layered them on the Bazzill pieces I had already scored and put together.  I added my single daisy head on the base to act as my stopper.  I layered my sentiment, added ribbon accents and pop-dotted it to the front of my card.  I also added a little Glossy Accents to my ladybug to give her a little shine.  It's really just a simple little card to wish you all a happy day!


This is my card while lying flat.  Below are two shots of it opened into the easel position.  I love how it turned out.  I know this set will get plenty of use by me as it's definitely a favorite! 


Here are the links for each of the team players  and a couple of guests playing along this week:
Lea Kimmel  (Me! I'm a guest!)
Stampendous would love for you to play along with this challenge and there's still time to enter your own shaped card.  You still have until April 5, 2012 at 11:00 PM EST to play.  All you have to do is link your creation to the Inlinkz on the Stampendous Impressions blog post for the March challenge.  You don't have to use Stampendous products to play, however, they would love to see you use their products.  As an added incentive for playing along, one very lucky participant, drawn at random, of course, will receive this gorgeous stamp set, Cling Jumbo Hollyhock.


Please keep in mind that due to shipping restrictions, the winner must have a US address.   I do hope you will play along with us.  I'm a firm believer in the more the merrier!  I can't wait to see what you come up with.  Thanks for stopping by to take a look and I hope to see you again soon!

Hugs,
Lea

Wednesday, February 22, 2012

Hydrangea Hope

Hello!  Welcome back!  Today I would like to share a card with you that started out with very different intentions.  By that, I mean I intended to do something along the "Fran-tage" line as in the rose card from the previous post.  However, as I started putting my card together, I decided to make it a little more spring-like and a lot cleaner than the shabby chic feel I was originally intending.  I stamped my Stampendous! Cling Jumbo Hydrangea stamp on Neenah Classic Crest with Memento Tuxedo Black ink and colored my image with Copics G0000, G00, B41, V0000, V01, YG61, YG63, and YG67.  Here's how it turned out:


I was pleased with my results and then I started my hunt for paper.  Ordinarily I pick out my papers first and then color.  I'm really not sure why I didn't do that this time but I really couldn't find any papers in my stash that were worthy of such a beautiful image.  (Actually, I couldn't find any that matched!)  That meant having to go to Enchanted Cottage on my lunch break to see what I could find.  Well, I found three papers that I thought would make a lovely combination so I bought them and as soon as I got home from work, I hit my stamp room determined to make another "Fran-tage" beauty.  The more I looked at the pink patterned paper from Creative Imaginations, the more I wanted to use the touching "Hope" message printed there.  I'm a cancer survivor so this is something near and dear to my heart.  I cut out my image and started playing around with the paper but I just couldn't get it configured in a manner I felt was right for "Fran-tage."  I had cut my base to be a 6" square from Bazzill.  I cut my bottom layer of patterned paper from Creative Imaginations in a 5 3/4" square.  I cut two strips of the green Karen Foster patterned paper about an inch wide and I then edged each strip with a Martha Stewart punch.  From my Creative Imaginations "Hope" paper I cut my middle panel to fit the word across the bottom section.  I adhered the punched strips to each side of the top layer and centered both top and bottom layers on my base.  In order to add some texture to my image, I added some of the new fresh green and lavender crushed glass glitters from Stampendous!  I used glossy accents to hold my glitter on and as soon as it was dry enough, I pop-dotted my image onto the card.  I added a little sheer pink ribbon with a pearl as an accent.  I chose the pearl because even with something as small as a grain of sand irritating the oyster, something as beautiful as a pearl can grow.  There are many things in life that irritate us but we can still radiate beauty from within if we choose to.  I would like to think that because of my cancer, I'm now able to see more of the beauty in life around me.  I still tend to rush through my days sometimes but I'm far more aware of my surroundings and of how blessed I am with God's grace to still be here.  So, without further ado, here's my card.  I hope (no pun intended) that you like it.


As I said in the beginning, this isn't exactly what I had in mind when I colored my image but I'm really pleased with the way it all came together.  I'm entering my card in the Stampendous! texture challenge for this month on their blog and if you haven't play along, you should!  Well, folks, that's it for today.  I hope to see you back soon.  Thanks for stopping by!

Hugs,
Lea

Tuesday, January 17, 2012

Lunch Time Brittany

So what do you think of these little cuties so far?  Aren't they all just adorable!?  Today we are featuring Lunch Time Brittany, the newest from Jude & the Rockers Playtime collection at Simply B Stamps.  I love coloring Brittany because her hair is so much fun to color.  This image is on Neenah and colored with Copics.  The solid papers are Bazzill and the patterned papers are from the DCWV paper pad "Nana's Kids."  The papers are glittered but it's hard to see the glitter in the picture.


I took three wooden stars, colored them with my Copics, covered the tops with Glossy Accents and then dipped them in Dazzling Diamonds glitter.  They look more frosted in the picture yet are pretty sparkly in real life.  I added a touch of ribbon across the patterned panel.  This is definitely a clean and simple card but I love how it turned out. 

Thanks for stopping by and I hope to see you again soon.  Your comments are always welcome as constructive criticism is a great learning tool!

Hugs,
Lea

Monday, December 12, 2011

Happy Birthday...

... to my Uncle Wake and my friend Gary.  This is a card I made for Gary.  He's turning 50 today and has Stage IV Pancreatic Cancer.  He's a sweet guy I've known since I was about 12, so it's been a while.  I know he's partial to pick-up trucks and I'm hoping he likes the color red!


My image is from Stampin' Up!, stamped on Neenah and colored with Copics.  The sentiment is printed on my laser printer using Magneto font.  I cut it to look like a banner and added holes for the DMC floss to attach the banner to the truck.  I added the dirt road and grass with my Copics but wanted to keep it clean and simple without too much fuss.  I also used a little Silver Fox Smooch for my chrome and Glossy Accents for my glass.  My image is layered with Bo Bunny and Bazzill papers and the base of my card is Bazzill.  Gary likes things clean and simple so hopefully this card will be just right!  Thanks for looking and happy birthday to two special guys!