Friday, March 28, 2014

Inspiration Winged Cross

This week at Stampendous®, we're featuring our beautiful cross images, I think these are perfect for the Easter season.  For my project, I've used Winged Cross.  I have to admit, it's my favorite!  I have a collection of angels and a collections of crosses so this kind of combines the two!  I've used the Fran•táge technique on this card with lots of crusties and texture.  It's so much fun to create this way!  So here's my card with details below:


Here's what I used to create this card:

Stampendous® R189 Winged Cross
Stampendous® Gold Encrusted Jewel Kit
Stampendous® Champagne PEARLustre™ Embossing Powder
Stampendous® Boss Gloss
VersaMarker™ by Tsukineko® Memento™ London Fog Ink by Tsukineko® 
Antique Linen, Pumice Stone, & Vintage Photo Distress Ink by Ranger®
Kraft Reflections Paper by Graphic 45® 
Clear Rock Candy Distress Crackle Paint by Ranger® 
Silver Bling Glamour Dust Paint by DecoArt® 
Copic® Markers - W1, W2, W4, W5, E33, E34, E35, E37 
Multi-Medium Matte by Claudine Hellmuth Studio 
ZipDry™ Paper Glue by Beacon Adhesives®


Here's how I created this card:

Stamp R189 Winged Cross on white with Memento Ink.
Color image with Copics.
Paint wings with Silver Bling paint, set aside to dry.
Trim image closely and distress edges with distresser tool.
Create card base from Bazzill in a tent fold and distress sides and bottom of front only.
Trim patterned paper to mat image and distress edges. 
Add antique linen distress ink all around image.
Add pumice stone distress ink around outer edges going in close to the image but not all the way.
Add vintage photo distress ink just to distressed edges of all papers.
Adhere image to patterned paper with Zip Dry and curl corners of image piece slightly.
Sponge Boss Gloss around card randomly and add Aged Gold EP and heat.
Using VersaMarker, outline swirls on image, add Champagne Pearl EP and heat.
Randomly sprinkle Aged Gold EP and heat from underneath.
Randomly dot on distress stain.
Adhere image and patterned paper to card base.
Add crackle paint to cross and let it dry.

That's it for today, I hope you've enjoyed my project and that it has inspired you to create your own!  Thanks for stopping by and I'll see you again soon.  Have a blessed day!

Hugs,
Lea

Thursday, March 27, 2014

Perfect Pear!

Hey there, crafty people!  It's time for another Dreamweaver Stencils Thursday post!  As you know, this is our last week to post for March Madness and I didn't want to post a card since I do cards all the time.  Instead, I have another canvas for you.  This is a smaller one, though, however, I really like it and I'm going to use it in my den since the colors match.  Here's my project:


Here's what I used to create this project:

Artist's Loft 5"x7" Canvas Panel
Copic Markers R29 & YG95
Copic Multiliner SP Sepia
DecoArt Gesso
Ranger's Tim Holtz Distress Ink in Vintage Photo

Here's how I created this project:

Prime canvas with gesso and set aside to dry
Paint canvas and set aside to dry
Stencil corners with sponge and distress ink
Mix paste and paint
Paste emboss pear, set aside to dry
Using Copic R29, air brush red onto pear
Using Copic YG95, draw veins on leaf
Using Copic Multiliner, color stems and add sentiment

This was a super fast project to create and very easy to do.  I've been looking at it and I have to admit, I might go over the sentiment with paint and stencil the two corners like I did for the other two corners I've completed.  I hope you have enjoyed my project and will check out the rest of the team's creations, links are below:


Thanks for stopping by today and I'll see you again tomorrow with a Stampendous post!  Have a blessed day!

Hugs,
Lea

Friday, March 21, 2014

Tombow Hop Time!


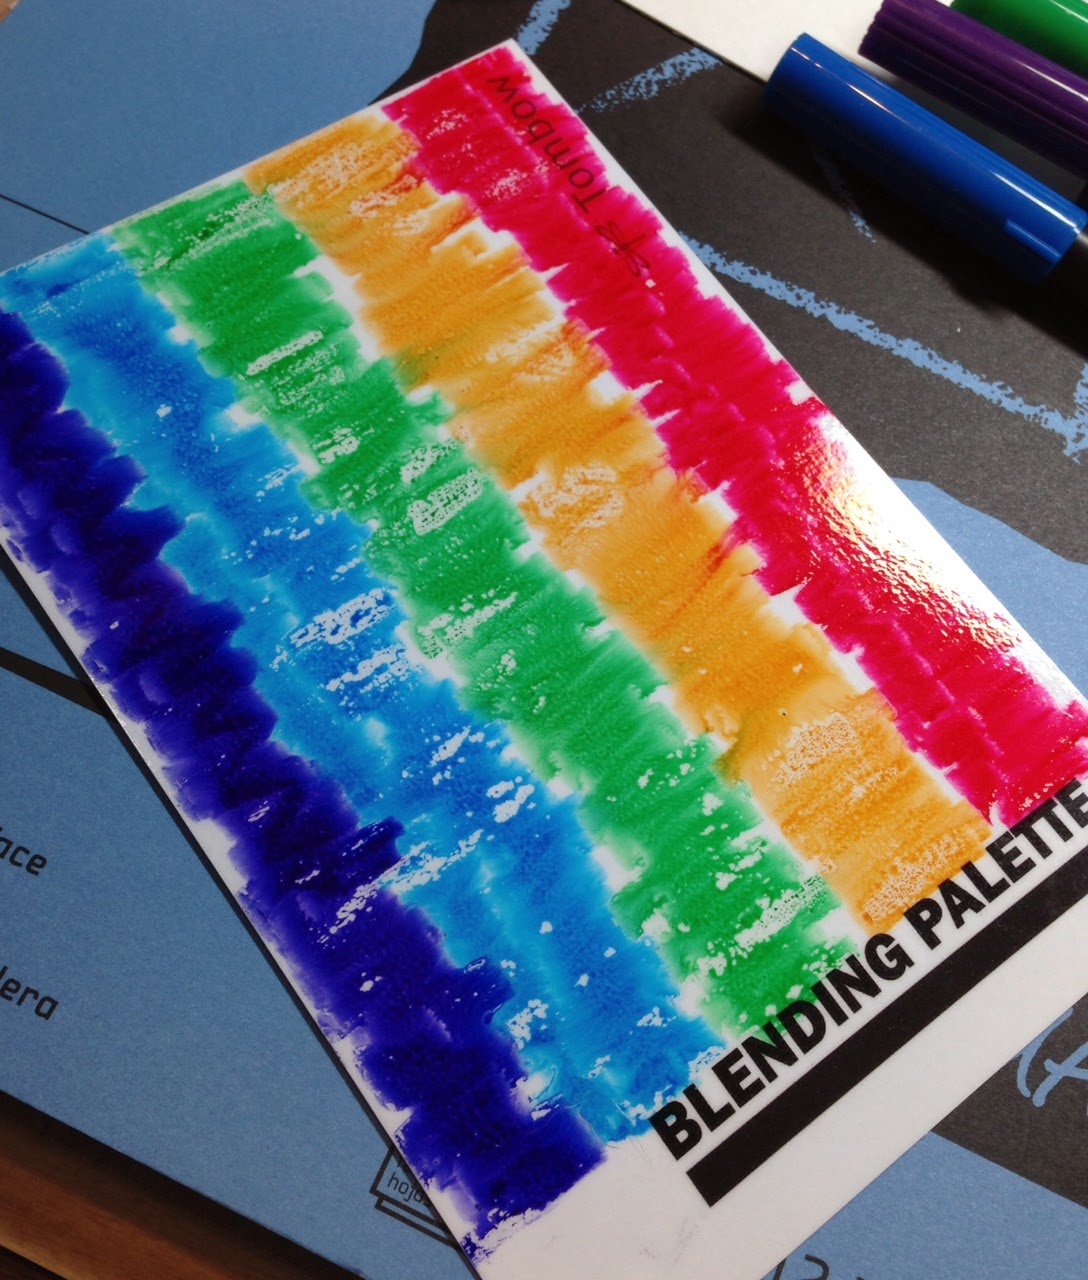
It's Friday, you know what that means!!!  It's HOP Day! Yay!!  The Stampendous Design Team is hopping along with the TombowUSA Design Team and I'm sure there will be plenty of eye candy to soothe your sweet tooth!  Remember, we have prizes to give out but you must comment to win a prize!  So, you may or may not recall that I received the set of 6 Jewel Dual Brush Pens and a Blending Kit from Tombow.  My first project uses five of the colors, 847/Crimson, 636/Imperial Purple, 245/Sap Green, 476/Cyan and 946/Gold Ochre.  I didn't use N25/Lamp Black for obvious reasons!  Here's my card using the Splash Technique:


Here's what I used to create this project:

Canson® Watercolor Paper
Black Cardstock
Archival Ink™ - Jet Black
Hug Snug® Seam Binding - White

Here's how I created this project:

Trim watercolor paper to fit blending palette
Color blending palette with markers in wide stripes (as shown above)
Spritz blending palette with water
Apply watercolor paper to blending palette and rub paper to make sure it picks up ink evenly
Set wet paper aside to dry (dry paper shown above)
Trim seam binding to desired length
Re-color blending palette and mist
Lay ribbon across palette and rub ribbon to help apply ink
Continue doing sections of ribbon while moving down palette
Set ribbon aside to dry (you can use your heat gun to speed this process up)
Stamp image on dry inked watercolor paper
Trim away excess paper at bottom
Stamp sentiment
Create card base to fit image
Adhere image to to card base
Tie dried ribbon around top of card with a simple knot in front

For my next project, I went back to mixing colors on the blending palette and applying the color using the Indirect Blending Technique to color my image with the blender pen.  I really like this technique!  


Here's what I used to create this project:

Bazzill® Cardstock in Parakeet and Lava
Making Memories Kids™ Collection - Emma
Canson® Watercolor Paper
Archival Ink™ - Jet Black

Here's what I did to create this project:

Stamp image and color, trim to desired size, set aside to completely dry
Create card base from green cardstock
Trim red-orange cardstock pieces as shown
Trim patterned paper as shown
Stamp sentiment on dry image
Adhere all layers as shown

So that's both of my projects, I hope at least one of them may have inspired you to give this a go yourself.  Easy and fun, what more can a girl/guy ask for!?  Here's the complete link list, I wouldn't want anyone wandering lost around the Internet, it could be light years before you're found! 

Lea Kimmel (me!)


Don't forget to leave some love along the way in order to be entered to win a prize.  Thanks for hopping by and I hope to see you again soon!  Have a blessed day!

Hugs,
Lea

Thursday, March 20, 2014

Time for Tombow!


And a Toadal Makeover!  This week has been all about Stampendous® Stamps and TombowUSA and lots of wonderful creations designed to inspire you!  I love it when the Stampendous Design Team does a blog collaboration with a fantastic company like TombowUSA; it's just so much fun!  Of course, as you can see, there are prizes to win, too!  However, if you want to win a prize, you have to comment on our blogs, the more blogs you leave comments on, the better your chance of winning!  Pretty darn simple, right!?  So, without further ado, here's my project for today:


These were the colors I received, the Jewel set of 6!  I also received one of their new Blending Kits, which includes the Blending Palette I've shown you here, a Blender Pen and a Compact Spray Mister.    I wanted to show you my blending palette with colors still mixed on it so you could get an idea of how easy it is to get the color you need even from the Jewel set of 6 markers.  There's a super cute coloring chart for all the House-Mouse mice that can be found here, however, since I wasn't sent any of those colors, I had to mix my own! By combining purple and golden yellow, I was able to get my brown for the mouse fur, combining the golden yellow and red gave me the peachy tones I needed for his skin.  As you can see here, I mixed a few other colors, too, I wouldn't want you to think you are limited to just these six colors.  I used the Indirect Blending technique for this card.

Here's what I used to create this project:

Stampendous® HMM04 Toadal Makeover
Tombow Dual Brush Pens - Jewel
Tombow Blender Kit
Archival Ink™ - Jet Black
Bazzill® - Ruby Slipper
Canson® Watercolor Paper
Bo Bunny® Mistletoe 6x6 Paper Pad (Wonky Squares)
Crate Paper® Party Day 6x6 Paper Pad (Stars)
May Arts Ribbon®
Mono Adhesive Power Bond
Foam Mounting Squares

Here's how I created this project:

Stamp image and color; trim to desired size
Create card base and image mat from Bazzill
Trim patterned papers as shown
Adhere patterned papers and attach ribbon as shown
Adhere patterned papers with ribbon to card base as shown
Adhere image to mat and attach to card base with foam mounting squares

This was a very easy card to create and I have to tell you, I really enjoyed mixing my colors and applying them with the Blender.  I know my colors are a little Christmas-y but when you have a green toad and red lipstick, you just have to go with what looks good, no matter what the season may be!

Thanks for stopping by today and don't forget to comment if you wish to be entered to win a prize.  Don't forget that tomorrow is the BIG HOP!!  You don't want to miss it and I'll have two projects to share tomorrow!  Have a blessed day and I'll see you again soon!

Hugs,
Lea


Saturday, March 15, 2014

Zombie, Tea or Me?

Hi there!  It's time for another friendly challenge at Desert Islands Crafters Challenge Blog and this time around our sponsor is The Stamping Boutique.  The image I've used is Zombie Girl with Tea, somewhat of a visual oxymoron, don't you think?  I love her, I think she's adorable and since I collect old teacups, this one really cracked me up.  Here's the itinerary for this challenge:


1.  polka dots
2.  make it an ATC or tag
3.  citrus colors (yellow/orange/lime green/pink)
4.  add ribbon
5.  Spring theme
6.  Add eyelets
7.  Include an animal
8.  Zombies 
9.  Washi Tape
10. Monochromatic

I've used #'s 1, 3, 4, 8 and 9 and here's my project:


Does she crack you up as much as she does me?  Every time I look at this card, I giggle, I just can't help myself.  Notice how her skin is starting to turn blue, bless her heart!  Oh, that's right, she's a zombie!  LOL!  Sorry, I'm just amused!

I hope you'll take time to create something fun and play along with us.  You could win a prize so what do you have to lose?  Thanks for stopping by and I hope to see you again soon.  If this is your first time here, take a look around, you might find something you like!  Have a blessed day!

Hugs,
Lea

Thursday, March 13, 2014

Emma's Zen Flower Garden

It's March Madness at Dreamweaver Stencils and we've all gone a little crazy!  Well, some of us have been there for a while!  Heehee!  Since we get to create pretty much whatever we want this month, I'm going to make a sweet little girl happy.  I had a "Nina request" recently from my adorable little granddaughter, Emmaline Grace.  (I'm Nina, by the way, that's what she has always called me and I love it!)  Emmaline knows I created a canvas for her Aunt Kiki so she wanted one made for her, too.  How could I possibly say no?  Creating art for a five-year old is easy, fast and fun!  You get to keep it simple and child-like.  I had to embrace my inner child and I decided to create something similar to one of the many drawings she has made for me.  Here's my project, I hope she's going to like it!


Here's what I used to create this canvas:

Echo Park's "Little Girl" 12x12 Collection
DecoArt Gesso
     Titanium White
     Cerulean Blue
     Viridian Hue
     Light Green
Artist Loft Canvas Panel
Sweet Petites Grosgrain Ribbon in Moss
Tim Holtz idea-ology fastener
Glue Dots
Office Depot brads

Here's what I did to create this canvas:

Gesso canvas panel, set aside to dry
Place stencil on back side of papers, trace cutting lines, trim flowers
Gesso back side of flowers, this covers trace lines and adds body to paper
Paint canvas as shown, set aside to dry
Layer flowers with brads and shape
Trim ribbon for stems and leaves, fold and fasten ribbon with staples to create leaves
Attach ribbon stems to back side of canvas and wrap to front
Holding ribbon in place, determine leaf locations and adhere leaves with glue dots
Adhere stems to front
Adhere flowers

So that's it for me, here's the list of my teammates that are playing along:


Be sure to leave some love along the way, we aim to please!  If your interested in becoming a member of the Dream Team, go here for more information on how you can apply.  Also, be sure to play along and link your creation here for a chance to win a stencil of your choice. Thanks for stopping by today, I hope you've been inspired to create something for a special child in your life!  See you again real soon!

Hugs,
Lea

Wednesday, March 12, 2014

It's Wicked Wednesday...

...and you know what that means!  Time for another Wicked Wednesday ATC Blog Challenge!  This week our sponsor is Sami Stamps and we've got the cutest little image, Leprechaun Cutie, as we celebrate Leprechauns and Luck!  Here's my ATC:


Here's what I used to create this ATC:

Sami Stamps Leprechaun Cutie Digital Stamp
Copic Markers:  YG03, 05, 09, 11, 13, 17; YR12, 14, 16, 18, 21, 23; E08, 50, 51, 53, 93
A Muse Sentiment - Sunshine & Laughter
Bazzill Cardstock
Bo Bunny Mint Dot Cardstock
Bo Bunny Wasabi Dot Cardstock
Neenah Classic Crest Solar White Cover Stock
Memento Tuxedo Black Ink Pad
Memory Box Shamrock Die
Recollections Adhesive Rhinestones - Greens
Scor-Tape
Glue Dots
Foam Mounting Squares

Here's what you need to do to recreate this card:

Print image off and color with Copic markers, trim to desired size
Create ATC base from Bazzill
Trim Mint Dot paper as shown
Stamp sentiment with black ink on Neenah and trim to desired size
Create a mat for the sentiment using Bazzill
Cut out shamrocks with Wasabi Dot paper
Adhere all layers as shown
Using glue dots, attach shamrocks as shown
Using foam mounting squares, attach matted sentiment to ATC
Add rhinestones

This was super easy and so much fun to create!  Since it fits, I think I'm going to enter it into the Sami Stamps Challenge!  So, be sure to enter your ATC in the Wicked Wednesday challenge and if it fits, enter it in Sami's challenge, too!  Thanks for stopping by and I'll see you again soon!  Take care and have a blessed day!

Hugs,
Lea


Friday, March 7, 2014

We're Hopping with Faber-Castell!

Stampendous and Faber-Castell have enjoyed a week-long collaboration and today we're celebrating with a final blog hop.  We're so glad you could join us!  I have two projects to share with you today.  One is a card and the other is a simple mixed media piece.  First up is my card:


Here's what I've used to create this card:

Faber-Castell® Gelatos® in Guava, Red Cherry, Tangerine, Mango, Lemon, Butter Cream, Pistachio,      Green Tea, Lime, Cotton Candy, Blueberry, Boysenberry, Grape, Earl Grey, Black Licorice, Chocolate, Peach, Squid Ink
May Arts Ribbon®
Archival Ink™ in Jet Black
Canson® Water Color Paper
Bazzill®
My Mind's Eye™Six By Six Designer Paper Pad in "Hootenanny"
Water Brush
Scor-Tape
Foam Mounting Squares

Here's what you need to do to re-create this card:

Stamp image with black ink
Color image with Gelatos and a water brush
Trim image to desired size
Create your card base with a tent fold and trim a mat for your image from the same paper
Trim patterned paper as shown
Cut a piece of ribbon to layer along width of card
Adhere ribbon to middle of patterned paper
Adhere patterned paper to card base
Adhere image to mat and apply foam squares
Mount image to card base

Here's my second project, a simple mixed media piece done with my favorite flower and colors!


Here's what you need to create this project:

Fedrix 8 x 10 Canvas Panel
Faber-Castell® Gelatos® in Pistachio, Grape, Gold Champagne, Chocolate, Lemon and Mango
Liquitex® Matte Gel Medium
Archival Ink™ in Jet Black
Torn Book Pages
Baby wipes

Here's what you do to create your own canvas:

Put down a layer of gel medium
Add torn pieces of book pages covering entire canvas
Top with a layer of gel medium and allow to dry
Stamp image with black ink
Gesso around image leaving a border of torn paper
Color image with Gelatos and a water brush
Using baby wipe, go around edges buffing on gold Gelato
Randomly dot with purple and green Gelatos, wet it with water brush and smudge with a baby wipe
Create a wet paste with the brown Gelato and use stipple brush to flick color randomly over canvas

So that's it for me, I hope you've enjoyed both projects!  Here's the complete hop list so be sure to check out everyone's projects and comment for your chance to win!

Stampendous Blog

Design•Memory•Craft Faber-Castell Blog

Tobi Crawford

Tenia Nelson

Asia King

Cyndi Bundy

Kristine Reynolds

Lea Kimmel

Janelle Stollfus

Jamie Martin

Krissy Fossmeyer

Wendy Price

Thanks for stopping by today!  Be sure to come back soon for another visit!  

Hugs,
Lea


Thursday, March 6, 2014

Fun with Faber-Castell


Wow!  Can I just say how much I love Faber-Castell®!!  When you combine it with Stampendous®, it's a  match made in Heaven!  For my project today I've used Bowl Bouquet and one of the many great sentiments from Friendship Assortment.  I've colored my image with Faber-Castell's Art Grip® Aquarelle Pencils.  Each watercolor pencil is given a number and the ones I've used are 147, 162, 109, 104, 107, 166, 167, 115, 118, 126, 163, 199 and 132.  Aren't the colors pretty!?


Here's what I used to create this project:

Ranger Archival Ink™ in Jet Black
My Mind's Eye® Six By Six Designer Paper Pad in "A Mother's Love"
Bazzill® Cardstock
Canson® Watercolor Paper
Queen & Co.® Pearls
Scor-Tape®
Misc. Foam Mounting Squares
Water brush

Here's how you can create this card:

Stamp image with black ink
Color image with pencils and apply water with water brush
Create card base with a tent fold
Trim patterned paper for background
Stamp sentiment with black ink
Apply color to sentiment
Trim a mat for image and sentiment
Adhere all layers as shown and pop sentiment on
Affix pearls as shown

Both companies are giving away some great prizes but to be eligible to win, you must leave a comment.  It's not hard, I know you can do it!  LOL!  Come on, leave us a little love to let us know you've enjoyed our projects.  We've created them just for you!  The big blog hop is tomorrow, there will be lots of projects to view so be sure to stop back by for some crafty inspiration!

Thanks for stopping by today.  I hope I'll see you here again tomorrow.  Until then, have a blessed day!

Hugs,
Lea

Wednesday, March 5, 2014

Coffee, Anyone?

Our theme this week at Wicked Wednesday ATC Challenge is coffee and it's kind of a wild card week where we could use any image from any company.  Well, of course I'm going to use my favorite stamp company, Stampendous!  My ATC is created from the set Coffee Talk Perfectly Clear Stamps.


I stamped my images using Boss Gloss ink from Stampendous and heat embossed it with Clear Bark Embossing Powder, also from Stampendous.  I colored it with Copics E25, E27 and C1.   Next I sprinkled on granules of instant coffee, spritzed it with water, allowed it to sit a few seconds and dissolve a little and then I heated it with the heat gun.  It creates a really cool effect!  The paper my cup is stamped on and the paper my sentiment is stamped on is the same paper but it doesn't look like it here.  I stamped my sentiment with Ranger's Archival Ink in..., you guessed it, Coffee!  Seriously, what other color could I have used!?  Anyway, I pop-dotted my sentiment on and adhered my layers.  My papers are Bazzill and my adhesives are Scor-Tape and Pop Dots.  

So, that's it for today!  Thanks for stopping by and I'll see you again tomorrow with some more Stampendous love as I play along with some cool Faber-Castell watercolor pencils.  Have a blessed day!

Hugs,
Lea

Sunday, March 2, 2014

Desert Islands Crafters Challenge Time!

So, I'm a little behind the 8 ball for this one but I hope my card will make up for my tardiness.  Let me just say, it's been a crazy weekend and I'm actually glad it's almost over!  I don't say that very often but I'm looking forward to the week ahead!  Our Desert Islands Crafters Challenge sponsor for this round is Polka Doodles, the image I've used is Dollie Daydream Goes East - Lantern Digi.  I've colored my image with Copics, enhanced her with a little chalk make-up (eye shadow and blush) and chalked the background.  I also used chalk for my lantern glow on the outside of the lantern.  Here's the itinerary for this challenge:

1. Asian Themed
2. Lots of Red
3. Metallics
4. Text (as in, paper or embellishments with text on them)
5. Mythical Creatures
6. Vellum
7. Found Object from Nature
8. Stripes
9. Use Chalk
10. Make it Glow

For my card, I used all but #5.  I just didn't have any mythical creature stamps or embellies that would have worked!  Here's my project:


I really had fun with this one!  If you're wondering where the metallic part of my card is, I used DecoArt's Metallic Lustre in Gold Rush on her dress hooks and trim around the edge.  I also used if for the handle of the lantern.  I punched the flowers out of vellum with a punch from  EK Success and colored them with Copics on the back side.  It was a beautiful spring-like day here in North Carolina so I enjoyed my little walk-about looking for just the right twigs for my "cherry blossoms."  My papers are Bazzill, Neenah Classic Crest Solar White Cover and Basic Grey's "konnichiwa."  The chalks are from Pebbles, Inc.    

We hope you'll play along with the DICC team, you just might win!  Thanks for stopping by!  

Hugs,
Lea