Showing posts with label Hug Snug. Show all posts

Thursday, February 19, 2015

February Froufrou

Break out the froufrou! For the month of February, the Dream Team is going Frilly and Fabulous! Vintage, retro, or modern, adding extra charm with fun Fran•táge products from Stampendous, ribbons and lace from May Arts, buttons, crystals, charms, or even creating your own dimensional decor! A snippet or a pile, whatever your creative heart desires! Remember to link your creations using the Inlinkz tool on the Dream It Up! blog for a chance to win the stencil of your choice! Bonus points for using Dreamweaver and/or Stampendous product in your work of heart.

Here's what I've been playing with:


Here's what I used to create this card:


Here's what I did to create this card:

  1. Create a card base from aqua cardstock
  2. Trim a panel of natural white 4"x 5.25"
  3. Spritz with Copic® reinker mixed with alcohol
  4. Spritz with Peacock Feathers reinker mixed with water
  5. Drip on acrylic ink
  6. Spritz with coffee
  7. Stamp border along bottom
  8. Paste feather and set aside to drive
  9. Stamp sentiment and trim closely as shown
  10. Distress edges of sentiment with paper distresser, ink edges with distress ink and spritz with inks and coffee like the background panel
  11. Trim a piece of seam binding and spritz with inks, set aside to dry
  12. Once paste has dried, go over feather with Brushed Corduroy ink and Peacock Feathers ink
  13. Using markers, add lines to feather
  14. Create bow with ribbon and twine
  15. Using scrap of crochet ribbon, fold into a "v" and adhere to panel
  16. Adhere bow to panel over the crochet ribbon scrap and trim twine ends
  17. Adhere sentiment to card
  18. Add any additional drips as needed

I love doing these mixed media style cards!  It's really a lot of fun to spritz and paste and drip and then add a touch of girlie-ness to it!  For more frilly fun, visit the rest of the "A" team: 
Thanks for stopping by!  I hope you like my card and found a little inspiration here today.  If so, I would love for you to leave me a comment and tell me what you think.  If you're not one of my followers, I would love for you to consider following my blog.  I love sharing my creations!  Hope to see you again soon!

Hugs,
Lea


Friday, June 13, 2014

Dreamweaver and Imagine Crafts Hop!

If you're looking for the Stampendous / Core'dinations Hop, here's the correct link:  http://ink-positive.blogspot.com/2014/06/stampendous-and-coredinations-hop.html


Welcome to our first ever collaboration week with Imagine Crafts/Tsukineko! We've shared all of our toys on both sides, so be prepared for Endless Possibilities! Three prize packages are available, each containing one set of each of these inks and stencils/dies. Just leave comments on each post of each day this week (June 9th - June 13th) for a chance to win! Winners will be announced on Tuesday, June 17th!


 These are the stencils and dies you could win!

These are the ink pads you could win!

Woohoo!  Have you had fun this week?  I know I have!  I'm so blessed to be a part of the Dreamweaver Stencils Dream Team!  I have two projects for you today and I sure hope you like them.


Here's my first creation for today:


Here's what I used to create this card:

Black Cardstock
Bazzill® Cardstock
Northwoods® Stamp
Silks Acrylic Glaze - Pink Azalea
Beacon Adhesive® Zip Dry™
Foam mounting squares


Here's what I did to create this card:

Tape stencil down to cardstock and using a stencil brush, stencil silver ink onto paper
Tape spider stencil down over web and paste emboss 
Add Metallic F/X powder to spider and heat
Spray texture spray over stenciled paper
Add coating of Silks glaze to spider
Once glaze dries, replace stencil over spider and add a layer of silver ink
Stamp sentiment with silver ink
Trim all papers and layer as shown

Here's my second project:


Here's what I used to create this card:

Bazzill® Cardstock
Neenah® Classic Crest™ Solar White 
Hug Snug® Seam Binding - White
Beacon Adhesive® Zip Dry™

Here's what I did to create this card:

Tape stencil down on white cs
Using stencil brushes, stencil ink onto cardstock
Stamp sentiment
Create card base
Trim stenciled piece and sentiment to desired sizes
Dye seam binding on ink pads and trim as shown
Adhere all layers as shown

These are two simple to create and fun cards!  I sure hope you like them!  Just Imagine the possibilities of what everyone else has created!  Here's the complete hop list:


Don't forget to comment as you go so you can be eligible to win one of our great prizes!  Thanks for stopping by today and I'll see you again soon!

Hugs,
Lea


Friday, March 21, 2014

Tombow Hop Time!


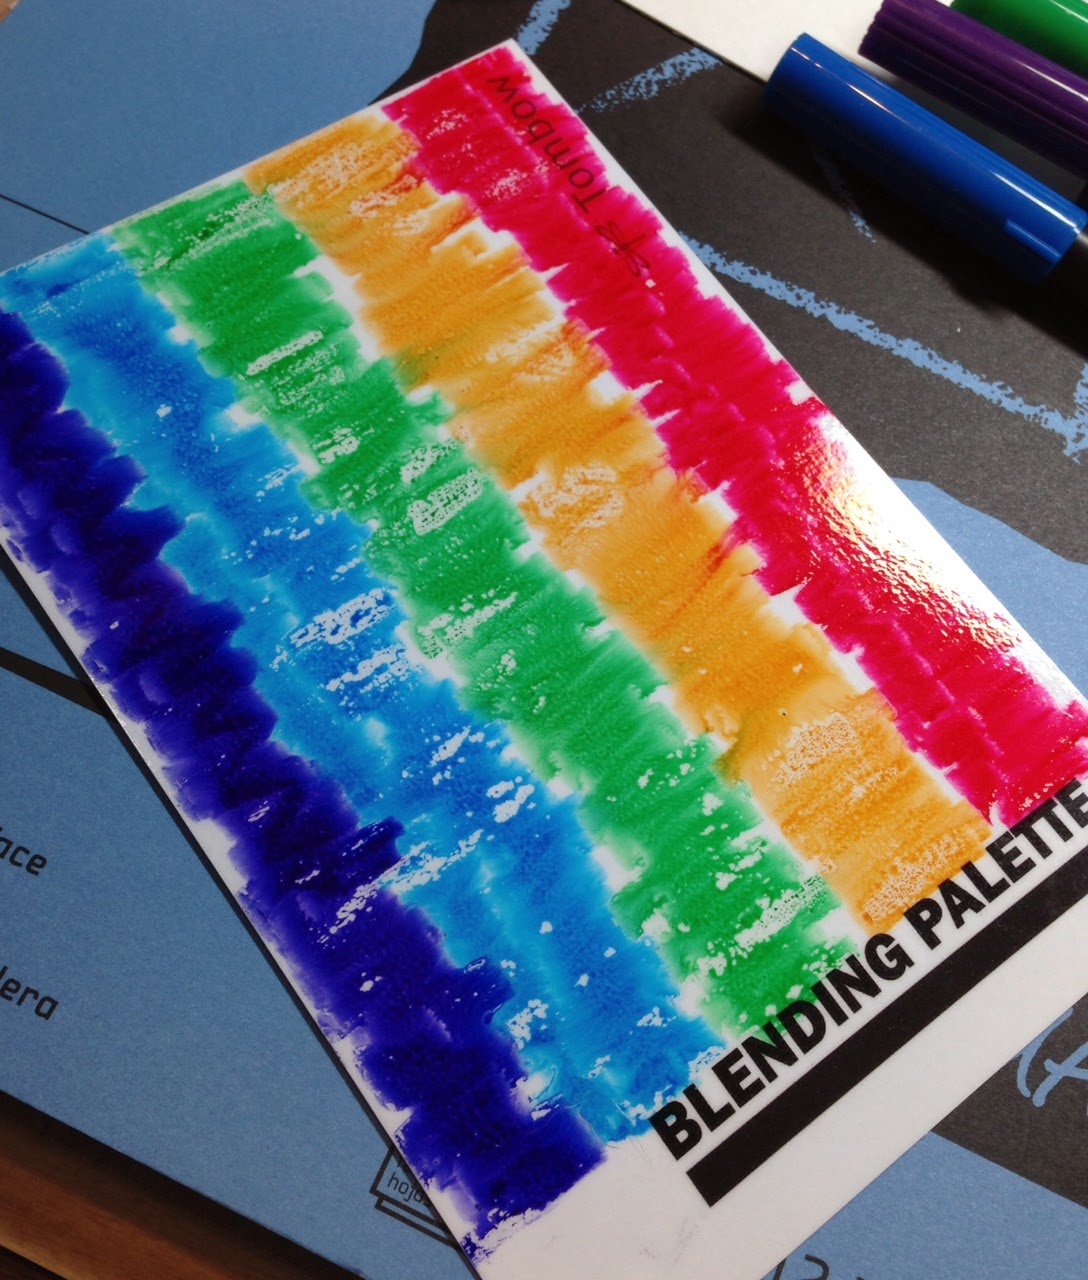
It's Friday, you know what that means!!!  It's HOP Day! Yay!!  The Stampendous Design Team is hopping along with the TombowUSA Design Team and I'm sure there will be plenty of eye candy to soothe your sweet tooth!  Remember, we have prizes to give out but you must comment to win a prize!  So, you may or may not recall that I received the set of 6 Jewel Dual Brush Pens and a Blending Kit from Tombow.  My first project uses five of the colors, 847/Crimson, 636/Imperial Purple, 245/Sap Green, 476/Cyan and 946/Gold Ochre.  I didn't use N25/Lamp Black for obvious reasons!  Here's my card using the Splash Technique:


Here's what I used to create this project:

Canson® Watercolor Paper
Black Cardstock
Archival Ink™ - Jet Black
Hug Snug® Seam Binding - White

Here's how I created this project:

Trim watercolor paper to fit blending palette
Color blending palette with markers in wide stripes (as shown above)
Spritz blending palette with water
Apply watercolor paper to blending palette and rub paper to make sure it picks up ink evenly
Set wet paper aside to dry (dry paper shown above)
Trim seam binding to desired length
Re-color blending palette and mist
Lay ribbon across palette and rub ribbon to help apply ink
Continue doing sections of ribbon while moving down palette
Set ribbon aside to dry (you can use your heat gun to speed this process up)
Stamp image on dry inked watercolor paper
Trim away excess paper at bottom
Stamp sentiment
Create card base to fit image
Adhere image to to card base
Tie dried ribbon around top of card with a simple knot in front

For my next project, I went back to mixing colors on the blending palette and applying the color using the Indirect Blending Technique to color my image with the blender pen.  I really like this technique!  


Here's what I used to create this project:

Bazzill® Cardstock in Parakeet and Lava
Making Memories Kids™ Collection - Emma
Canson® Watercolor Paper
Archival Ink™ - Jet Black

Here's what I did to create this project:

Stamp image and color, trim to desired size, set aside to completely dry
Create card base from green cardstock
Trim red-orange cardstock pieces as shown
Trim patterned paper as shown
Stamp sentiment on dry image
Adhere all layers as shown

So that's both of my projects, I hope at least one of them may have inspired you to give this a go yourself.  Easy and fun, what more can a girl/guy ask for!?  Here's the complete link list, I wouldn't want anyone wandering lost around the Internet, it could be light years before you're found! 

Lea Kimmel (me!)


Don't forget to leave some love along the way in order to be entered to win a prize.  Thanks for hopping by and I hope to see you again soon!  Have a blessed day!

Hugs,
Lea