Showing posts with label #MME. Show all posts

Thursday, December 22, 2016

DICC with A Day For Daisies

It's time for another Desert Islands Crafters Challenge and this week our sponsor is A Day For Daisies.  The image I've used is Christmas Pixy One.  Here's the list of items to choose from for this challenge, remember, you must use at least three:


For my card, I've used 2, 3, 4, 5, 7, 8, 9


Here's what I used to create this card:

Copic® Markers
Neenah® Classic Crest™ Solar White Paper
Blue Cardstock by Bazzill Basics Paper®
Be Merry™ 6x6 Paper Pad by My Mind's Eye™
Star Dust Stickles™ by Ranger®
Christmas Red Stickles™ by Ranger®
Tim Holtz® Distress Stickles™ in Picket Fence by Ranger®
Miscellaneous Lace Trim
E-Z Runner® by Scrapbook Adhesives™

I'd love for you to play along with us.  This is such a fun challenge.  With 10 items to choose from, you can truly make it your own.  I'll see you again soon, in the meantime, have a wonderful holiday.

Merry Christmas,
Lea


Wednesday, December 16, 2015

Wicked Wednesday with SLS Lines

It's Wicked Wednesday ATC Challenge Blog time and this week our sponsor is SLS Lines.  Our theme is "Add Antlers" and the image I've used is Nature Goddess Girl with Antlers.  I don't usually get into antlers since I'm not into hunting so I decided to get a little cheeky with mine. Hope the humor doesn't offend!


Here's what I used to create this ATC:

Copic® Markers
Tim Holtz® Distress Ink™ in Antique Linen
My Mind's Eye™ Indie Chic "Nutmeg"
Green Cardstock by Bazzill Basics Paper®
Neenah® Classic Crest™ Solar White Cover Stock
Tombow® Marker - Brown
Miscellaneous Patterned Paper
Zip Dry™ Paper Glue by Beacon Adhesives

Here's what I did to create this ATC:

Print image, color with markers and fussy cut.
Trim green cardstock for ATC base.
Trim patterned papers as shown.
Adhere layers of papers.
Add distress ink to edge of trimmed image and adhere to ATC.
Using scraps, write out sentiment, trim, add distress ink and adhere to ATC as shown.

We would love for you to play along with our challenge this week.  All you need is some antlers and some creativity and you're all set!  Thanks for stopping by and I'll see you again soon!

Hugs,
Lea


Wednesday, December 2, 2015

Wicked Wednesday with All Dressed Up

Yep!  That's right!  It's time for another Wicked Wednesday ATC Challenge Blog challenge and this week our sponsor is All Dressed Up.  The image I've used today is Little Star and our theme is a little different this week, we're playing Tic Tac Toe!  Select your "three in a row" on the board posted below.  I've used Stickles™, Free Space and Buttons for my three.


Here's my ATC:


Here's what I used to create this ATC:

Copic® Markers
Antique Linen Distress Ink
My Mind's Eye™ Vintage Christmas Patterned Papers
Neenah® Classic Crest™ in Solar White
Red Cardstock by Bazzill Basics Paper®
Diamond Stickles™
Aqua Stickles™
Patina Stickles™
Buttons by ©Buttons Galore and More
Misc. Twine
Zip Dry™ Paper Glue by Beacon Adhesives

Here's what I did to create this ATC:

Print image, color and trim closely as shown.
Trim patterned papers and ATC base.
Distress edges of all papers.
Add distress ink around image and patterned papers.
Adhere layers and roll corners as shown.
Add twine to buttons and attach buttons to ATC with glue.
Add various Stickles™ to image as shown, set aside to dry.

Thanks so much for stopping by today.  I hope you'll play along with us this week and pick your own "three in a row!"  I'll see you again tomorrow with a Dreamweaver Thursday post.  In the meantime, have a wonderful day!

Hugs,
Lea

Thursday, June 18, 2015

It's Irrelephant!

We're going wild this week at Stampendous with some awesome Dreamweaver stencils and some great stamps!  Today I have a card with a little bit of Indian spice and lots of stuff that's nice!  Here's my card:


Here's what I used to create this card:

Tim Holtz® Distress Ink in Pumice Stone by Ranger®
Neenah® Classic Crest™ Solar White Cover Stock
May Arts Ribbon®
Zip Dry Paper Glue by Beacon Adhesive
Scrapbook Adhesives® 3D Foam Mounting Squares by 3L®
Self-Adhesive Pearl by Want2Scrap™

Here's what I did to create this card:

Mix some regular white paste with a squirt of gold paint and a pinch of beads for some fun texture
Paste emboss stencil with mixture directly onto trimmed patterned paper, set aside to dry
Create A2 card base with a tent fold from blue cardstock
Trim bottom layer of designer paper 
Stamp sentiment on scrap of white paper with blue ink and add distress ink
Trim a mat for sentiment and adhere sentiment to mat
Cut two strips of ribbon
Once paste has dried, adhere elephant to bottom patterned paper and wrap ribbons around as shown covering edges
Adhere these layers to card base
Add foam squares to sentiment and attach to card over ribbon

This was a fun card to create, I like the effect of the micro beads and will add those to future pasted projects for sure.  Just something different! Here's a list of my teammates that have more wild animals to share with you:

Lea Kimmel (me!)

Thanks for stopping by today!  Comments, as always, are appreciated!  Now it's your turn to get wild and show us what you can do!  Have a wonderful day!

Hugs,
Lea


Wednesday, June 17, 2015

Wicked Wednesday and SLS Lines

Yep, it's that time again and this week we're Seeing Red at Wicked Wednesday ATC Challenge Blog as we spend the week with SLS Lines' images!  That's right!  We're all mad around here!  Heehee!  Not really, but, that's our theme!  My image this week is Goth Girl.  Here's my take on this:


Here's what I used to create this ATC:

My Mind's Eye™ Voyager Paper Pad
Red Cardstock by Bazzill Basics Paper®
Neenah® Classic Crest™ Solar White Cover Stock
Copic® Markers
atyouSpica™ Glitter Pen by Too®
Tim Holtz® Distress Ink in Antique Linen by Ranger®
Miscellaneous Sequins - Red
Zip Dry Paper Glue by Beacon

Here's what I did to create this ATC:

Print image and color with markers
Trim image keeping just a small edge of white
Trim ATC base from red cs at 2.5x3.5"
Trim bottom layer of patterned paper 1/8" smaller than ATC
Trim next layer up of patterned paper 1/4" smaller than ATC
On a scrap of white paper, handwrite your sentiment with glitter pen, add distress ink, snip apart
Distress white edge of main image
Adhere all layers as shown
Attach three sequins as shown

That's it for me this week!  Thanks bunches for stopping by today.  We would love for you to play along with our challenge this week.  Just as an FYI, I'll have a Stampendous post on Thursday and Friday as we celebrate Wild Animal Week!  Come get wild with us!

Hugs,
Lea

Thursday, January 1, 2015

Happy Birthday to You!

Welcome to the birth of a new year...2015 to be precise! In honor of that, we've decided that our monthly challenge for January will be Birthday Wishes.  More precisely, today's post is in honor of Lynell's birthday!  So, Lynell, SURPRISE!  HAPPY BIRTHDAY!!  We'd love for you to play along with us, and link your creations to the Inlinkz tool at the bottom of this post, or on the Dream It Up! blog, for a chance to win the stencil of your choice...and remember, using Dreamweaver products gets you bonus points towards an extra stencil!

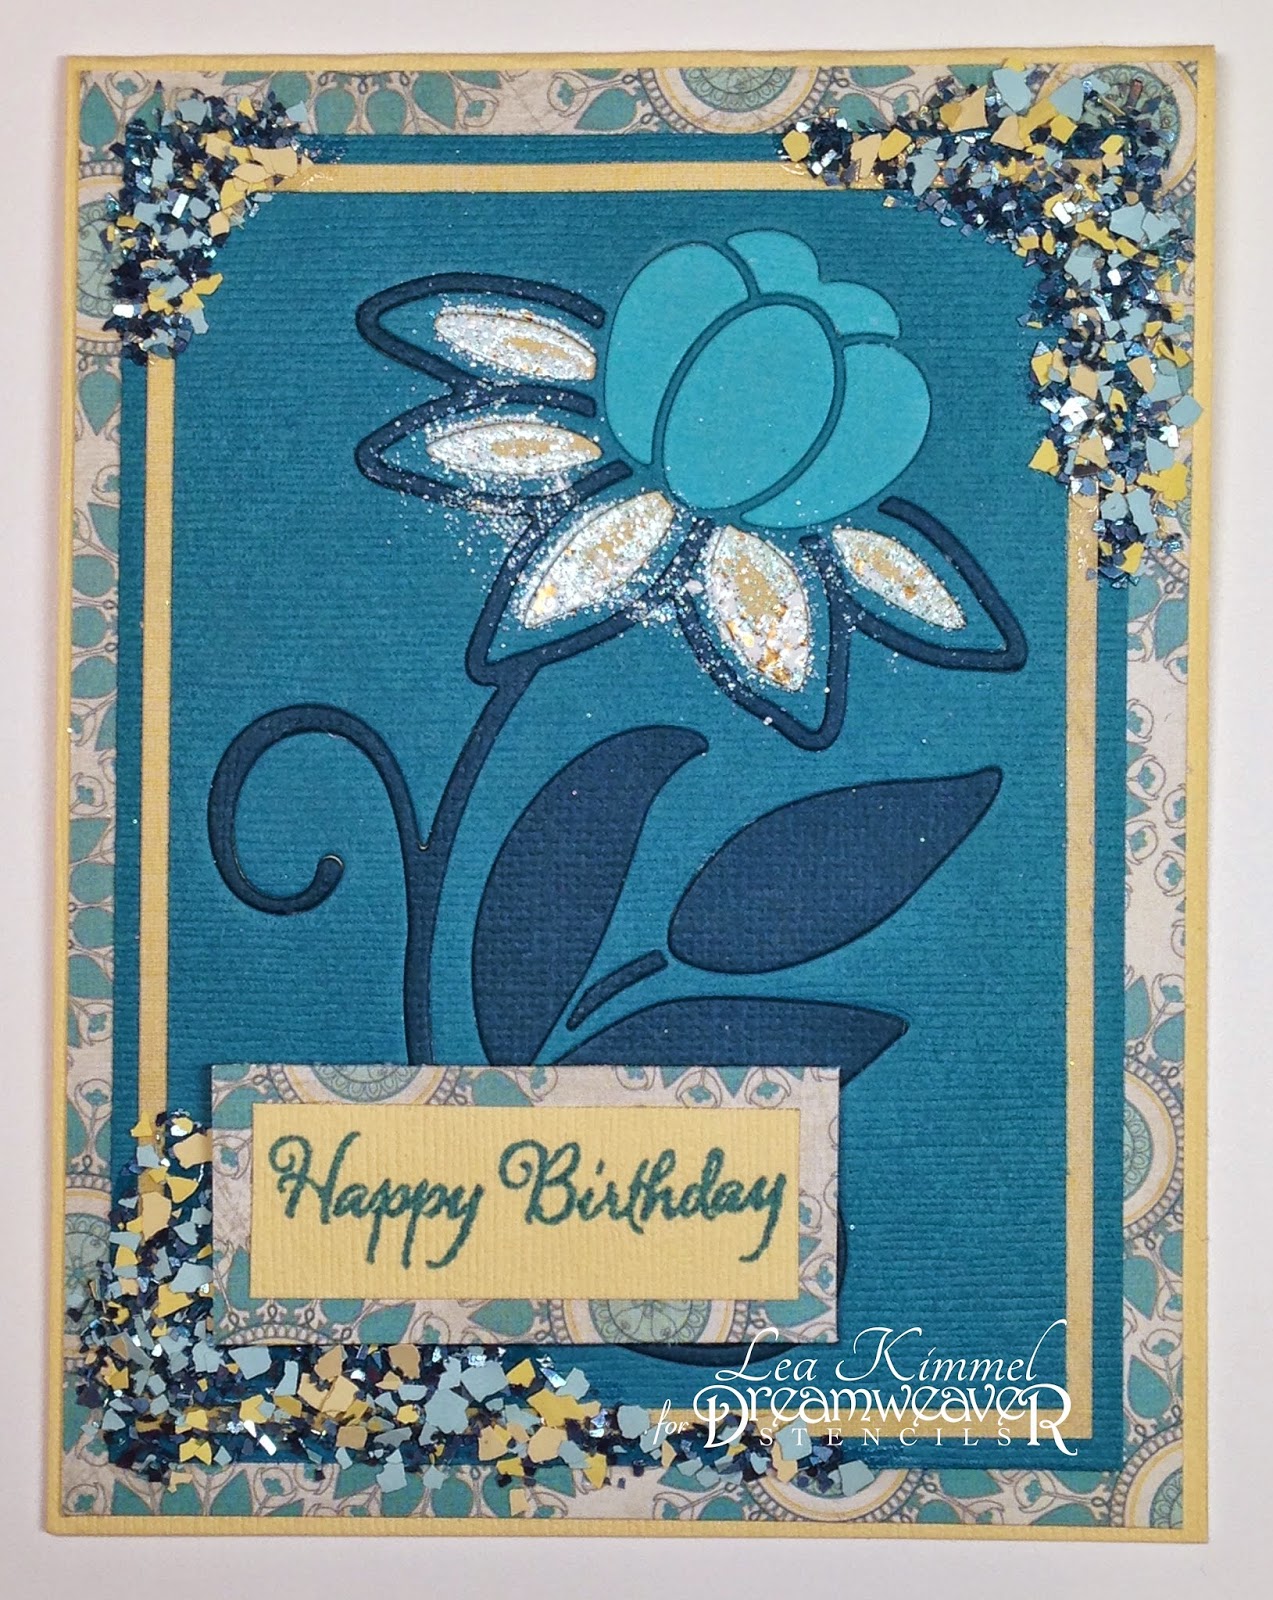
Here's my birthday wish for this week:


If I remember correctly, aqua/teal is one of Lynell's favorite colors so that's the primary color used on this card.  I sure hope I'm right!  LOL!  If not, well, it's still a lovely color!

Here's what I used to create this card:

Memento™ Teal Zeal Ink by Tsukineko®
My Mind's Eye™ Indie Chic™ "Nutmeg" 6x6 Paper Pad
3-in-1 Glue by Beacon Adhesives
3L Scrapbook Adhesives 3D Foam Squares

Here's what I did to create this card:

Die cut flower from three different shades of aqua/teal cardstock, light, medium and dark
Trim the cardstock around the medium-tone cs as this will be your base for the flower
Trim a piece of yellow cardstock to go behind the flower base
Adhere the aqua flower base to the yellow piece
Inlay the darker and lighter shaded pieces as shown
Add watermark ink to the inside of lower petals and add embossing enamel, tap off extra and return to jar 
Heat enamel from below with heat gun
Create an A2 card base with a tent fold from yellow cardstock
Trim patterned paper to fit card base
Create an aqua mat to go under the flower layers (this really pops it off the patterned paper visually)
Using a scrap of the yellow cardstock, stamp sentiment and trim closely
Using a scrap of the patterned paper, create a mat for the sentiment and adhere the two layers
Adhere the patterned paper to the card base
Adhere the matted flower layers to the card base
Attach the matted sentiment to the card 
Mix together the glitter and fragments and adhere to the card as shown

That's it for me!  Of course, there's more birthday inspirations coming your way from the Dream Team, be sure to leave some love along the way:

Lynell, I hope you have the happiest of birthdays!!  Happy New Year to everyone!  Here's to many blessings throughout the new year.  Thanks for stopping by and I'll see you again soon!

Hugs,
Lea