Showing posts with label Stampendous Color Fragments. Show all posts

Wednesday, April 1, 2015

Wicked Wednesday and Creepie Cute Stamps

Hello there!  It's Wicked Wednesday ATC Challenge Blog time and this week our sponsor is Creepie Cute Stamps.  The image I've used is called Vampling, she reminds me of Wednesday from The Adams Family!  If only she had braids!  The theme for this week is April Fools Day or Favorite Holiday.  I chose to do my favorite holiday, which is, of course, Halloween.  Here's my ATC for this week:


Here's what I used to create this ATC:

Neenah® Classic Crest™ Solar White Cover Stock
Washi Tape
Tim Holtz® Dusty Concord Distress Ink
Copic® Markers - YR04, 07; YG11, 13, 17; R56; B0000, 21; V12, 15; E21, 50, 51, 53, 95, 97, 99; C4, 5, 6, 7, 9
Lavender atyouSpica® Glitter Pen
Sepia Copic® Multiliner™
Gelly Roll™ White Gel Pen
Beacon® 3-in-1 Advanced Craft Glue

Here's what I did to create this ATC:

  1. Print image and color with markers, trim to ATC size
  2. With glitter pen, write sentiment
  3. Add distress ink around edges
  4. Add a small piece of wash tape to opposite corners as shown
  5. Gather the three different colors of fragments and mix a small pinch of each into one jar
  6. Run glue along edges and add fragments, set aside to dry

Any time I get to do Halloween and use my favorite colors, lime and purple, I'm a happy gal!  Hope you liked my little ATC for today.  We would love for you to play along with us; you can find the link on the Wicked Wednesday blog.  Thanks for stopping by today and I'll see you again soon!  In the meantime, have a wonderful day!

Hugs,
Lea

Friday, October 10, 2014

Feeling a Little Witchy?

I am...Bwahahahahaha!  It's the 31 Days of Halloween and time to celebrate all things spooky!  Stampendous Stamps and Dreamweaver Stencils have some of the best Halloween goodies to make cards, home decor and party supplies for the scariest Halloween ever!  Today I've got a card that uses products from both companies.

I had a lot of fun creating this card.  This was a case of looking at the stamp and knowing exactly what paper, die and embellishments I needed to use as well.  I wanted the witch to have some depth and thought about stamping her and cutting her out but then I spotted my box of transparencies and decided to go that route instead.  I'm so glad I did!

I really wanted some gray fragments and since Stampendous doesn't make that color, I decided to create my own.  Easy to do with alcohol ink and/or an airbrush!  If I had a refill bottle, I would have just mixed them in that, however, I didn't so I put some rose fragments in a jar, stuck my Copic airbrush nozzle with my T8 Sketch marker into the top and hit the trigger.  Well, let me just say, that was interesting experience.  Quite a few of them blew up and out of the jar!  So, next time I covered the top with my had and sprayed away.  It was kind of like watching popcorn pop and with a little shaking around, I had some great gray fragments!


I played around with the lighting and liked how this one made it look like the jack-o-lantern was creating a glow in the woods.  I thought it would be fun to share both photos!

Here's what I used to create this card:

Copic® Marker T8
BasicGrey® Eerie Paper Pad
Cardstock by Bazzill Basics Paper®
Highland 901 Transparency Film for Copiers, Clear
Zip Dry™ Paper Glue by Beacon® Adhesives
Glue Dots® - Small

Here's what I did to create this card:

Trim transparency to desired size, stamp image with embossing ink, add powder, remove excess powder and heat.
Once cooled, add glue to jack-o-lantern and apply orange micro glitter.
Add glue to witches dress as shown and apply lime micro glitter, set aside to allow glue to dry.
Create A-2 card base with a tent fold from purple cardstock.
Trim patterned paper to fit card base with a small edge of purple showing.
Adhere patterned paper to card base.
Take embossed transparency piece and flip over so embossed and glittered side is down and adhere to card base with glue dots, this allows the image to show completely with the glitter showing through.
With black cardstock, die cut the tree and then cut branches off to adhere to card as shown.
Airbrush rose fragments with gray marker, mix with purple fragments and apply to bottom of card with glue.

I have to say, I LOVE how this card turned out, it's just like I saw it in my head!  I also love how the the transparency photographed along the bottom of the card.  The reflection looks like mist rising from the ground.  Sooo cool!  

That's my project for today, I hope you like it as much as I do.  Thanks for stopping by and I'll see you again soon.  Have a wonderful day!

Hugs,
Lea


Wednesday, September 24, 2014

Wicked Wednesday Supports...

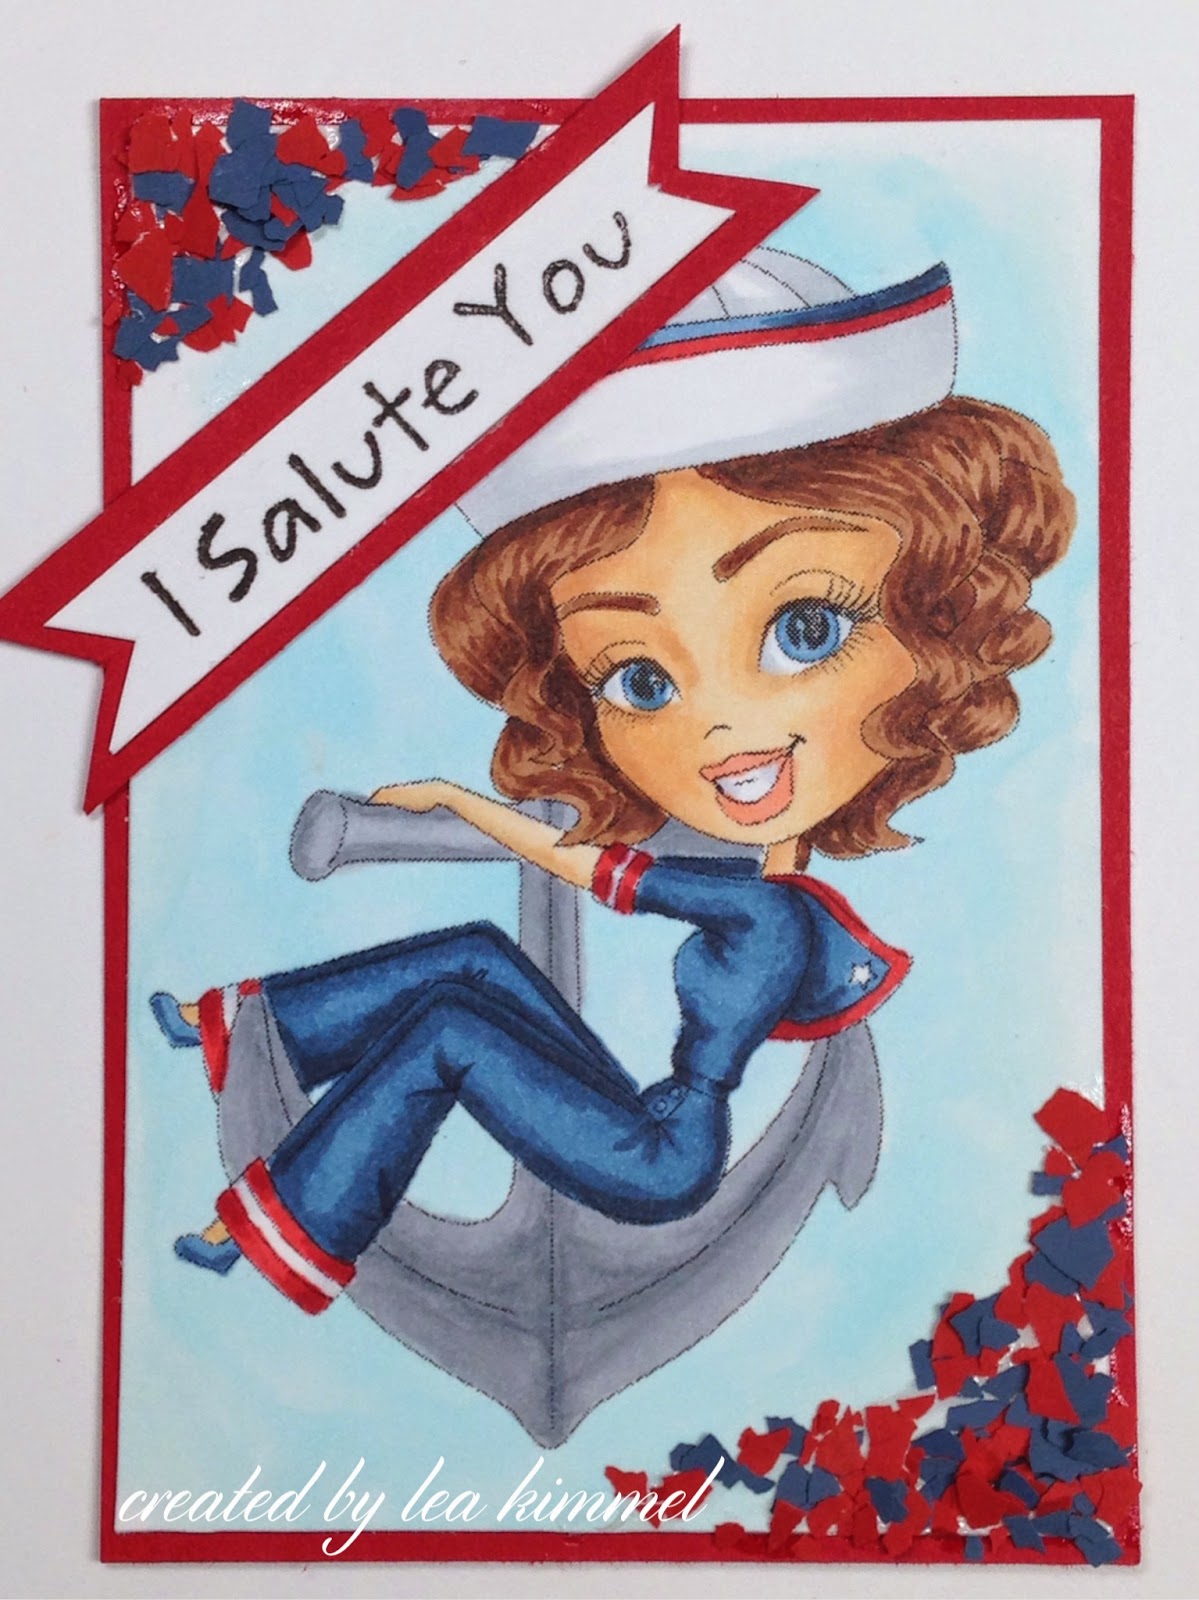
...our Troops!  Our sponsor for this week's Wicked Wednesday ATC Challenge is Sassy Studio and I've used Sailor Honey.  I spent 9 years in the Army on active duty and my Dad retired after 21 years of service in the Navy.  This ATC is in honor of my Daddy!  Anchors Away!


This is what I used to create this ATC:

MFT PI-Soldier Girl (Sentiment)
Bazzill® - Red
Neenah® Classic Crest™ Solar White
Beacon® Adhesive Zip Dry™
Copic® Markers:
  • Skin - E50, 51, 21, 53
  • Hair - E23, 25, 27
  • Suit/Hat - B91, 95, 97, 99; R24, 27, 29; C1
  • Anchor - C1, 3, 4
  • Background - B0000, 000


Here's what I did to create this ATC:

Print image, color and trim to desired size
Trim red cardstock to ATC size
Stamp sentiment on scrap of white, fishtail ends, layer on scrap of red, fishtail red ends
Adhere all layers as shown
Using Zip Dry adhere mixed color fragments

This was a fun one to create but I have to admit I shed a few tears thinking about my Dad.  He passed away on 9/11 two  years ago and life just hasn't been the same without him.  Anyway, I hope you like my little Sailor Honey.  Have a blessed day and I'll see you again soon!

Hugs,
Lea