Showing posts with label Nestabilities. Show all posts

Friday, August 2, 2013

Hopping the day away...

...it's Friday Hop Day!  Woohoo!


It's fun in the sun time again with another collaboration between Stampendous and Dreamweaver Stencils! We'll be playing together all of this week, with a fabulous hop on Friday, August 2nd, featuring a slew of amazing talent from both teams, and of course...prizes!!!

Two prize packages will be given away for the comments left on posts Monday-Thursday, July 29th - August 1st, and one prize will be given away for comments left on the hop day, Friday, August 2nd. Winners will be selected randomly and announced Thursday, August 8th. (Note: USA addresses only, please, due to shipping costs.) Here's what you could win:

Stampendous Surfer and Sandcastle Kiddos • Dreamweaver Hot Air Balloon, Ice Cream Cones, Summer, Mosaic Swirls, Bird Words, and Sandcastle stencils


 Here's what I created:


I love summertime weddings!  I decided to go for a more simple yet (hopefully) elegant look today!  I used Dreamweaver Stencil LL3034 Your Wedding and pasted it with matte black embossing paste.  Once dry I cut it out with a Spellbinder die and set it aside.  I trimmed a piece of white cardstock to the size I wanted and using Stampendous Zinnia stamp, I stamped it randomly on the cs with my Boss Gloss ink.  Next I heat embossed it with Kaleidoscope Embossing Powder and set it aside.  I used my VersaMark marker to highlight just part of the flourishes on my stenciled piece, then added Kaleidoscop EP on it and quickly heated it being careful not to bubble my paste.  Once that was done I created my card base from black cardstock, added a bit of May Arts silk ribbon to my white panel and adhered the two.  Using some pop dots, I attached my sentiment and, voila!, a simple card for that special couple getting married!  I added the two close-up photos so you can, hopefully, see the sparkle!  This is so pretty in real life and the pictures never seem to capture the true beauty of the sparkle!

Now, hop on over to the next in line. Don't forget to leave some love for a chance to win, and just 'cuz it's nice!


Thanks so much for joining those of us at Stampendous and Dreamweaver for this week long collaboration.  I hope you've enjoyed it and been inspired along the way. I appreciate all the wonderful comments you've left this past week, it's heartwarming to read them and know you've enjoyed my work.   I'll have more projects for you soon so be sure to check back in next week.  See you soon!

Hugs,
Lea

Saturday, November 10, 2012

I {heart} Fast Finish!

Really!  I love this stuff and you will, too!  It's so easy to use and just like the name says, it's F-A-S-T!


I went to Michael's earlier this week and picked up this really cool wooden heart.  I've been wanting to create some decorative wall items for my shabby chic-styled craft room.  I'm fortunate to be one of those people that can pick something up and an idea instantly pops into my head as what I can do with it.  Well, as soon as I saw this heart, I knew what I wanted to do!  First, I stamped these images and embossed them with Clear Bark embossing powder on a Lost and Found 6x6 paper pad from My Mind's Eye.


  I used Stampendous images Deco Lady, I Love Paris, and Carte Postale.  I loved the vintage feel of these stamps and knew they would be great together.  (I added a tiny bit of pink and green to Deco Lady with my Copics!)

After stamping and embossing the images on the papers I picked out, I set about doing the background of my heart.  First I covered it with Tim Holtz distress ink in Antique Linen, then added accents in Spun Sugar.  Next I covered it with a thin coat of Distress crackle paint in Picket Fence.   While waiting for the crackle paint to dry, I used my Spellbinder heart and scalloped heart dies and cut out a few hearts using scraps from the paper I stamped my images on.  When the paint dried, I laid the stamped images and hearts out and found a layout I was happy with.  I did end up tweaking it just a little!


Next up was adding the Beacon Fast Finish Decoupage adhesive.  Let me tell you, I love how quick and easy this adhesive works!  I let the first coating dry, added a little more around the edges and sprinkled some chunky glass glitter around the edges for a little vintage sparkle!  For a finishing touch, I added some ribbon and bow to hang it with.   Here's a close-up.


I'm so pleased with how this project turned out and I hope I've inspired you to try this product for yourself.  I'm sure you'll love it just as much as I do!

These are the team members playing along today, so be sure to visit all of the blogs and leave some insightful, kind comments (the kind that let us know you looked at the project) and we'll give some great prizes, sending some of you with U.S. mailing addresses some Fast Finish Decoupage Medium and some Stampendous Stamps. Here we go...
Lea Kimmel (me!)

Thanks for stopping by and I'll see you again soon!  Have a blessed day!

Hugs,
Lea

Saturday, April 14, 2012

Dreampendous and Challenge time!


Get ready to be inked, pasted, encrusted, stenciled and stamped! This week, the Dreamweaver Stencils' Dream Team and the Stampendous Design Teams have had so much fun sharing "Dream-pendous" inspiration with you, and today we wrap things up with a terrific blog hop! You'll see how to mix and mingle your creativity...if you are a stenciler, you will be fascinated at combining stamps with your first love. If you are a stamper, you will be wowed at how stencils can add to your impressions.

And since this hop falls on a Saturday, some of the Stampendous team members are combining their amazing Dreamweaver Stencils projects with the monthly Stampendous challenge. This month, in honor of Earth Day, we are challenging ourselves (and you) to make something that uses product(s) that are recycled, re-purposed, or reused in some way.
Here's what I found for recycling.  This came off of a filter on a truck.  I could see a lot of possibilities as soon as I picked it up!  Of course one of the things I thought of was chicken wire.  It has that look to it.  Well the more I looked at it, the more I realized that what it really made me think of is fish scales.  Well, in my world, fish scales = mermaid.  I pulled out my Stampendous Cling Mermaid and set out to create this card.


I stamped my image on Neenah with Memento and colored it with my Copics.  I cut it out with a Spellbinders Nestie and set it aside.  Next I started on my base of Bazzill, Echo Park Splash patterned paper, wire mesh, twine, shells, gilded mica fragments and powder blue fragments.  I really do enjoy the whole Fran•táge look.  It's so fun to play with and mix up.  I love it!


Here's a pic of just the card:


I really like the way it turned out.  It was almost exactly what I had in mind!  I hope you like it too!


Be sure to leave comments as you tour the blogs (with your email addy!) for a chance to win one of these sets:


Here's the entire Dreamweaver Stencils/Stampendous party train for the hop today:


Stampendous Monthly Challenge only:


Don't forget - we want YOU to play along in our monthly challenge! You have until Thursday, May 3, 2012 at 11:59 PM EST to add your direct link to our collection at the end of this post (or on the Stampendous blog). You do not have to use Stampendous products, but we sure love it when you do! As an extra incentive for playing along, one lucky crafter (drawn at random) will receive this fabulous Mother's Love Perfectly Clear Stamp Set. Available in stores now, it will be on the website for purchase soon!


Due to shipping restrictions, the winner must have a US address. We hope you have a chance to play along with us (you an enter as many times as you'd like!) this month...Happy Crafting!

Hugs,
Lea

Pin It


Sunday, April 1, 2012

Who remembers the Bunny Hop?

In grade school the Bunny Hop was one of my favorite dances to do.  I loved it!  Also, when I was in my early teens one of my best friends, Totsy, and I dressed up as Easter bunnies and delivered little Easter baskets around our neighborhood to the elderly neighbors.  We had such a good time together and even to this day I have a collection of bunnies that remind me of our fun.  That why I chose to preview Cotton Tail Sally from the Simply B Stamps Sweet Gothic Kids Easter collection.  Originally this was supposed to be the last day these adorable stamps would be available.  Well, they have been such a hit that Betty has decided to make them available through Easter.  So, if you haven't purchased your digis yet, now is the time to get hoppin'!

Saturday, March 31, 2012

How's your Saturday shaping up?

Mine is shaping up nicely with Stampendous on the last Saturday of their March shaped card challenge.  This was a fun challenge! I'm so appreciative of the invitation to play along with such awesome talent as the Stampendous Design Team.  For my card I used the SSC1112-R Daisy Thanks Perfectly Clear™ Stamps set.  I'm a huge fan of daisies even though I colored these to look like Black-eyed Susans.  This is a sweet set with two simple sentiments.

I created my easel card by cutting out three pieces of Bazzill using the Spellbinders Nestabilities Label 10 die.  I used the next to the largest die for my basic card and two of the smaller sizes for my sentiment.  I stamped my images on Neenah and colored them with Copics.  I cut out my flowers and layered them on the Bazzill pieces I had already scored and put together.  I added my single daisy head on the base to act as my stopper.  I layered my sentiment, added ribbon accents and pop-dotted it to the front of my card.  I also added a little Glossy Accents to my ladybug to give her a little shine.  It's really just a simple little card to wish you all a happy day!


This is my card while lying flat.  Below are two shots of it opened into the easel position.  I love how it turned out.  I know this set will get plenty of use by me as it's definitely a favorite! 


Here are the links for each of the team players  and a couple of guests playing along this week:
Lea Kimmel  (Me! I'm a guest!)
Stampendous would love for you to play along with this challenge and there's still time to enter your own shaped card.  You still have until April 5, 2012 at 11:00 PM EST to play.  All you have to do is link your creation to the Inlinkz on the Stampendous Impressions blog post for the March challenge.  You don't have to use Stampendous products to play, however, they would love to see you use their products.  As an added incentive for playing along, one very lucky participant, drawn at random, of course, will receive this gorgeous stamp set, Cling Jumbo Hollyhock.


Please keep in mind that due to shipping restrictions, the winner must have a US address.   I do hope you will play along with us.  I'm a firm believer in the more the merrier!  I can't wait to see what you come up with.  Thanks for stopping by to take a look and I hope to see you again soon!

Hugs,
Lea

Friday, March 23, 2012

Mad Hatter Hop

We're All Mad Here, that's for sure, so in honor of our madness, and the fact that it's release day, let's have a very Mad Hatter Hop.

Yes, today you get to meet the final character in the Simply B Stamps Alice in Wonderland Chibis Collection, none other than The Hatter himself.

Our Mad Hatter Hop starts here at the SBS Blog
Lelia
Rebecca
Lea (Me!)
and then finishes back here at the SBS Blog.

Here's my version of the Hatter.  He does look a little crazy with his wildly flowing hair, crazy eyebrows and let's not forget that wild make-up.  He's lovable anyway and has certainly been one of my favorites in this collection. 


I'm glad you've jumped in from Rebecca's blog to visit me and from here you may return to the SBS Blog.  I do hope you will find time to hop around to each design team member's blog to look as we've had a lot of fun with this release.  Thanks for stopping by!

Hugs,
Lea
Supplies used:

Image:  Simply B Stamps
Inks:  Memento, Copics, Tim Holtz Distress Ink
Paper:  Bazzill, Neenah, Basic Grey, Echo Park
Accessories:  Prima Ribbon, Spellbinders Nestabilities

Wednesday, March 21, 2012

Feeling Royal?

Today we are previewing the Red Queen, our newest image in the Alice in Wonderland Chibis Collection from Simply B Stamps.  She looks so much like the Tim Burton version, more so I believe than any of the others so far.  I do believe Helena Bonham Carter would be pleased! 


I decided to use the sketch challenge found on my fellow design team member's blog.  She would so love for you to play along too!  She's still kind of new to doing her own sketches and she has great prizes so tell all your friends and let's get sketchy with Cyndi B!  I've added my own little twist to it but that's what it's all about.  I hope you will take time to visit the SBS blog and check out what the rest of the design team has put together for you.  Thanks for stopping by to take a look and comment if the mood strikes you!

Hugs,
Lea


Supplies used:

Image:  Simply B Stamps
Ink:  Memento, Copics
Paper:  Bazzill, Neenah, Basic Grey, Bo Bunny
Accessories:  A Muse, SU!, Spellbinders

Tuesday, March 20, 2012

Here kitty kitty kitty...

...that's right!  We're previewing the Cheshire Cat, newest image from the Alice in Wonderland Chibis Collection from Simply B Stamps.  This is the Tim Burton version so he's feeling a little blue!  I love how adorable he is, goofy grin and all.  He was a bit of a challenge to color though to make him look like he has fur. 


Using the Leafy Branch die from Memory Box, I tried to make it look as though he is sitting amongst the tree branches without detracting from the image itself.  I hope you like my creation and please be sure to stop by the SBS blog to see what the rest of the design team has created.  Thanks for stopping by to take a look and your comments are always appreciated!

Hugs,
Lea


Supplies used:
Image:  Simply B Stamps
Ink:  Memento, Copics, Tim Holtz Distress Inks
Paper:  Neenah, Bazzill, Bo Bunny, Echo Park
Accessories:  SU! Ribbon, Memory Box Die, Spellbinders Nestabilites

Monday, March 19, 2012

The White Queen

Hi everyone!  I hope you liked The Tweedles and today we are previewing The White Queen from the new Alice in Wonderland Chibis Collection from Simply B Stamps.  She's one of my favorites from this collection, well, actually, they're all pretty fab!  I am trying to follow the look of the Tim Burton characters as the images were modeled after his version.  I have to admit, it was very difficult to color her as she doesn't have a lot of color!  I think I've captured her rather well though so I'm pleased with my outcome.


Though the White Queen doesn't have much color, Wonderland or Underland, however you choose to refer to it, was quite colorful.  I've tried to make up for her lack of color with bright papers and embellishments.  My sentiment is computer generated.  Please be sure to visit the Simply B blog for more design inspiration from the rest of the Design Team and while you're at it, have a Frabjous Day!  Now where's that darn cat?


Hugs,
Lea


Supplies used:
Stamps:  Simply B Stamps
Ink:  Memento, Copics, Tim Holtz Distress Ink
Paper:  Bazzill, Neenah, Basic Grey's green at heart
Embellishments:  May Arts Ribbon, Prima Flowers, SU! Brads, Spellbinders Nestabilities

Tuesday, February 7, 2012

It's Miller Time!

Miller Munster, that is!  Yes, he is the newest image in Simply B Stamps Teen Scene Birthday Munsters Collection being previewed today.  He is just the cutest little thing and so takes me back to my days of watching the Munsters on TV as a little girl.  I used to love that show!  Shucks, I would still watch it if I could!


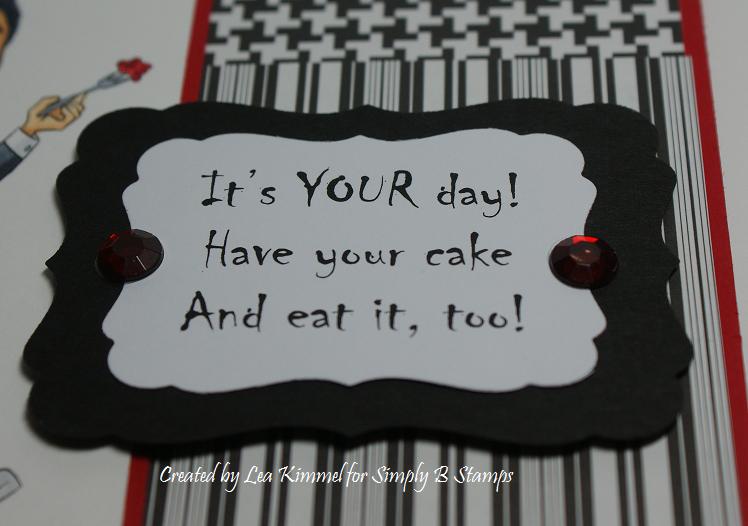
I decided to keep him somewhat monochromatic with just a touch of red.  This wasn't the direction I intended to go in initially, but this is where I ended up!  The red and black papers are Bazzill and the patterned papers are from Me and My Big Ideas Black and White Color Basics pack.  My image and sentiment are on Neenah.  My image is colored with Copics and layered on red.  My sentiment is one I created on Microsoft Publisher and printed out.  I used a Spellbinder's Nestie to cut it and the black layer out.  I added the dark red rhinestones for just a little color and bling.  Here's an angled shot to better show the color.


I put all my layers together and, voila!, a cute little card that is just right for one of the guys and not too girlie.  I do hope you will check out the blog, simplybettystamps.blogspot.com and see the other cards created by the design team.  They are awesome!  Thanks for stopping by and please come back tomorrow for another sneaky peek!  'Til then, cheers!

Hugs,
Lea


Friday, January 6, 2012

Valentine Release Blog Hop

It's finally here!  Whoop Whoop! Time to release these cuties and show you our last image... you are going to LoVe her!

Big Love Gun Lola is sure to shoot you in the heart with loads of love!

Today we are going to send you hopping around to our DT ladies to take a peek at what they have prepared for you!  There will be three winners who comment on all of the stops chosen from any of our DT blogs (don't forget to comment on EACH STOP!) for two Rubber Stamps from our release (sorry no digis for sale or prizes available this time)!  
That's right three people will get one of the following;

Winner #1: Box of Chocolates Miller & Kitty Love London
Winner #2: A Heart for you Rio & My Heart a Flutter Christian
Winner #3: My Funky Valentine Betty & Big Love Gun Lola

So, all you have to do is hop around, leave a comment on all participating blogs including this one!  Your name will go into the hat for every comment you leave!  That means more chances of winning... the more comments we gather with your name, the more you can win!  Who knows maybe your name will be chosen all three times!  The winners will be announced Saturday afternoon!

Okay off you go to do some hopping...oh, and don't forget to go back to the Simply Betty Stamps blog for your discounts! Below is the hop order in case you get lost along the way or haven't started at the beginning.

Starts at Simply Betty Stamps blog
ends back at Simply Betty Stamps blog!

Happy hopping!  

Here's my first card, Big Love Gun Lola!  Now don't you think she looks like she should have pink hair?  I thought so anyway, so pink it is!  My image is on Neenah and colored with Copics, the edges are inked with Tim Holtz distress ink.  It's layered on Bazzill and patterned papers from Bloom & Grow collection by My Mind's Eye.  The sentiment is one I created on my computer and punched out.  I edged it in the Tim Holtz ink as well, punched out two more hearts and layered it over a piece of ribbon from my stash.  A very easy card to put together but I think it's also pleasing to the eye.


Next up is Valentine Betty.  I think she is absolutely adorable!  The cool part is, you can actually get her for free!  Read below for the details how.  Again, my image is on Neenah, colored with Copics (gee, where would I be without my Copics!?), and inked around the edges with Tim Holtz distress ink.  My base is Bazzill and my patterned papers are Basic Grey.  The "hugs & kisses" sentiment was too big so I cut out the "&" and just layered the words, one on each side.  I wish you could see the Spica glitter pen on her eyeliner, belt, fishnets and cuff.  In person they are all so sparkly and cute!  

I have really enjoyed this release.  All of the images have been awesome and I honestly can't even decide which one I love the most!  So, these are my two cards and I hope you've enjoyed them.  Before you hop on over to Jennifer D. blog take a look at the purchasing details below.  Thanks for hopping over!

Now here are the wheels and deals!

Any six New Teen Scene Valentine Steampunks Rubber stamps for $42 use code Love42
Any three new Teen Scene Valentine Steampunks Rubber stamps for $21 use code Love21

Buy all 7 new rubber stamps; Big Love Gun Lola, My Funky Valentine Betty, A Heart for You Rio, My Heart a Flutter Christian, Box of Chocolates Miller, Kitty Love London, and Valentine Pals and get this little Valentine Betty Digi for free!  She is available for purchase in clear form only!


Sunday, November 27, 2011

Baking Betty

Hi everyone!  I hope you had a wonderful Thanksgiving with family and friends!  As usual, I ate too much but Thanksgiving Day only comes once a year so I indulge myself a little.  Of course, every day should be thanksgiving day as I have much to be thankful for.  God's grace shines upon me, I have a wonderful family and wonderful friends, and a little bit of a creative gift that allows me to share my love of stamping and creating with you.  Thank you for being a part of my life here in blog land.

Today Simply Betty Stamps is releasing the first image in the Teen Scene Kitchen collection beginning with Baking Betty.  She is such a cutie, I just love her!


I colored Baking Betty on Neenah with my Copics, which, as you know, is my favorite medium.  I cut her out with a Spellbinders Nestie and edged her with Tim Holtz Distress Ink.  The base of my card is Bazzill.  I layered Karen Foster's In the Kitchen paper with Lasting Impressions checks and added my image piece to the top.  I cut out a couple of images from the paper as accents.  I printed out my sentiment, punched it out, added a couple of pearls and some ribbon.  One Baking Betty card cooked up and served!

Check back tomorrow to see what the next course is from the kitchen.  I'm sure it will be tasty!  Bon appetit!

Saturday, October 15, 2011

DICC Challenge #18


Here's my entry for the Desert Islands Crafters Challenge #18.  Of the 10 things you could possibly use, I've used most of them!  It's a 1. Halloween Card, 2. SBS Image, 3. Favorite Color (purple and lime green), 5. Candy Colors (think Fruit Stripe Gum, Jolly Ranchers, etc), 6. Not Square, 7. Stripes, 8. Shades of Gray (love my kitty), and last but not least, 9. Bats (also gray!) and Spiders (no spiders, yuck!)!  My sweet little Betty Witch is all about pink, purple and green!  I colored her with my Copics on Neenah Classic Crest paper, cut the image out with my Wonky Squares Nestie, edged her with some Seedless Preserves Distress Ink and layered her on "the Midnight Spell" paper from DCWV.  How appropriate is that name!  I gave her a lovely purple bow and then gave her some magic dust (Star Dust Stickles) she's pouring into the cauldron.  I stamped my sentiment in the Seedless Preserves and gave it a little Lime Green Stickles accent.  What fun!  I so love Halloween and my pretty in pink Betty Witch!  Thanks for stopping by for a look.

Thursday, July 28, 2011

MFTWSC30 - Cute Is What I Do!


Cute Is What I Do! from My Favorite Things Pure Innocence line is one of my favorite sets in a long time!  It really lends itself to some cute paper piecing and coloring with my Copic markers.  I did this little cutie in honor of their weekly sketch challenge, MFTWSC30.  The base of the card is Neenah, the green and floral print is either Three Bugs in a Rug or Little Yellow Bicycle, sorry not sure at the moment.  The pink gingham is Bo Bunny.  I used an EK Success punch to do my scallops at the bottom.  I used two Spellbinders Nesties, one for her and one for the layer in pink behind her.  She, of course is colored with my Copics, E51, E30, E21, R02, Y11, Y23, Y26, Y28, B0000, B00, C0, R83, R85.  I lightly airbrushed a little B0000 around her.  I used another EK Success punch to do the green flower.  The floral "ribbon" trim is some I picked up at JoAnn's and I had some little sparkly rhinestones in my stash for a little extra bling.  I think she's adorable, I hope you like her too!

Tuesday, July 5, 2011

Have a Bloomin' Good Day!


I have only recently found My Favorite Things stamp company and I am so glad I did!  For starters, the little girl looks like my granddaughter, Emmaline.  These are just some of the cutest stamps I have seen, I love them!  I stamped her on Neenah Classic Crest and colored her with my Copics.  I paper-pieced her dress with some cute paper I think is from SU and using the same paper I layered that on some Real Red for my base.  I cut her out with the Lattice Rectangles Nestabilities Spellbinder die.  I also used the flower die from MFT to cut out some flowers which I layered on Prima flowers for a little more dimension and colored some pearls with my Copic R22.  The blue velvet ribbon is from my stash so I don't know what company it's from.  I added a little more grass than what was actually part of the stamp with my Micron pen.  I think she's pretty darn cute and now it's time to enter her in some challenges!

Thursday, May 19, 2011

Tilda is Thinking of You!


Here's a cute little Tilda and you know she's thinking about you!  This is one of the cards I'm doing in my class this Saturday at Enchanted Cottage.  She is such a cutie and great fun to color.  The papers are Bazzill and Memory Box.  The pearls and ribbon are from my Cottage stash.  I also used Nestabilities, a Martha Stewart punch and a an EK Success punch.  Of course she's colored with Copics.  Hope you like her!