Showing posts with label #Frantage. Show all posts

Friday, October 14, 2016

Feelin' Witchy?

Halloween is right around the corner and Stampendous has this adorable Witchy Cat stamp that is sure to put you in the mood for a hauntingly good time!


Here's what I used to create this card:

Chameleon™ Markers: NU3, Y03, YL2, BR2, VO4, YL2, CG8, OL3, BL3, BL6, PK3
Purple Cardstock by Bazzill Basics Paper®
Royal Blue Cardstock by Bazzill Basics Paper®
Zip Dry™ Paper Glue by Beacon Adhesives

Here's what I did to create this card:

Stamp image, color and trim as shown.
Create an A2 card base with a tent fold from blue cardstock.
Trim a mat for image from purple cardstock.
Adhere all layers as shown.
Mix ochre and amethyst color fragments with royal blue glass glitter, apply to card as shown with adhesive.  
Set aside to drive.

Thanks so much for stopping by today.  I do hope you're feeling a little inspired to create some fun Halloween cards!  Stampendous has an amazing selection of stamps and embellishments for any style of card.  I'll see you again soon, in the meantime, have an awesome day!

Hugs,
Lea


Friday, May 8, 2015

Give Me Liberty...

...Lady Liberty, in fact, from Stampendous!  She's one of our newest stamps showing our patriotic spirit.  I've also used Free and Brave for my sentiment.  I love these two stamps together, it really appeals to my military pride as I previously served in the U.S. Army for 9 years of active duty.  It's nice to design for a company that appreciates our beautiful country as much as Stampendous does!  Here's my card using some fun Fran•táge technique:


Here's what I used to create this card:

Memento™ Tuxedo Black Ink by Tsukineko®
Memento™ Toffee Crunch Ink by Tsukineko®
Tim Holtz® Antique Linen Distress Ink by Ranger®
Iced Cocoa Cardstock by Bazzill Basics Paper®
Smoky Cardstock by Bazzill Basics Paper®
Zip Dry™ Paper Glue by Beacon Adhesives
Copic® Markers (N2; G00, G02, G24; Y13, Y17; T2, T4; B91; E42, E43)

Here's what I did to create this card:

Stamp main image and color, trim closely and set aside.
Stamp sentiment and trim to desired size and add distress ink.
Create an A2 card base with a tent fold and stamp with Vintage Note.
Create mats for both images and adhere all layers as shown.
Run embossing ink over areas desired, add embossing powder and heat.


So, whether you're creating cards or invitations for the upcoming Fourth of July or you simply want to thank a soldier for their service through Operation Write Home, these stamps are perfect for the job!  Thanks for stopping by today and I hope you have a wonderful weekend with plenty of crafting, creating time!

Hugs,
Lea

Friday, January 16, 2015

Hummingbird, Don't Fly Away

If I could be a bird, I would want to be a Hummingbird.  They're colorful, cute and they have a serious sweet tooth.  That's my kind of bird!!  Have you checked out all the beautiful Stampendous Hummingbird projects my teammates have posted this week?  If you haven't, you really should go check them out, lots of gorgeousness.  I chose to go very mixed media for mine.  Paints, inks, crunchy goodness, oh yeah!  Here's my card for today:


Here's an angled view of the glittery goodness I've added to my card:


Here's what I've used to create this card:

Twinkling H2O's in Key Lime, Sunflower and Pink Azalea
DecoArt® Traditions Hansa Yellow Acrylic Paint
DecoArt® Glamour Dust Glitter Paint in Aqua
Americana® Yellow Green Acrylic Paint
Americana® Hauser Light Green Acrylic Paint
Americana® Multi Surface Satin™ in Sky Blue
Liquitex® Inks in Quinacridone Magenta and Transparent Burnt Umber
Neenah® Classic Crest™ Solar White Cover Stock
Magenta Cardstock by Bazzill Basics Paper®
Jet Black Archival Ink™ by Ranger®
Beacon® 3-in-1 Paper Glue

Here's what I did to create this card:

  • I started off by adding some Sky Blue and Aqua paints to my Creative Palette, brayered it out, stamped my Mish Mesh stamps into the paint and printed my paper
  • I set the paper aside to dry but since I'm impatient, I dried it with my heat tool
  • Next I stamped my images onto the printed paper
  • I put dabs of yellow and green paints onto my paint palette and misted them with water to create a wash and added my greens and yellow paint to the images
  • In a small plastic container, I added one drop of magenta acrylic ink and added it to my flowers and bird
  • Once I had my dark pinks painted on, I spritzed the ink with water and thinned it down then added my lighter magenta to the flowers and bird as shown
  • I watered down just a tiny drop of the burnt umber and added it to the bird
  • Realizing that some Hummingbirds are somewhat iridescent, I decided to go over the bird only with the Twinkling H2O's
  • Next I created my card base with a tent fold
  • I trimmed my painted piece to fit on my card base as shown
  • I stamped my sentiment in black ink and adhered the image to the card base
  • It was time to play mad scientist and mix my glitters and fragments into a fun mix and I adhered the yumminess to my card with glue

I seriously love how this card turned out!  There's not a single element to it that I don't like.  I've been taking the Creative Jumpstart 2015 on-line workshop on Nathalie Kalbach's N*Studio blog and the various lessons have really inspired me and taught me some new tricks.  If you haven't signed up, it's not too late, you can sign up any time now.  It's so worth it! For this piece, I really think the glitter and fragment mix was the perfect finishing touch!  Here's the list with my teammates that are playing along today, I hope you'll check them out:

Lea Kimmel (me)

Thanks for stopping by today!  I hope I've inspired you to pull out some stamps, paint, ink and fun embellishments for some weekend play.  Whip out that Creative Palette and spread some paint for lots of creative fun; the possibilities are endless!  Have a wonderful day and I'll see you again soon!

Hugs,
Lea

Thursday, January 1, 2015

Happy Birthday to You!

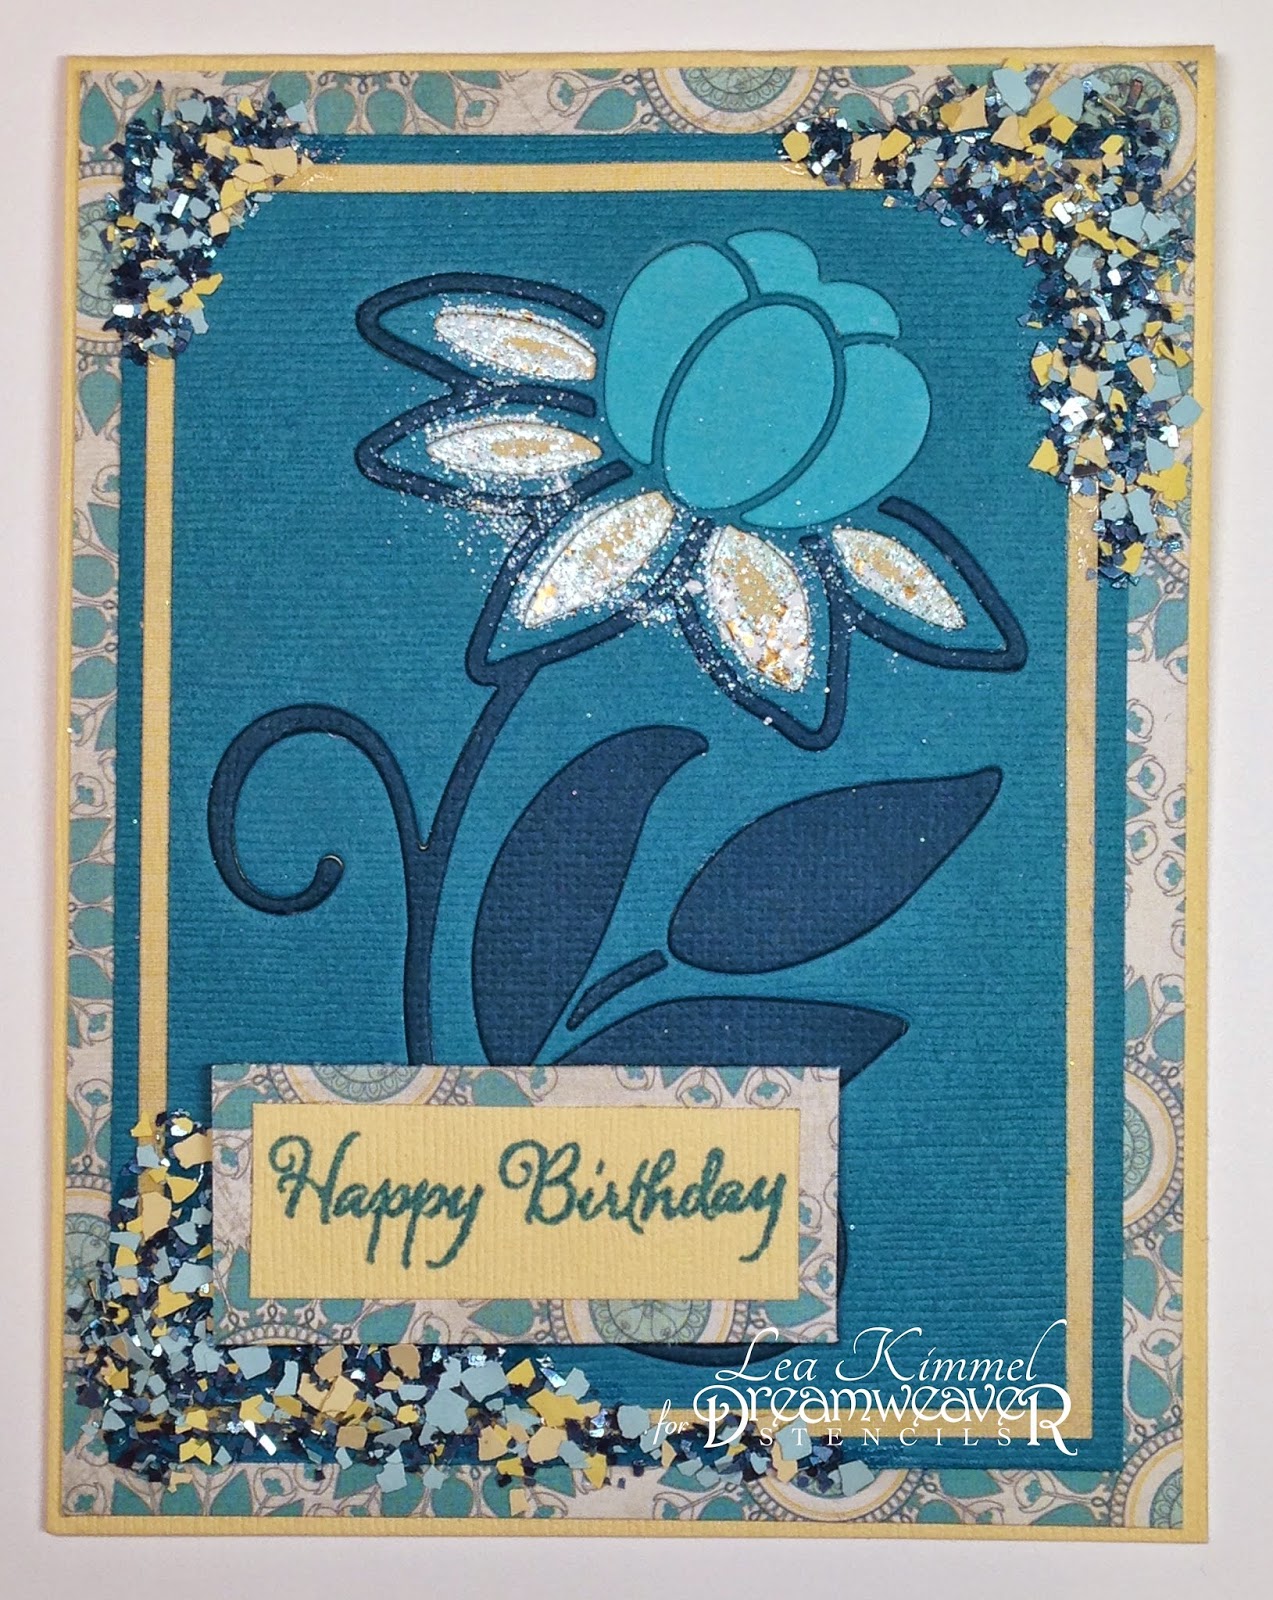
Welcome to the birth of a new year...2015 to be precise! In honor of that, we've decided that our monthly challenge for January will be Birthday Wishes.  More precisely, today's post is in honor of Lynell's birthday!  So, Lynell, SURPRISE!  HAPPY BIRTHDAY!!  We'd love for you to play along with us, and link your creations to the Inlinkz tool at the bottom of this post, or on the Dream It Up! blog, for a chance to win the stencil of your choice...and remember, using Dreamweaver products gets you bonus points towards an extra stencil!

Here's my birthday wish for this week:


If I remember correctly, aqua/teal is one of Lynell's favorite colors so that's the primary color used on this card.  I sure hope I'm right!  LOL!  If not, well, it's still a lovely color!

Here's what I used to create this card:

Memento™ Teal Zeal Ink by Tsukineko®
My Mind's Eye™ Indie Chic™ "Nutmeg" 6x6 Paper Pad
3-in-1 Glue by Beacon Adhesives
3L Scrapbook Adhesives 3D Foam Squares

Here's what I did to create this card:

Die cut flower from three different shades of aqua/teal cardstock, light, medium and dark
Trim the cardstock around the medium-tone cs as this will be your base for the flower
Trim a piece of yellow cardstock to go behind the flower base
Adhere the aqua flower base to the yellow piece
Inlay the darker and lighter shaded pieces as shown
Add watermark ink to the inside of lower petals and add embossing enamel, tap off extra and return to jar 
Heat enamel from below with heat gun
Create an A2 card base with a tent fold from yellow cardstock
Trim patterned paper to fit card base
Create an aqua mat to go under the flower layers (this really pops it off the patterned paper visually)
Using a scrap of the yellow cardstock, stamp sentiment and trim closely
Using a scrap of the patterned paper, create a mat for the sentiment and adhere the two layers
Adhere the patterned paper to the card base
Adhere the matted flower layers to the card base
Attach the matted sentiment to the card 
Mix together the glitter and fragments and adhere to the card as shown

That's it for me!  Of course, there's more birthday inspirations coming your way from the Dream Team, be sure to leave some love along the way:

Lynell, I hope you have the happiest of birthdays!!  Happy New Year to everyone!  Here's to many blessings throughout the new year.  Thanks for stopping by and I'll see you again soon!

Hugs,
Lea