Showing posts with label 3L Scrapbook Adhesives. Show all posts

Wednesday, September 9, 2015

Wicked Wednesday with Crafty Sentiments Designs

It's Wicked Wednesday ATC Challenge Blog time and this week our sponsor is Crafty Sentiments Designs.  Today I've used the image Mia - Howdy and our theme is Cowgirls/Cowboys.


Here's what I used to create this ATC:

Copic® Markers
Neenah® Classic Crest™ Solar White
Little Yellow Bicycle® Patterned Paper
Light Blue Cardstock by Bazzill Basics Paper®
Red Cardstock by Bazzill Basics Paper®
Burlap Twine
Zip Dry™ Paper Glue by Beacon Adhesives
Scrapbook Adhesives® 3D Foam Mounting Squares

Here's what I did to create this ATC:

Print image, color and fussy cut
Trim base for ATC from light blue cs
Trim patterned paper 1/4" smaller height and width than ATC base
Trim strips of red cs and weave into a plaid pattern over denim-look paper
Adhere strips to patterned paper and snip off ends of strips that hang over edges
Adhere patterned paper with strips to ATC base
Create a "lasso" with twine and adhere to ATC
Using foam mounting squares, attach Mia to ATC
On a scrap of white paper, write sentiment, edge with red Copic® and adhere to front of ATC

I did take a little creative license with this image by giving her boots and a dot of a nose and a tiny mouth.  I just felt like she needs boots to be a cowgirl and they were easy enough to draw onto her legs.  She was actually quite fun to color and I think she's turned out cute as can be!

I do hope you'll play along with us!  Thanks for stopping by and I hope to see you again soon!

Hugs,
Lea

Thursday, April 16, 2015

Rain, Rain, Go Away!

Rain, rain, go away, come again another day!  That's my theme song this week!  It's been raining the past few days here in North Carolina and, even though we need it, I'm ready for it to be gone.  Bring on the sunshine!

Our Stampendous Dreamweaver Stencils April challenge is "Showers to Showers" and this is my take on the theme this week:


Here's a close-up that shows the gloss from the paste and a little of the sparkle from the Spica pen on the main image raindrops:


Here's what I used to create this card:

Stampendous® Dreamweaver Stencils Rain Stencil
Stampendous® House-Mouse Designs® Rain Flower Stamp
Stampendous® Dreamweaver Stencils Translucent Paste
Yellow Cardstock by Bazzill Basics Paper®
Blue Cardstock by Bazzill Basics Paper®
Neenah® Classic Crest™ Solar White Cover Stock
Memento™ Tuxedo Black Ink by Tsukineko®
Tim Holtz® Distress Ink in Tumbled Glass
Copic® Markers: Y11, 15, 17; YG11, 13, 17; B91; E47, 50, 51, 53; R01, 02; C3, 4, 5
atyouSpica™ Clear Glitter Pen
May Arts Ribbon®
Beacon Adhesives
Scrapbook Adhesives® 3D Foam Mounting Squares by 3L®

Here's what I did to create this card:

Trim white cs to fit stencil
Tape stencil down over cs
Airbrush blue ink (B91) all over rain stencil
Leaving stencil and paper in place, add translucent paste over inked raindrops
Set this aside to drive
Stamp image onto white cs and color with markers, add distress ink all around image
Color over raindrops with glitter pen
Create an A2 card base from blue cs with a tent fold
Trim a piece of yellow cs a 1/4" smaller than card front
Trim a piece of yellow cs to mat behind image
Cut a piece of green ribbon and a piece of yellow ribbon and adhere the two together
Trim rain stenciled piece to fit 1/4" smaller than yellow cs
Add distress ink all over stenciled piece
Adhere stenciled piece to yellow cs and attach ribbon as shown
Adhere these layers to card base
Adhere stamped image to yellow mat
Using foam squares, attach image to card

Here's the links for the "A" team that is posting this week:

Thanks so much for stopping by today!  I do hope you'll join us for our challenge this month!  In the meantime, have a wonderful day and I'll see you again soon!

Hugs,
Lea

Wednesday, March 25, 2015

Coming Up Roses

We’re excited, once again, to be partnering with the folks over at Spellbinders for a Spring mini blog hop! As Spellbinders design partners this year, we’ve been blessed to use many of their exciting products, and we know their design team is enjoying the Stampendous products we sent for their use! Monday and Tuesday, our team has shared projects with you and today we have more inspiration!  I'm sharing my fun projects I’ve made with the Spellbinders products I’ve received.  Today we're the  featured company on their blog and I'm one of our two designers posting tutorials for you focused on the newest Spellbinders products.  Here's my projects:


Here's what I used to create these projects:

Memento™ Tuxedo Black Ink Pad by Tsukineko®
VersaFine™ Onyx Black Ink Pad by Tsukineko®
Tim Holtz® Peeled Paint Distress Ink™ Pad
Neenah® Classic Crest™ Solar White Cover Stock
Blossom Cardstock by Bazzill Basics Paper®
Sour Apple Cardstock by Bazzill Basics Paper®
May Arts Ribbon 1/4 Inch Sheer Ribbon - Pink
May Arts Ribbon 1 Inch Sheer Nylon Edge Ribbon - Pink
May Arts Ribbon 2 Millimeter Baker's Twine Ribbon - Pink
Copic® Markers - R81, R83, R85; YG61, YG63, YG67
Want2Scrap® White Pearls Self Adhesive - 72 Count
Tsukineko® Sheer Shimmer Spritz - Sparkle
Tim Holtz® idea-ology® Baubles
Beacon® 3-in-1 Advanced Craft Glue
Scrapbook Adhesives® 3D Foam Mounting Squares by 3L®
Scotch® Removable Tape
Recycled Silver Gift Box


I absolutely love these bezels!  There's something so stately and elegant about them and they really appeal to my inner Victorian Lady!  And what could possibly look more elegant with roses than pearls?  So much possibility with one piece!  You can even add some goodies inside the bezel and close it off with the handy plexiglass cover, however, I couldn't decide what to add so I left it plain!  Still beautiful, still elegant, it's not missing a thing!

Here's what I did to create this project:


  1. Stamp rose images onto white cardstock with Memento ink and color with Copics
  2. Place large bezel die over image and decide where you want to die cut image
  3. Tape die in place with removable tape and run through die cutting machine (I used a Big Shot with Genesis Magnetic Plates)
  4. Adhere die cut piece into bezel
  5. Paint on shimmer spritz with brush
  6. Attach pearls to bezel as shown
  7. Hang pearl "Bauble" from bottom of bezel
  8. Attach ribbon through top loop and knot ends for wear


The Tudor Rose Card Front set makes it so easy to create a fast, yet very impressive card for many different occasions.  I paired it with my Labels One Die Set to add a little more color and depth.  Since I decided to stamp the white panel behind the pink overlay, I kept the pink clean and simple.

Here's what I did to create this project:

  1. Create an A2 vertical card base with a tent fold from green cardstock 
  2. Die cut floral inset with border using pink cardstock
  3. Trim a piece of white cardstock to fit behind pink die cut
  4. Stamp Industrial crackled paint background stamp onto white cardstock with green ink
  5. Adhere pink overlay onto white background piece
  6. Using Labels One die 3, die cut a piece of green cardstock
  7. Using Labels One die 2, die cut a piece of white cardstock
  8. Stamp Industrial crackled paint background stamp onto white die cut label with green ink
  9. Stamp sentiment onto white label with black ink
  10. Adhere white die cut label to green die cut label
  11. Wrap pink ribbon around overlay piece attached to white background piece and adhere ends to back
  12. Trim another piece of sheer pink ribbon, dovetail ends, cross and attach to adhered die cut labels
  13. Adhere pink and white overlay piece to green card base
  14. Using foam mounting squares, attach die cut labels over pink label in center
  15. Attach pearls to flower centers


The Tudor Rose Card Front Set also comes with a sweet little gift tag, the perfect complement!

Here's what I did to create this project:


  1. Die cut tag from pink cardstock
  2. Stamp "To: and From:" image onto tag
  3. Adhere pearl to center of flower on tag
  4. Add twine and attach to bow on box 


Here at Stampendous we’ve got some mystery Spellbinders dies up for grabs along with some fantastic Stampendous cling rubber so be sure to comment on our blog posts and those of our designers for the three days. See our Official Rules for eligibility and more. Comment deadline is Thursday, March 26th, and winners will be announced Friday, March 27, 2015.

Spellbinders has fantastic prize packages from all of their partners to give away each day, so be sure to visit their blog and use their contest entry tool to enter each day (one entry per day, per person). See the Spellbinders Blog for rules and a list Product Partner companies.

Here's the complete list of my teammates posting today.  Please visit their blogs and leave them some love!  It really makes our day to know you like what we've created!

Lea Kimmel (Me!)


Other Featured Product Partners hopping today are:


Thanks so very much for stopping by my blog today.  I hope you've enjoyed my projects.  I think they clearly show that you can create an elegant set but still keep it simple.  I'll have two more posts for Stampendous this week, please stop back by and take a peek!  Have a wonderful day!

Hugs,
Lea

Friday, March 20, 2015

Easter Cupcake

All week long the Stampendous Team has been sharing projects created with our super cute Easter stamps.  Today I'm sharing a card created with Easter Cupcake:


This is what I used to create this card:

Stampendous® Jumbo Perfectly Clear™Acrylic HandleCardstock by Bazill Basics Paper®Patterned Paper by Doodlebug Design, Inc™Classic Crest™ Solar White Cover Stock by Neenah®Ribbon by May ArtsAction Wobble®Spectrum Noir™ Markers (PP1; BP1, BP2; GB5; OR1; CG1, CG2; IB1, IB2; IG1)3D Foam Squares by Scrapbook Adhesives™Zip Dry™ Paper Glue by Beacon Adhesives

This is what I did to create this card:
  1. Stamp three cupcake images, color and fussy cut each image.
  2. Create A2 card base with a landscape tent fold.
  3. Trim patterned papers as shown.
  4. Create mat for top layer of patterned papers with same Bazzill® paper and adhere to top patterned paper.
  5. Create bow with tails long enough to reach around sides of matted top layers and adhere to back.
  6. Adhere bottom patterned paper to card base.
  7. Adhere top matted pieces to card.
  8. Using foam squares, attach the outer images to the card.
  9. Attach an Action Wobble® to the middle image and then attach to card.
Several of my teammates have projects for your viewing pleasures, so, be sure to check them out:

Amy Hurley-Purdie (2nd project)

Thanks for stopping by today!  I hope you've enjoyed our week of Easter inspiration.  Next week will be a busy one so please check back frequently for more posts.  Have a wonderful day!

Hugs,
Lea

Friday, March 6, 2015

Home Sweet Home

This week Stampendous has been showcasing our cute new house stamps.  I've used the Family Home Perfectly Clear Stamps Set for my card today and it's just an incredibly cute set with great sentiments!  You can see for yourself here!  Here's my card:


Here's what I used to create this card:

Tim Holtz® Distress Ink in Tumbled Glass, Peeled Paint and Shabby Shutters
African Daisy Yellow Cardstock by Bazzill Basics Paper®
Neenah® Classic Crest™ Solar White Cover Stock
May Arts® Black Grosgrain Ribbon
Gelly Roll White Gel Pen
Beacon® 3-in-1 Craft Adhesive
Tombow Mono Adhesive Temporary Adhesive
Scrapbook Adhesives® 3D Foam Mounting Squares

Here's what I did to create this card:

Stamp images, color with markers and trim to fit on an A2 card base
Create a horizontal A2 card base with a tent fold with yellow cs
Stamp an additional set of images, cut out to create a mask for each image
Using temporary adhesive, cover each image and add distress inks for grass and sky
Trim a piece of black ribbon and add white lines to create a "road"
Adhere ribbon across image panel as shown
Stamp sentiment on white cs and trim as shown
Create a mat for sentiment with yellow cs and adhere the two 
Adhere main image to card base
Attach sentiment as shown

I love the clean and simple look of this card and the bright, happy colors.  I'm pretty much in love with my ribbon road, too!  Thanks for stopping by today, I'll see you again soon.  In the meantime, have a wonderful day!

Hugs,
Lea

Thursday, March 5, 2015

Love Is In the Air

Ready for fresh air, sunshine, new leaves, and flowers blooming? Well, the Dream Team is right there with you! Our challenge for the month of March is...coincidentally...Marching into Spring. Per usual, we'd love to have you play along with us, and link your own creations to the Inlinkz tool on the Dream It Up! blog, or at the bottom of this post. Play as many times as you'd like. Those of you who work Dreamweaver and/or Stampendous products into your projects receive bonus points, but everyone has an opportunity to be the winner who receives the stencil of their choice.

Here's my hint of Spring:


Here's what I used to create this canvas:

Archival Ink™ in Jet Black
Reeves® Gouache Paints: Leaf Green, Mid Green, Emerald, Prussian Blue, Blue Lake, Cobalt Blue Hue, Yellow Ochre, Burnt Sienna, Burnt Umber, White
Faber-Castell® Medium Point Black PITT Pen
Americana® Decou-Page™
Neenah® Classic Crest™ Solar White
Copic® Markers E47 & E49
Scrapbook Adhesives® 3D Foam Mounting Squares
5x7 Canvas Panel

Here's what I did to create this canvas:

Paste emboss Nest stencil and set aside to dry
Die cut tree and airbrush with Copics®, cut branches off on right side
Mix blues and small amount of green and paint canvas, once dry, coat with Decou-Page™
Once nest has dried, paint as shown
Adhere branches to canvas
Stamp "Love" as shown and write "is in the air" with PITT Pen
Trim nest and attach nest with foam squares to canvas

The "A" team would love to share their interpretations of this theme:


Thanks for stopping by today.  I hope you like my little canvas, I know it makes me happy!  Have a wonderful day !

Hugs,
Lea


Thursday, February 19, 2015

February Froufrou

Break out the froufrou! For the month of February, the Dream Team is going Frilly and Fabulous! Vintage, retro, or modern, adding extra charm with fun Fran•táge products from Stampendous, ribbons and lace from May Arts, buttons, crystals, charms, or even creating your own dimensional decor! A snippet or a pile, whatever your creative heart desires! Remember to link your creations using the Inlinkz tool on the Dream It Up! blog for a chance to win the stencil of your choice! Bonus points for using Dreamweaver and/or Stampendous product in your work of heart.

Here's what I've been playing with:


Here's what I used to create this card:


Here's what I did to create this card:

  1. Create a card base from aqua cardstock
  2. Trim a panel of natural white 4"x 5.25"
  3. Spritz with Copic® reinker mixed with alcohol
  4. Spritz with Peacock Feathers reinker mixed with water
  5. Drip on acrylic ink
  6. Spritz with coffee
  7. Stamp border along bottom
  8. Paste feather and set aside to drive
  9. Stamp sentiment and trim closely as shown
  10. Distress edges of sentiment with paper distresser, ink edges with distress ink and spritz with inks and coffee like the background panel
  11. Trim a piece of seam binding and spritz with inks, set aside to dry
  12. Once paste has dried, go over feather with Brushed Corduroy ink and Peacock Feathers ink
  13. Using markers, add lines to feather
  14. Create bow with ribbon and twine
  15. Using scrap of crochet ribbon, fold into a "v" and adhere to panel
  16. Adhere bow to panel over the crochet ribbon scrap and trim twine ends
  17. Adhere sentiment to card
  18. Add any additional drips as needed

I love doing these mixed media style cards!  It's really a lot of fun to spritz and paste and drip and then add a touch of girlie-ness to it!  For more frilly fun, visit the rest of the "A" team: 
Thanks for stopping by!  I hope you like my card and found a little inspiration here today.  If so, I would love for you to leave me a comment and tell me what you think.  If you're not one of my followers, I would love for you to consider following my blog.  I love sharing my creations!  Hope to see you again soon!

Hugs,
Lea


Wednesday, February 18, 2015

Wicked Wednesday with Squigglefly

It's time for another Wicked Wednesday ATC Challenge Blog post and this week our sponsor is Squigglefly.  Sadly, Squigglefly has closed their shop but we wanted to go ahead as planned and create with the adorable images sent to us.  This is "A Good Catch Maddie" and I think she's super cute!  From what I've read, there are a couple of artists from Squigglefly moving to Sweet Pea Stamps so maybe this little cutie will become available there.  Our theme this week is Fishing Fun, show us what you've got!


Here's what I used to create this ATC:

Squigglefly™ A Good Catch Maddie
Neenah® Classic Crest™ Solar White Cover Stock
Little Yellow Bicycle® Splash 6x6 Paper Pad
Tim Holtz® Distress Inks in Tumbled Glass and Stormy Sky
Beacon® Adhesive 3-in-1 Advanced Craft Glue
Copic® Markers in:  YG00, 01, 03, 05, 93, 95; B91, 93, 95, 97; YR15, 16, 18; R14, 17, 20; E21, 41, 42, 43, 50, 51, 53
3L® Scrapbook Adhesives® 3D Foam Mounting Squares

Here's what I did to create this ATC:

Print image and color
Trim patterned paper to ATC size
Determine where you need to trim image to fit ATC as shown and trim
Adhere image to ATC base
Add distress ink with tumbled glass on upper portion and lower portion and storm sky on lower portion only
Cut out a small fish and mount onto ATC as shown

We would love for you to play along with us and show us your best fishiest, funnest ATC!  In the meantime, have a wonderfully blessed day and I'll see you again soon!  Thanks so much for stopping by!

Hugs,
Lea

Thursday, February 5, 2015

Key to My Heart

Break out the froufrou! For the month of February, the Dream Team is going Frilly and Fabulous! Vintage, retro, or modern, adding extra charm with fun Fran•táge products from Stampendous, ribbons and lace from May Arts, buttons, crystals, charms, or even creating your own dimensional decor! A snippet or a pile, whatever your creative heart desires! Remember to link your creations using the Inlinkz tool on the Dream It Up! blog for a chance to win the stencil of your choice! Bonus points for using Dreamweaver and/or Stampendous product in your work of heart.

Here's what I've been playing with:


Here's what I used to create this card:

Bo Bunny® Love Letters 6x6 Collection
Key Charm from Stampin' Up!®
Miscellaneous Brads

Here's what I did to create this card:

  • Die cut heart from Bo Bunny® paper
  • Add a thin layer of gesso over entire die cut heart
  • Tape stencil in center of heart and paste emboss with silver paste
  • Set aside heart to dry
  • Create 5x5 square card base with a tent fold
  • Trim wood grain paper to fit in background as shown
  • Once paste is almost dry, heat with heat gun allowing some areas to bubble up, this gives a rough, worn look
  • Once paste has cooled, replace stencil over paste and buff on Metallic Lustre™ all over 
  • Using PITT pen, outline the entire pasted design and color the keyhole
  • Punch three holes and add brads
  • Adhere heart to background paper
  • Stamp sentiment on wood grain paper and layer onto green mat as shown
  • Trim ribbon to fit across the front of background paper, wrap ends under each side
  • Loop twine through top of key charm and attach to ribbon as shown with knot on back of ribbon
  • Attach sentiment with foam squares as shown
  • Using PITT pen, ink key to reduce shine and age key slightly

I love the shabby chic feel of my card.  For more frilly fun, visit the rest of the "A" team: 
Thanks for stopping by!  I hope you like my card and found a little inspiration here today.  If so, I would love for you to leave me a comment and tell me what you think.  If you're not one of my followers, I would love for you to consider following my blog.  I love sharing my creations!  As a matter of fact, I'll have another card on my blog tomorrow.  Hope to see you again soon!

Hugs,
Lea

Tuesday, February 3, 2015

With Tails Entwined

With Tails Entwined from Stampendous' House-Mouse Designs collection, you just feel the love in the air!  Sitting by the light of the moon, these two cuties are over the top adorable!  All week long, Stampendous is sharing the love with a theme of "Be Mine, Valentine."  We would love to inspire you to make your own Valentine feel the love with a sweet handmade card by YOU!  Here's my project:


Here's what I used to create this card:

Stampendous® Tails Entwined
Stampendous® Life Words Perfectly Clear ™Stamps
Memento™ Tuxedo Black Ink by Tsukineko®
Stampendous® Jumbo Perfectly Clear™ Acrylic Handle

Cardstock by Bazill Basics Paper®
Happy Haunting Collection Jolly Jack-O-Lantern by Graphic 45®
Copic® Markers  (B93, B95, B97, B99; Y000, Y11, Y15, Y21, Y23; E40, E41, E42, E43, E50, E51, E53, E93; W0, W1, W4, W7; YG93, YG95; C0, C1, C3, C6)
Star Punch by EK Success®
Hole Punch 1/16th by EK Success®
Miscellaneous Blue Craft Wire
3D Foam Mounting Squares by Scrapbook Adhesives
Zip Dry™ Paper Glue by Beacon Adhesives


Here's what I did to create this card:
  1. Stamp image, color and trim to desired size.
  2. Create A-2 card base with a tent fold.
  3. Trim a mat for image from Bazzill cardstock.
  4. Trim patterned paper as shown.
  5. Adhere all layers as shown.
  6. Stamp sentiment on Bazzill and trim to desired size, punch two holes as shown and add wire.
  7. Punch out star.
  8. Hang sign on star and adhere to star.
  9. Attach star to card with foam squares.
Thanks so much for stopping by today!  I do hope you like my little card, I sure had fun creating it.  I'm going to have a busy week with a post on Wednesday, Thursday and Friday, too, so be sure to stop back by.  Have a wonderful day!

Hugs,
Lea

Thursday, January 29, 2015

Manly Kind of Birthday Card

January has been all about birthdays for Dreamweaver Stencils, the birth of a new year and the birthday celebrations of family and friends.  Such a perfect way to start a new year!  We'd love for you to play along with us, and link your creations to the Inlinkz tool at the bottom of this post, or on the Dream It Up! blog, for a chance to win the stencil of your choice...and remember, using Dreamweaver products gets you bonus points towards an extra stencil!  

For my post today, I've created a monochromatic card with a masculine feel for all those special fellas in your life.  Actually, if my dad was still living, this card would be perfect for him!  That man loved his coffee and this mug reminds me of the ones at Waffle House, his favorite place to eat breakfast.  Here's my card:


Here's what I used to create this card:


Here's what I did to create this card:


  • I started out by taping my stencil to my paper and with a brush, I inked through the stencil with frayed burlap ink
  • Once done, I trimmed my paper to the edge of the stenciled area and distressed the edges, then inked the edges with vintage photo ink
  • I stamped three "coffee rings" on the inked design and then added my spoonful of gold dust and heated it from underneath
  • I adhered a small scrap of burlap to fit behind the mug and then wrapped the card with burlap twine as shown and finished it off with a knot
  • Next I created an A2 card base with a tent fold
  • I attached this stenciled panel to the card base and lightly inked the base edges
  • I stamped the coffee mug with the sentiment and cut it out
  • I colored the "coffee" and went over the text with distress markers
  • Lastly I attached my mug to the card base


I'm really pleased with the way this card turned out.  I love it when they come together so easily.  There's lots more inspiration for you from the whole team so be sure to check it all out and leave us some love!  

Thanks for stopping by today!  I'll see you again soon, and, in the meantime, have a wonderful day!  Don't forget to play along with us!

Hugs,
Lea
An InLinkz Link-up 

Thursday, January 1, 2015

Happy Birthday to You!

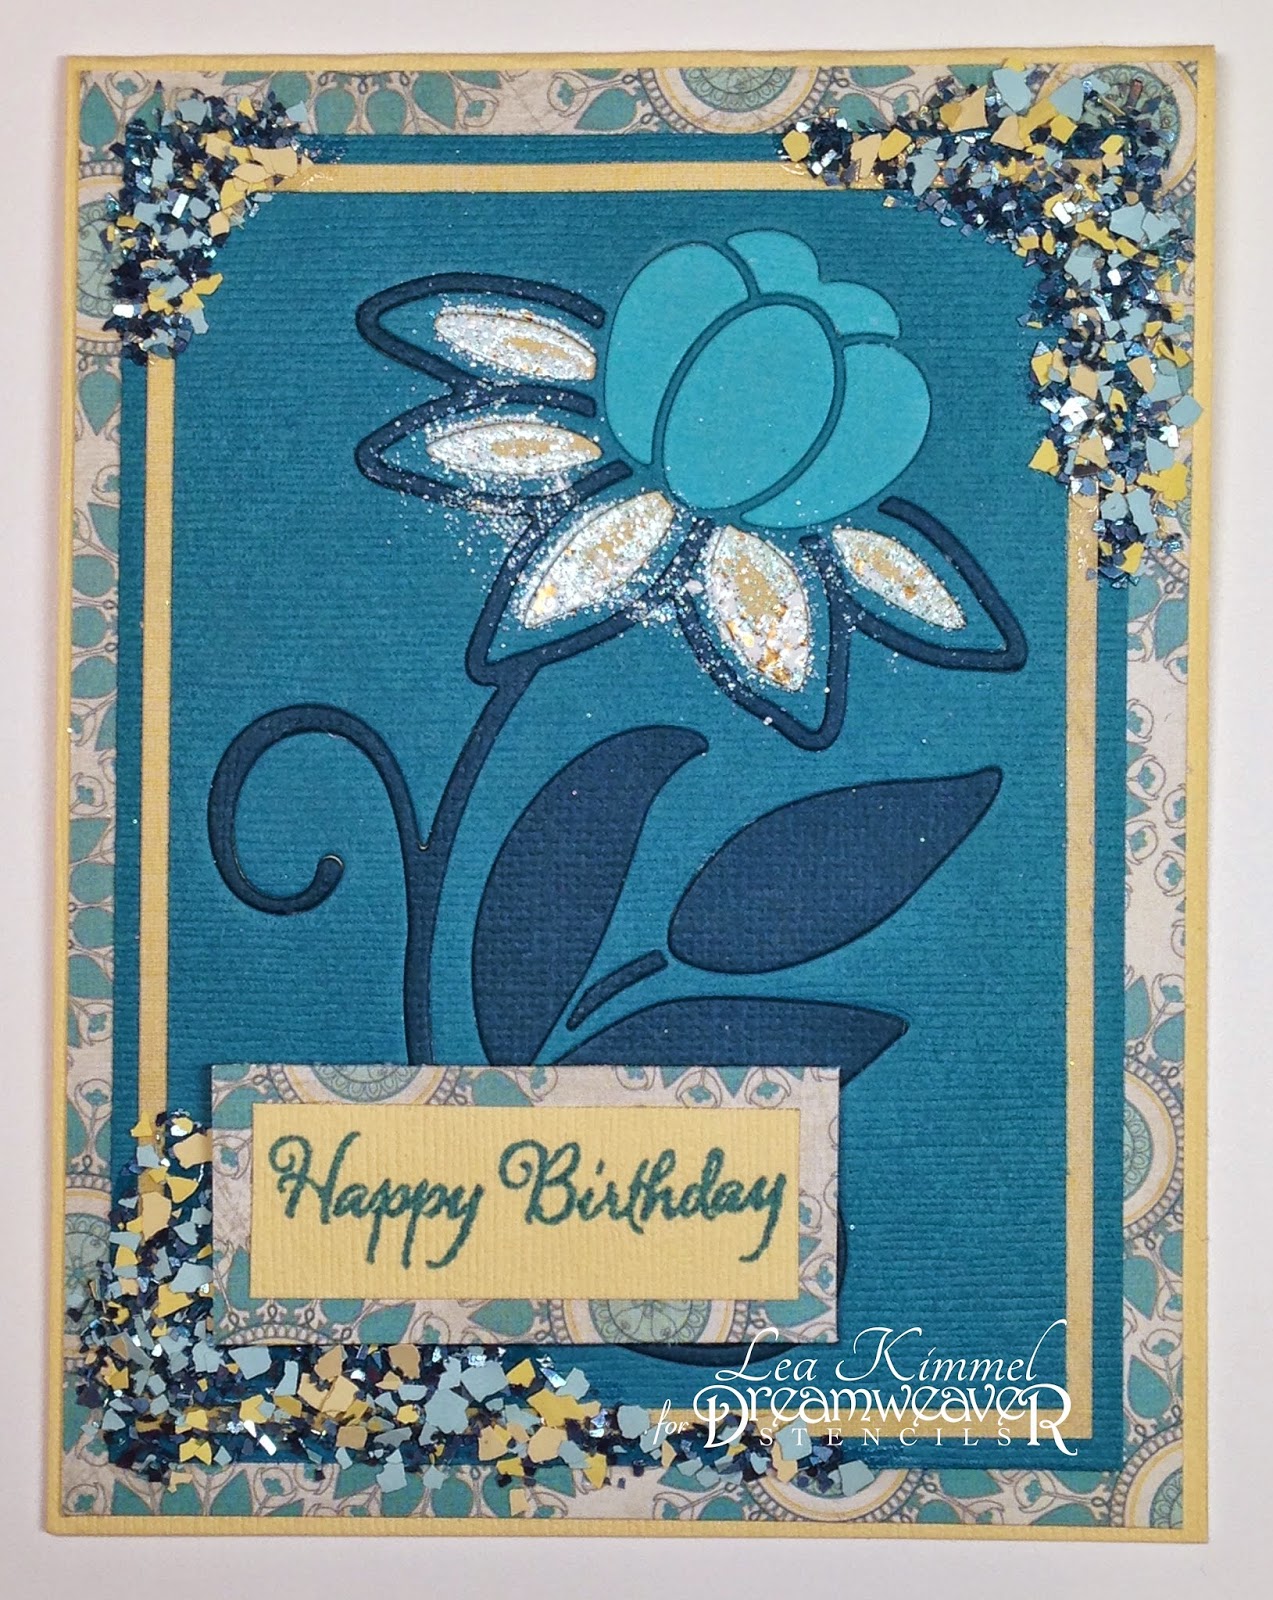
Welcome to the birth of a new year...2015 to be precise! In honor of that, we've decided that our monthly challenge for January will be Birthday Wishes.  More precisely, today's post is in honor of Lynell's birthday!  So, Lynell, SURPRISE!  HAPPY BIRTHDAY!!  We'd love for you to play along with us, and link your creations to the Inlinkz tool at the bottom of this post, or on the Dream It Up! blog, for a chance to win the stencil of your choice...and remember, using Dreamweaver products gets you bonus points towards an extra stencil!

Here's my birthday wish for this week:


If I remember correctly, aqua/teal is one of Lynell's favorite colors so that's the primary color used on this card.  I sure hope I'm right!  LOL!  If not, well, it's still a lovely color!

Here's what I used to create this card:

Memento™ Teal Zeal Ink by Tsukineko®
My Mind's Eye™ Indie Chic™ "Nutmeg" 6x6 Paper Pad
3-in-1 Glue by Beacon Adhesives
3L Scrapbook Adhesives 3D Foam Squares

Here's what I did to create this card:

Die cut flower from three different shades of aqua/teal cardstock, light, medium and dark
Trim the cardstock around the medium-tone cs as this will be your base for the flower
Trim a piece of yellow cardstock to go behind the flower base
Adhere the aqua flower base to the yellow piece
Inlay the darker and lighter shaded pieces as shown
Add watermark ink to the inside of lower petals and add embossing enamel, tap off extra and return to jar 
Heat enamel from below with heat gun
Create an A2 card base with a tent fold from yellow cardstock
Trim patterned paper to fit card base
Create an aqua mat to go under the flower layers (this really pops it off the patterned paper visually)
Using a scrap of the yellow cardstock, stamp sentiment and trim closely
Using a scrap of the patterned paper, create a mat for the sentiment and adhere the two layers
Adhere the patterned paper to the card base
Adhere the matted flower layers to the card base
Attach the matted sentiment to the card 
Mix together the glitter and fragments and adhere to the card as shown

That's it for me!  Of course, there's more birthday inspirations coming your way from the Dream Team, be sure to leave some love along the way:

Lynell, I hope you have the happiest of birthdays!!  Happy New Year to everyone!  Here's to many blessings throughout the new year.  Thanks for stopping by and I'll see you again soon!

Hugs,
Lea