Showing posts with label DecoArt Paints. Show all posts

Friday, January 16, 2015

Hummingbird, Don't Fly Away

If I could be a bird, I would want to be a Hummingbird.  They're colorful, cute and they have a serious sweet tooth.  That's my kind of bird!!  Have you checked out all the beautiful Stampendous Hummingbird projects my teammates have posted this week?  If you haven't, you really should go check them out, lots of gorgeousness.  I chose to go very mixed media for mine.  Paints, inks, crunchy goodness, oh yeah!  Here's my card for today:


Here's an angled view of the glittery goodness I've added to my card:


Here's what I've used to create this card:

Twinkling H2O's in Key Lime, Sunflower and Pink Azalea
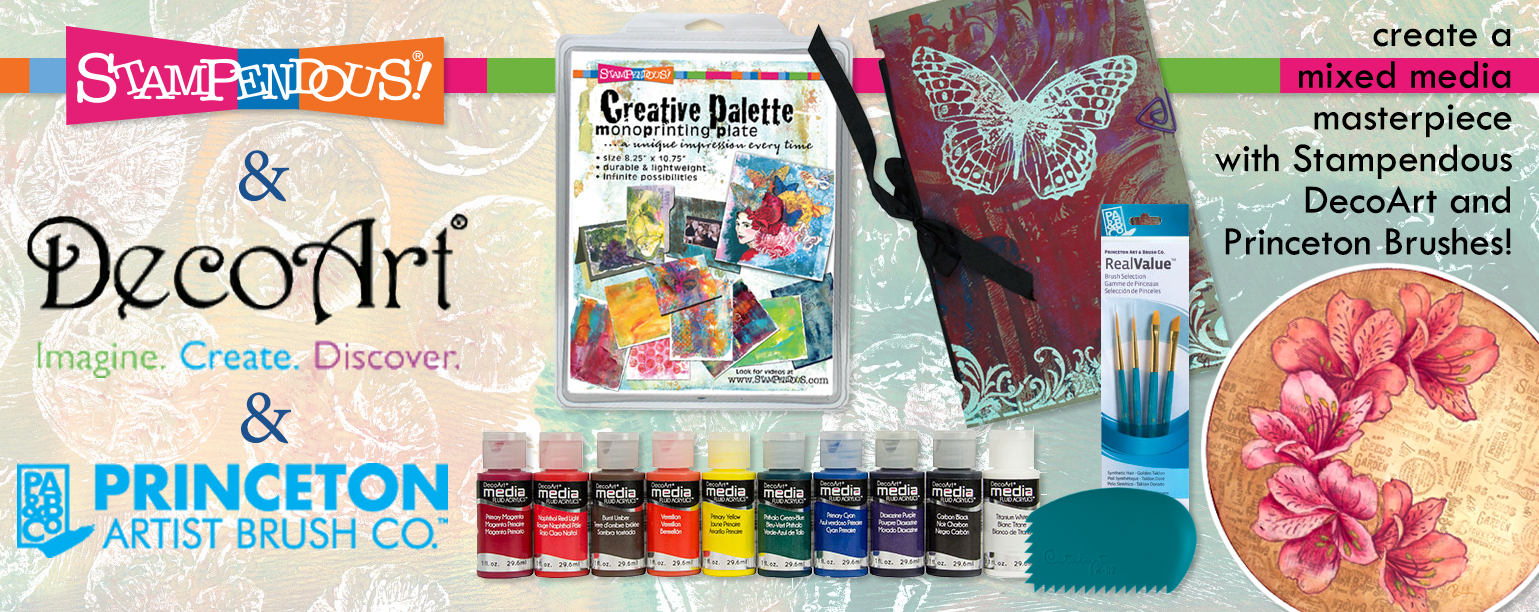
DecoArt® Traditions Hansa Yellow Acrylic Paint
DecoArt® Glamour Dust Glitter Paint in Aqua
Americana® Yellow Green Acrylic Paint
Americana® Hauser Light Green Acrylic Paint
Americana® Multi Surface Satin™ in Sky Blue
Liquitex® Inks in Quinacridone Magenta and Transparent Burnt Umber
Neenah® Classic Crest™ Solar White Cover Stock
Magenta Cardstock by Bazzill Basics Paper®
Jet Black Archival Ink™ by Ranger®
Beacon® 3-in-1 Paper Glue

Here's what I did to create this card:

  • I started off by adding some Sky Blue and Aqua paints to my Creative Palette, brayered it out, stamped my Mish Mesh stamps into the paint and printed my paper
  • I set the paper aside to dry but since I'm impatient, I dried it with my heat tool
  • Next I stamped my images onto the printed paper
  • I put dabs of yellow and green paints onto my paint palette and misted them with water to create a wash and added my greens and yellow paint to the images
  • In a small plastic container, I added one drop of magenta acrylic ink and added it to my flowers and bird
  • Once I had my dark pinks painted on, I spritzed the ink with water and thinned it down then added my lighter magenta to the flowers and bird as shown
  • I watered down just a tiny drop of the burnt umber and added it to the bird
  • Realizing that some Hummingbirds are somewhat iridescent, I decided to go over the bird only with the Twinkling H2O's
  • Next I created my card base with a tent fold
  • I trimmed my painted piece to fit on my card base as shown
  • I stamped my sentiment in black ink and adhered the image to the card base
  • It was time to play mad scientist and mix my glitters and fragments into a fun mix and I adhered the yumminess to my card with glue

I seriously love how this card turned out!  There's not a single element to it that I don't like.  I've been taking the Creative Jumpstart 2015 on-line workshop on Nathalie Kalbach's N*Studio blog and the various lessons have really inspired me and taught me some new tricks.  If you haven't signed up, it's not too late, you can sign up any time now.  It's so worth it! For this piece, I really think the glitter and fragment mix was the perfect finishing touch!  Here's the list with my teammates that are playing along today, I hope you'll check them out:

Lea Kimmel (me)

Thanks for stopping by today!  I hope I've inspired you to pull out some stamps, paint, ink and fun embellishments for some weekend play.  Whip out that Creative Palette and spread some paint for lots of creative fun; the possibilities are endless!  Have a wonderful day and I'll see you again soon!

Hugs,
Lea

Friday, January 9, 2015

Beautiful Butterflies

Stampendous has showcased our butterfly stamps and dies this week.  Rather than do a card, I decided to do a mixed media canvas.  I've really gotten into creating in the mixed media style as it's more of a anything goes way of creating.  There is no right or wrong, it's all a matter of taste and what makes you happy.  Here's my canvas:


Here's what I used to create this canvas:

Stampendous® Lovely Garden Die Cut Set
Stampendous® Vintage Letter Stamp
Stampendous® Vintage Contract Stamp
Stampendous® Elegant Borders Perfectly Clear Stamps
DecoArt® Traditions™ Acrylic Paint - Hansa Yellow
Americana™ Acrylic Paints - Winter Blue, Baby Blue, Pistachio Mint, Pineapple
Americana™ Multi-Surface Satin™ - Cottonball
DecoArt® Gesso
Liquitex® Ultra Matte Gel
Derwent® Inktense Blocks
LuminArte® Twinkling H2O's™ - Key Lime, Blue Grass, Sunflower, Bougainvillea, Ocean Wave, Yellow Rose
Silks Acrylic Glaze - Oyster
Ranger® Archival Inks - Jet Black, Sap Green
Staedtler® Pigment Liner 0.5
Miscellaneous Craft Wire

Needless to say, there were a bunch of different steps to this piece so I'm not going to go into detail.  It would just take too long to tell you each step.  As long as you like the outcome, that's what really matters, right?!  Suffice it to say that participating in Creative Jumpstart 2015 has taught me a trick or two!

I hope you've enjoyed checking out all of the projects this week from my teammates!  We really love having matching dies to go with some of our stamp sets.  It makes it so easy to create projects when you have great products to work with!

Thanks for stopping by today and I'll see you again soon!  In the meantime, have a blessed day.  Oh, and stay warm!

Hugs,
Lea

Wednesday, November 12, 2014

Wicked Wednesday and ARandomFan Stamps

It's Wicked Wednesday ATC Challenge Blog time and this week our sponsor is ARandomFan© Stamps with a theme of something sweet or hearts.  OMG!  If you've never checked out these sweet digi stamps, now is the time.  They are so darn cute!  I've used Zodiac: Leo, kind of appropriate since I am a Leo!  Such sweetness!


Here's what I used to create this ATC:

Memory Box® You Make My Heart Flutter Stamp
Copic® Markers
Memento™ Rosebud DewDrop™
DecoArt® Americana® Gloss Enamels® Metallic Glorious Gold
Neenah® Classic Crest™ Solar White
Echo Park® Patterned Paper
3L® Scrapbook Adhesives™ 3D Foam Squares
Zip Dry™ Paper Glue by Beacon® Adhesives

Here's what I did to create this ATC:

Print image, color and trim to desired size
Trim base to ATC size (2.5 x 3.5)
Stamp sentiment on scrap of white
Fishtail ends of sentiment and edge with Copic® marker
Adhere image to base
Paint crown with gold paint
Attach sentiment with foam mounting squares

This is such a sweet image.  I really enjoyed making this ATC!  We would love to have you play along with us this week, it's an easy challenge.  Thanks for stopping by today and I'll see you again soon!  Have a great day!

Hugs,
Lea


Friday, September 19, 2014

Add A Little Dazzle Hop


                      Blog_header_add_a_little_dazzle

Hope you're enjoying all the inspiration featuring Add a Little Dazzle Craft Metal Sheets and Stampendous Stamps and Essentials this week! We know you'd love to win some goodies to try yourself! If you missed the earlier posts, here are the links for you:  MONDAY, TUESDAY, WEDNESDAY, THURSDAY .  Here's my project for today:


Here's what I used to create this project:

Stampendous Cling PenPattern Leaves
Stampendous Leaves Die Set
Stampendous Opaque Embossing Powders - Honey, Paprika, Olive
Stampendous Boss Gloss Embossing Ink
Add A Little Dazzle Metal Sheets - Golden Glimmer
Add A Little Dazzle Metal Sheets - Brushed Bronze
DecoArt Americana Acrylic Paint - Antique Gold
DecoArt Americana Chalkboard Paint - Black Slate
DIY Bangles 14 mm Wooden Barrel Beads
May Arts Ribbon String Burlap Ribbon - Natural
Miscellaneous Baling Twine
Miscellaneous Chalk

Here's what I did to create this project:

Die cut each leaf from the metal sheets, ink each leaf, add a mix of embossing powders and heat set each one
Create bow from baling twine being sure to leave long tails to attach the leaves
Tie three knots at different levels on each twine tail
Use May Arts string to attach leaves by their stems to each tail, one over each knot
Paint wooden beads, once dry, attach one to each tail and knot ends of twine to hold beads in place
Attach twine to chalkboard for hanging and attach bow to that twine with burlap string
Take largest leaf die, turn to flat side down and trace inside with chalk, add lines
Write sentiment with chalk

If my chalkboard were not damaged, this is pretty much where the process would have stopped!  However, I found this chalkboard at Tuesday Morning in the clearance section because the chalkboard had been scratched pretty extensively.  I bought it for $10.00!  I knew I had chalkboard paint at home and this was an easy fix.  I couldn't pass it up.  So, to cover the scratches, I merely added two coats of chalkboard paint over the existing surface.  This was one of those projects that popped into my head almost as soon as I saw the chalkboard.  By the time I got home, I couldn't wait to get the paint out and get the first coat on it.  I'm so loving how it looks.  I've already decided to make a garland for each season and I can change the look as the seasons change.  Yep, I'm pretty excited!

The team over at Add a Little Dazzle has created a special featuring the metals from this blog hop for those of you who have already realized you're going to need these products. You can find it here - Add A Little Dazzle Stampendous Hop Special. Of course you might win some, too! We're giving away three prize packages this week for comments on the blogs. A nice package of Metal Sheets, Stamps and Cutting Dies!

Stampendous

Wendy Price

Vicki Dutcher

Keren Baker

Janelle Stollfus

Add a Little Dazzle

Lea Kimmel

Cathy Parlitsis

Kristine Reynolds

Lee-Anne Cross 

Graciela Chavez

Jamie Martin

Lydia Brooke-Evans

Asia King

Lee Ann Barrett

Amy Hurley-Purdie

Kate Capper

Pam Hornschu

Martha Lucia Gomez


I so hope you've enjoyed this past week.  Who knew metal sheets would be so fun to create with?!  I know I'll be doing lots more down the road!  Thanks for stopping by today, I hope to see you again soon.  Have a blessed day!

Hugs,
Lea

P.S. If you click on a blog link and receive a notice that says "this post is not here" or something similar, just click on the blog header or look for a link that says Home. That should take you to the home page of that blog and the correct post should be near the top. Thanks for your patience.

Friday, August 8, 2014

Back to School...

...for our favorite little mice!  Yes, school is starting back soon and it's time to think about those teacher "here's to a great year" cards.  Stampendous has celebrated all week with House-Mouse Designs® as we prepare for yet another school year!  Here's my card:


This is what I used to create this card:

DecoArt® Americana™ Clear Chalkboard Coating
Bazzill® Cardstock
Little Yellow Bicycle® Making the Grade
Neenah® Classic Crest™ Cover Stock in Solar White
Tim Holtz® Distress Ink® in Pine Needles
Krylon® Workable Fixatif
Sargent Art® Chalk
Paperclips
Beacon Adhesive® Zip Dry™ 
Spectrum Noir Markers used:
  • GB2, GB4
  • FS9
  • CR2
  • TN1
  • EB1
  • IG1, IG3, IG4, IG5
  • CT2, CT4
  • TN5, TN7, TN9

Here's what I did to create this card:

Stamp image on white cs, color and trim to desired size, edge with green ink
Create card base for a 5"x5" square card with a tent fold
Trim patterned papers as shown
Coat "chalkboard" patterned paper with chalkboard coating, allow time to dry
Write on "chalkboard" paper with chalk, spray with Fixatif, allow a few minutes to dry
Arrange patterned papers as shown, add paper clip and adhere all papers to card base
Adhere paperclips in lower corner
Add burgundy fragments

Thanks for stopping by and checking out my card, I appreciate your visit.  Next week will be a busy one so please do stop by.  Dreamweaver Stencils is hopping with Woodware all week and Stampendous is featuring Authentique papers all week.  Yep, it's going to be a busy week in blogland!  Have a blessed day and I'll see you again soon!

Hugs,
Lea


Friday, August 1, 2014

How Do You Stack Art?

All this week, the Stampendous Design Team and several guest designers have been showing off a lot of fun things you can create with the new Stampendous Stack Art Kits.  Truly, you are only limited by your imagination with these fun kits!  I've created two different projects with similar themes but two very different looks!  We'll get to my projects momentarily, first, here's an explanation of our Stack Art Kits to help you better understand what they consist of.

Our Stack Art Kits have three components:
  • The Stack Art Kraftboard Kit which includes all the kraftboard pieces you’ll need to make at least 4 amazing creations; die cut, double-sided adhesive for all the kraftboard pieces; and sentiments you can use to make each piece a special gift or card embellishment.
  • The Stack Art Stamp Sets which include an assortment of terrific background stamps and other images plus an acrylic handle.
  • The Stack Art Elements Kits which each include five jars of embellishing goodness to stick to your adhesive covered kraftboard pieces.
Since so many others have shown you projects using the larger kraftboard pieces, I decided to show you a couple of different ways to use the smaller accent pieces and the adhesive pieces.  Here's my first project:


Here's what I used to create this project:

DecoArt® Americana® Winter Blue Acrylic Paint
DecoArt® Americana® Baby Blue Acrylic Paint
DecoArt® Americana® Snow White
DecoArt® Traditions® Carbon Black
StāzOn® Cloudy Sky Ink Pad
Faber-Castell® Pitt Pen in Warm Grey III
Faber-Castell® Pitt Pen in Black Medium Point
Beacon® Gem-Tac
Artist's Loft™ Canvas Panel

Here's what I did to create this project:

Mix both blue paints and cover canvas
Paint on some clouds and allow to dry
Once clouds have dry, mix a tiny amount of black to some white paint and add some subtle shading in the clouds
Paint the wings with the white paint and set aside to dry
Cover the fronts of two hearts with glue and add the red glitter, set aside to dry
Using gray ink, cover wing stamp with ink, stamp off once and then stamp onto painted wings
Write sentiment on canvas panel
Glue wings and hearts onto canvas panel 

For my second project, I wanted to make a little something different that I could set on my desk or on a shelf around the house.  I have a thing for hearts, I love them!  Hearts with wings remind me of my dad, I bought him a pillow that was a heart with wings attached right after he had quadruple by-pass surgery on his heart.  This project is dedicated to my dad whom I miss dearly!


Here's what I used to create this project:

Bo Bunny® Love Letters Collection 6x6 Paper Pad
Neenah® Classic Crest™ Solar White Cover Stock
DecoArt® Americana® Coral Blush Acrylic Paint
Tim Holtz® Distress Inks® in Antique Linen and Tea Dye
StāzOn® Cloudy Sky Ink Pad
Beacon® Gem-Tac®
Frames & Moore™ Medford 3.5 in x 5 in Frame

Here's what I did to create this project:

Stamp background image onto white cs and trim to desired size
Add distress inks to stamped image
Apply wings die-cut, double-sided adhesive  to image as shown
Add embossing enamel over wings and heat
Paint heart with coral paint, set aside to dry, apply additional coats of paint as needed
Trim patterned paper to fit frame
Adhere stamped image to center of patterned paper
Adhere heart to wings
Assemble into frame

That's it for me today!  I do hope you've enjoyed my projects and have found a little inspiration along the way!  Thank you so much for stopping by and I hope to see you again soon.  Have a blessed day!

Hugs,
Lea


Thursday, June 26, 2014

Stampendous and DecoArt Blog Hop Day!


2014_06_decoart

 The excitement continues as conclude our grand tour of amazing artists playing with Stampendous, DecoArt, and Princeton Artist Brushes via inspired by Willow Wolfe products! The inspiration has been amazing, and today you'll be even more astonished! If you missed the beginning of our journey, be sure to go back and check it out! MONDAY - TUESDAY - WEDNESDAY - THURSDAY Of course, there are prizes! DecoArt is sending three sets of their Media Fluid Acrylics, Princeton Artist Brushes via inspired by Willow Wolfe is donating Select 3750 Brushes and some Catalyst Wedges, and we'll be adding a Stampendous Creative Palette so you can practice all the techniques you'll see this week.

We'll be sending three prize packages to commenters with U.S. Mailing Addresses, and DecoArt will be sending three generous sample packages to international commenters, so all our friends can play. This week we've shown you how to use Stampendous Rubber Stamps to transfer a terrific pattern for painting. Did you know you can sell your projects made with our images? As long as you hand stamp each one, you can sell as many as you like of any kind of project anywhere you want. You can find our detailed Angel Policy on our website. One of the terrific prizes is a Catalyst Wedge from Princeton Artist Brushes and inspired by Willow Wolfe. These wedges are terrific for using with our Creative Palette and DecoArt paints. In this video Stampendous owner Fran Seiford demonstrates how easy it is to make amazing backgrounds with these tools. [youtube https://www.youtube.com/watch?v=x7UqUFDrTXg&w=560&h=315] Wait until you see what our other artists have created!

Visit each blog, leave a comment! • Like Stampendous, DecoArt, Princeton Artist Brushes, and inspired by Willow Wolfe on Facebook! • We've also got a Pinterest Board started!

I wanted to do a canvas for today's project.  I had something totally different in mine when I started this but as I was looking through my stamps, I decided I wanted to do something entirely different.  Funny how that happens!

Gesso'd and Background Done

Stamped face on

Painted Girl

Finished Project

Well, I say finished project but I think I may go back and do some more shading on her face as well as in her hair.  I want to hang her in my craft room when I' done.  I kinda like her!

Here's what I used to create this canvas:

Stampendous® Cling Blossom Beauty Stamp Set
Stampendous® Cling Hydrangea Garden Stamp Set
Stampendous® Creative Palette
Stampendous® Blossom Beauty Die Set
DecoArt® Americana™ Acrylic Paints - Variety of colors
DecoArt® Glamour Dust™ Glitter Paint
DecoArt® Dimensional Effects™
Ranger® Archival Ink™ - Jet Black
Speedball® Brayer
Foam Mounting Squares


Please repin our projects on to your boards and be sure to tag us when you do (#Stampendous, #DecoArt, #PrincetonArtistBrushes, #byWillowWolfe) - we'll be tracking. Your comments on the blogs are your entry into the drawing! AND I have a few bonus goodies hanging around my office for some lucky people who SHARE our Facebook posts and Pinterest Pins! Ready for your trip around the world??? Pack your bags, get a cup of coffee and a kitten, and get comfy. You have until the end of Sunday, June 29 PDT to comment on all the blog posts.

Louise Crosbie (Scotland, UK)

Lea Kimmel (North Carolina, USA)

Claudia Neubacher (Vienna, Austria)

Asia King (Oxford, UK)

Iliane de Fockert (Elly) (Niedersachsen, Germany)

Suzanne Czosek (Illinois, USA)

Julia Stratford-Wright (near London, UK)

Kristine Reynolds (California, USA)

Angelica Stark (Hudiksvall, Sweden)

Mark Gould (West Sussex, UK)

Debbie Cole (California, USA)

Jamie Martin (Oklahoma, USA)

Tobi Crawford (BC, Canada)

Wendy Price (New Jersey, USA)

Jessa Plant (Arizona, USA)

A few of the bloggers this week are new to hopping, so if you have an issue with any of the links, here's a little tip! If you get a page that says "Sorry that Page is not here" or something similar, try clicking on the header of the blog, or look for something that says Home. The hop page should be near the top of the day's posts. We will fix broken links as the day goes on, as well, so check back here if you are really lost.

Monday, June 23, 2014

Decorate with DecoArt and Stampendous!


                      2014_06_decoart

 WELCOME - to our weeklong blog collaboration with DecoArt Paints, Princeton Artist Brushes, and inspired by Willow Wolfe. If you missed Monday's excitement, here's the LINK. DecoArt creates so many fantastic paint products, our team was excited to try so many! We know you'll be stunned when you see what these great products add to your stamping! When you combine them with Princeton Artist Brushes and Catalyst Wedges used on the Stampendous Creative Palette, well WOW!

While Debbie Cole, CDA is an expert at adding paint to your stamped creations, the real excitement happens when she shows Decorative Painters how to use stamps to minimize their prep time in astonishing ways! In fact, she's made a series of five videos featuring the Stampendous Creative Palette and DecoArt paints. You can check them out on our YouTube channel here! Here's my project for today:

In normal lighting

Lights off with some outdoor light coming through

Lights off and exterior lighting blocked

I loved using the glow in the dark paint on this project!  The paint absorbs the light and then gives off this fantastic glow and these were taken rather soon after applying all the paint.  If I had waited to take the photos another day, the stars and moon would have been even brighter.  This idea just popped into my head over the weekend and I had to use this stamp with this paint, it was screaming at me, begging me to!  The Twisted Tree stamp isn't available on the Stampendous site just yet but it's possible it may already be in your local stamp store.  It will be available on the Stampendous site beginning July 6th.


Here's what I used to create this project:

Stampendous® Stamps Twisted Tree (Available July 6, 2014 on-line, may already be in your LSS)
DecoArt® Americana™ Glow in the Dark Paint
DecoArt® Americana™ Paints in Navy Blue, Burnt Umber, Snow (Titanium) White, Pineapple, Flesh Tone, French Vanilla, Hauser Light Green
DecoArt® Traditions™ Paint in Carbon Black
Ranger® Archival Ink™ in Jet Black
Artist's Loft™ 6"x6" Canvas Board
Circle Die
Neenah® Classic Crest™ Solar White Cover Stock
Scotch® Double-Sided Tape

Here's what I did to create this project:

Chose a circle die the size of the moon you want to create and cut it
Decide where you wish to place the moon and adhere die-cut circle with tape to canvas
Paint sky first being sure to leave room at the bottom for grass
Remove die-cut piece and dry paint with heat gun
Paint moon next and dry, one you've dried the paint, go back and add glow in the dark paint, dry
Paint grass at bottom and dry
Ink image and stamp onto canvas being sure to press hard to get the best impression
Paint details of stamp, heat dry
Add "stars" with glow in the dark paint


Artists from all over the world are playing with us this week. Prepare to be amazed! Of course, there are prizes! DecoArt is sending three sets of their Media Fluid Acrylics, Princeton Artist Brushes, through Willow Wolfe, is sending a Select 3750 Brush Set and a Catalyst Wedge, and we'll be adding a Stampendous Creative Palette so you can use all the new techniques you'll learn here this week! Wait until you see what our other artists have created!  Here's what you have to do for a chance to win:

Visit each blog, leave a comment! 

Like Stampendous, DecoArt, Princeton Artist Brushes and inspired by Willow Wolfe on Facebook!

We've also got a Pinterest Board started!

Please repin our projects on to your boards and be sure to tag us when you do (#Stampendous, #DecoArt, #PrincetonArtistBrushes, #byWillowWolfe) - we'll be tracking. Your comments on the blogs are your entry into the drawing! We'll randomly choose three blog posts from all the designer posts this week and then choose a winner from each to receive a prize package. BUT I have a few bonus goodies hanging around my office for some lucky people who SHARE our Facebook posts and Pinterest Pins! We'll send three prize packages to commenters with a U.S. Mailing Address, DecoArt will send three Sample Packs to international commenters so they can play, too!! Ready for your trip around the world??? Let's get Hoppin!

Louise Crosbie (Scotland, UK)

Iliane de Fockert (Elly) (Niedersachsen, Germany)

Julia Stratford-Wright (near London, UK)

Julie Robertson (UK)

Leadonna Kimmel (North Carolina, USA)

Angelica Stark (Hudiksvall, Sweden)

Debbie Cole (California, USA)

A few of the bloggers this week are new to hopping, so if you have an issue with any of the links, here's a little tip! If you get a page that says "Sorry that Page is not here" or something similar, try clicking on the header of the blog, or look for something that says Home. The hop page should be near the top of the day's posts. We will fix broken links as the day goes on, as well, so check back here if you are really lost. The Official Rules are here.

So that's it for me today, I'll be posting again on Friday and the next time I plan to use my Creative Palette for my project.  Thanks for stopping by today and please don't forget to comment if you want to be eligible to win a prize.  See you again soon.

Hugs,
Lea

Wednesday, June 18, 2014

What day is it?

It's Wicked Wednesday!!  Time for another Wicked Wednesday ATC Blog Challenge!  Today's sponsor is AliciaBel.com and the image is Sirenita presumida.  She's such a cute image, I had so much fun coloring her!


Here's what I used to create this ATC:

AliciaBel image - Serenita presumida
Stampendous Stamps Ochre Color Fragments
Stampendous Stamps Creative Palette
DecoArt Paints
Neenah Classic Crest Solar White Cover Stock
Copic Markers
May Arts Ribbon
Beacon Adhesive Zip Dry
Foam mounting squares

Here's what I did to create this ATC:

I created the background paper first by rolling paint out on the Creative Palette and laying my paper down to pick up the paint, set the paper aside to dry
Print image, color with Copic markers, cut out images
Cut background paper to correct size
Add fragments to bottom of card with glue
Add ribbon to card with glue
Adhere crab and mermaid to card with foam mounting squares

I hope you like my little mermaid!  Thanks for stopping by today and I'll see you again tomorrow with another project for Dreamweaver Stencils.  Hope you have a blessed day!

Hugs,
Lea


Friday, June 13, 2014

Stampendous and Core'dinations Hop

If you're looking for the Dreamweaver / Imagine Crafts Hop, here's the link:  http://ink-positive.blogspot.com/2014/06/dreamweaver-and-imagine-crafts-hop.html


2014_06_coredinations 

Hope you've enjoyed the terrific collaboration between Stampendous products and Core'dinations' gorgeous papers! We have been thrilled to bring it to you! Today is the final day!! Of course there are prizes! We'll give away three packs of goodness! The Prize Package includes the Lovely Garden Stamp Set; the Matching Lovely Garden Cutting Dies from Stampendous; a Sand It Kit from Core'dinations which includes a sanding block, replacement sandpaper, and a "must-have" Dust Buddy clean up cloth; Core'dinations will also be sending the lucky winners some of their fantastic 6" X 6" paper pads. PLUS an extra special bonus - our friends at Dreamweaver Stencil will be adding the gorgeous Stone Wall stencil that Jamie Martin used in her terrific card she'll be posting this week (you can see a peek of it on this blog hop banner!)  In the meantime, here's my project:


Here's what I used to create this card:

Core'dinations® Sand It Kit
DecoArt® Paints
Bazzill® Cardstock
Neenah® Classic Crest™ Solar White
VersaFine™ Onyx Black Stamp Pad
Imagine Crafts StāzOn™ - Orange Zest
Cuttlebug™ Folder - Dots
Sizzix® Tim Holtz® Embossing Folder - Stripes
Beacon Adhesive® Zip Dry™
Foam Mounting Squares


Here's what I did to create this card:

Using the Creative Palette and paints, I created my papers for the flowers
Stamp the flower three times for each flower
Using the dies, cut out the pieces to create two flowers
Create card base
Trim orange paper and green paper to desired sizes
Run both through machine to dry emboss and sand
Add dot paper to card base
Put together flower layers and adhere to card
Freehand cut three leaves and add to card
Stamp sentiment, trim and sponge ink around edges
Trim a mat for sentiment and adhere the two
Adhere sentiment to card

It was a really fun and easy card to create but it looks like it was way more complicated!  I love how the colors pop on this one!  So, on to bigger and better...

LET'S GET HOPPIN'! The official rules are HERE. You still need a U.S. mailing address to win, but we sure want to hear your comments anyway! You have until the end of Sunday, June 15th to finish your comments. If you missed any previous posts here they are for TUESDAY, WEDNESDAY, and THURSDAY. We'll draw three random blog posts from all the posts this week. Then we'll choose one comment from each. Of course we'd be super grateful if you pin our projects to your Pinterest Boards, or if you Tweet, or Share on Facebook, follow us, like our pages. You know the drill! Here's who is posting today!

Core Blog

Debbie Standard

Kristine Reynolds

Krissy Fossmeyer

Tobi Crawford

Rhea Weigand

Trine Brandt Lassen

Tenia Nelson

Lea Kimmel

Jamie Martin

Thanks so much for stopping by today!  I hope you've enjoyed the hop and have left lots of comments to better your chances of winning a prize!  I'll see you again soon!  Have a blessed day!

Hugs,
Lea


***Blog Hop Hint - if you click on a link that takes you to a page saying something like, "Sorry this page cannot be found," just click on the header at the top of the blog (usually a picture, or the blog's name), and it will take you to that blog's most recent post. That post *should* be our hop. If not, you can probably scroll down a short way to find the hop post. When in doubt type Stampendous in the search box to find the most recent post about our products.

Friday, April 25, 2014

Get Hoppin' with Stampendous and Dreamweaver!


Wow!  What a "Dream-Pendous" week it has been!  Are you ready to hop with Dreamweaver Stencils and Stampendous Stamps?  Before you do, don't forget that there are three prize packages available but you must comment to be eligible to win. Each will have a great selection of Dreamweaver Stencils and Stampendous images and dies...one of which is the new "Blossom Beauty" face image as shown on the badge.  So on with the show!  

My project today is another canvas.  I had this idea in my head and, well, if you saw my post yesterday, you know what that's like!  I had to get it out!!  I recently saw a canvas that was done with joint compound.  I liked the look but didn't have any joint compound laying around, however, I did have embossing paste!  So, an idea was born.  My project, even with embossing paste in place of joint compound, is nothing like the canvas I saw originally.  It was a beautiful canvas but mine is more of a mixed media project.  Guess you could say it's a little more "artsy!"  I look forward to hearing what you think!


For some very odd reason, the bottom of my canvas photo keeps pulling into Blogger much darker than it actually is.  The bottom shading is actually like the top of the canvas.  I've never had this happen before so I'm not sure how to fix it.  One of the things I really love about this project is how the text from the Dream Text stamp still shows through the embossing paste.

Here's what I used to create this project:

Stampendous® Cling Blossom Beauty
Stampendous® Cling Lovely Garden
Stampendous® Regal Bird Quotes PC™S
Stampendous® Angel Wings Quotes PC™S
Stampendous® Royal Heart Quotes PC™S
Stampendous® Charmed Art PC™S
Stampendous® Artist Elements
Stampendous® Cling Jumbo Dress Form
Stampendous® Dream Text
Dreamweaver Stencils© White Embossing Paste
Liquitex® Ultra Matte Gel Medium
Ranger® Archival Ink™ - Jet Black
Tim Holtz® Distress Ink™ - Pumice Stone
Dixie® Deli Paper
Neenah® Classic Crest™
Artist's Loft™ Watercolors
DecoArt® Paints 
Artist's Loft™ Necessities™ 8 x 10 Canvas Board

Here's what I did to create this project:

Stamp Dream Text stamp over entire surface of canvas board
Cover surface of canvas with embossing paste and allow to dry
Stamp all images on deli paper and tear out close to edge of image
Use watercolors to color butterfly and eyes and lips on face
Apply images with gel medium
Add enough embossing paste around edge of images to blend into background
Brush on distress ink randomly around canvas
Stamp words on cardstock pieces and trim
Stipple distress ink on words
Apply words to canvas with gel medium

Squirt paint on ends of brushes, tilt up and allow paint to run down canvas

That's it for this one, I do hope you like it!  I had a good deal of fun putting this one together with the various images and words.  Enjoy the rest of the hop and I hope to see you back here soon!  Here's the complete hop list:
Thanks again for stopping by!  Don't forget to comment if you want to be eligible to win a prize package.  Have a blessed day!

Hugs,
Lea