Showing posts with label Canson. Show all posts

Tuesday, July 29, 2014

A Little Fun in the Sun

This week Stampendous® is celebrating summer with some of the cutest little critters around!  My card today is created with Gruffies® Beachy Bears!  I absolutely love these little bears; they are adorable!  Here's my card:


Here's what I used to create this card:

Faber-Castell® Gelatos®
Ranger® Archival Ink™ in Jet Black
Canson® Watercolor Paper
Little Yellow Bicycle® Hello Spring
May Arts Ribbon®
Bazzill® Cardstock
Viva® Pearl Pen in Ice White
Beacon Adhesive® Zip Dry™
Water Brush

Here's what I did to create this card:

Stamp image on watercolor paper and color with water brush and Gelatos®
(here's a hint, I scribble my Gelatos® onto the inside of a page protector I've cut open and use that as a palette, I pick up the color with my water brush)
Trim image to desired size
Create card base and mat for image from Bazzill®
Trim patterned paper to fit as shown
Trim length of ribbon to wrap around patterned paper and create bow
Adhere ribbon to patterned paper and then adhere patterned paper to card base
Adhere image to mat and then adhere matted image to center of card base
Attach bow with a dot of glue
Squiggle on the "sunscreen" with the Pearl Pen and set aside to dry

So there you have it, a cute and simple card that's fun to create!  I hope you've enjoyed viewing my card and maybe it has inspired you to create your own!  Thanks for stopping by!  Have a blessed day!

Hugs,
Lea

Friday, March 21, 2014

Tombow Hop Time!


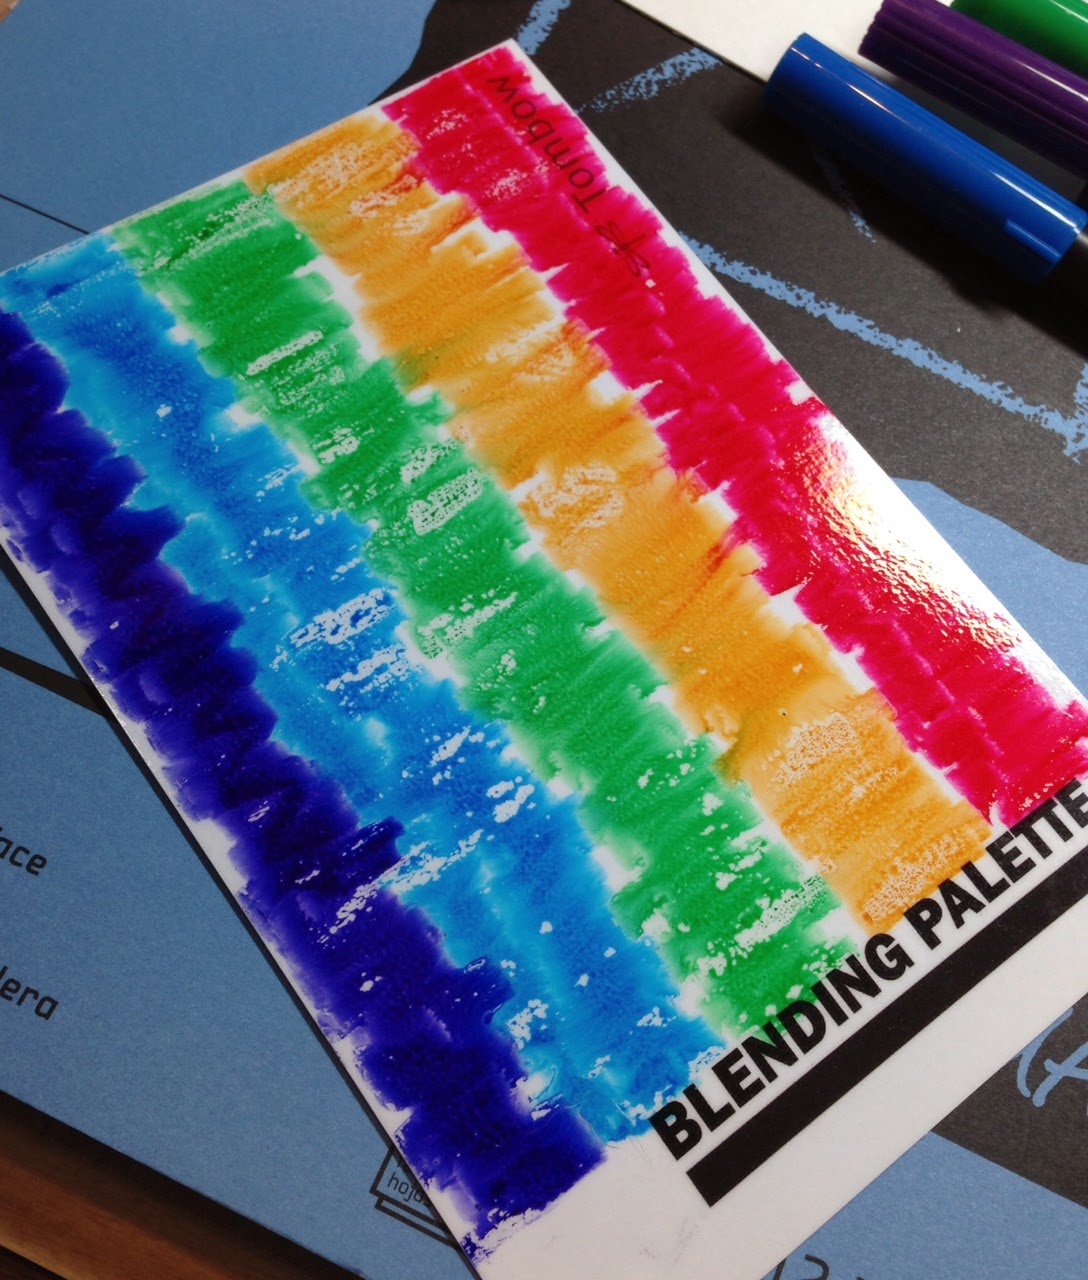
It's Friday, you know what that means!!!  It's HOP Day! Yay!!  The Stampendous Design Team is hopping along with the TombowUSA Design Team and I'm sure there will be plenty of eye candy to soothe your sweet tooth!  Remember, we have prizes to give out but you must comment to win a prize!  So, you may or may not recall that I received the set of 6 Jewel Dual Brush Pens and a Blending Kit from Tombow.  My first project uses five of the colors, 847/Crimson, 636/Imperial Purple, 245/Sap Green, 476/Cyan and 946/Gold Ochre.  I didn't use N25/Lamp Black for obvious reasons!  Here's my card using the Splash Technique:


Here's what I used to create this project:

Canson® Watercolor Paper
Black Cardstock
Archival Ink™ - Jet Black
Hug Snug® Seam Binding - White

Here's how I created this project:

Trim watercolor paper to fit blending palette
Color blending palette with markers in wide stripes (as shown above)
Spritz blending palette with water
Apply watercolor paper to blending palette and rub paper to make sure it picks up ink evenly
Set wet paper aside to dry (dry paper shown above)
Trim seam binding to desired length
Re-color blending palette and mist
Lay ribbon across palette and rub ribbon to help apply ink
Continue doing sections of ribbon while moving down palette
Set ribbon aside to dry (you can use your heat gun to speed this process up)
Stamp image on dry inked watercolor paper
Trim away excess paper at bottom
Stamp sentiment
Create card base to fit image
Adhere image to to card base
Tie dried ribbon around top of card with a simple knot in front

For my next project, I went back to mixing colors on the blending palette and applying the color using the Indirect Blending Technique to color my image with the blender pen.  I really like this technique!  


Here's what I used to create this project:

Bazzill® Cardstock in Parakeet and Lava
Making Memories Kids™ Collection - Emma
Canson® Watercolor Paper
Archival Ink™ - Jet Black

Here's what I did to create this project:

Stamp image and color, trim to desired size, set aside to completely dry
Create card base from green cardstock
Trim red-orange cardstock pieces as shown
Trim patterned paper as shown
Stamp sentiment on dry image
Adhere all layers as shown

So that's both of my projects, I hope at least one of them may have inspired you to give this a go yourself.  Easy and fun, what more can a girl/guy ask for!?  Here's the complete link list, I wouldn't want anyone wandering lost around the Internet, it could be light years before you're found! 

Lea Kimmel (me!)


Don't forget to leave some love along the way in order to be entered to win a prize.  Thanks for hopping by and I hope to see you again soon!  Have a blessed day!

Hugs,
Lea

Thursday, March 20, 2014

Time for Tombow!


And a Toadal Makeover!  This week has been all about Stampendous® Stamps and TombowUSA and lots of wonderful creations designed to inspire you!  I love it when the Stampendous Design Team does a blog collaboration with a fantastic company like TombowUSA; it's just so much fun!  Of course, as you can see, there are prizes to win, too!  However, if you want to win a prize, you have to comment on our blogs, the more blogs you leave comments on, the better your chance of winning!  Pretty darn simple, right!?  So, without further ado, here's my project for today:


These were the colors I received, the Jewel set of 6!  I also received one of their new Blending Kits, which includes the Blending Palette I've shown you here, a Blender Pen and a Compact Spray Mister.    I wanted to show you my blending palette with colors still mixed on it so you could get an idea of how easy it is to get the color you need even from the Jewel set of 6 markers.  There's a super cute coloring chart for all the House-Mouse mice that can be found here, however, since I wasn't sent any of those colors, I had to mix my own! By combining purple and golden yellow, I was able to get my brown for the mouse fur, combining the golden yellow and red gave me the peachy tones I needed for his skin.  As you can see here, I mixed a few other colors, too, I wouldn't want you to think you are limited to just these six colors.  I used the Indirect Blending technique for this card.

Here's what I used to create this project:

Stampendous® HMM04 Toadal Makeover
Tombow Dual Brush Pens - Jewel
Tombow Blender Kit
Archival Ink™ - Jet Black
Bazzill® - Ruby Slipper
Canson® Watercolor Paper
Bo Bunny® Mistletoe 6x6 Paper Pad (Wonky Squares)
Crate Paper® Party Day 6x6 Paper Pad (Stars)
May Arts Ribbon®
Mono Adhesive Power Bond
Foam Mounting Squares

Here's how I created this project:

Stamp image and color; trim to desired size
Create card base and image mat from Bazzill
Trim patterned papers as shown
Adhere patterned papers and attach ribbon as shown
Adhere patterned papers with ribbon to card base as shown
Adhere image to mat and attach to card base with foam mounting squares

This was a very easy card to create and I have to tell you, I really enjoyed mixing my colors and applying them with the Blender.  I know my colors are a little Christmas-y but when you have a green toad and red lipstick, you just have to go with what looks good, no matter what the season may be!

Thanks for stopping by today and don't forget to comment if you wish to be entered to win a prize.  Don't forget that tomorrow is the BIG HOP!!  You don't want to miss it and I'll have two projects to share tomorrow!  Have a blessed day and I'll see you again soon!

Hugs,
Lea