Showing posts with label DecoArt. Show all posts

Friday, May 1, 2015

KLIK It, KLIK it Good!


Klik Interchangeable Jewelry from Metal Complex is a fantastic new line of DIY accessory options. With two snap sizes and dozens of settings to snap your creations into, this terrific product is fun to play with for every level of crafter. There are tons of pre-made snaps so you can just “klik and go” to change up your look. But this week we’re playing with the Metal Complex Snap Bezel Blanks so we can craft our own masterpieces of wearable art.  Here’s what I’ve created:


Here’s what I used to create my project:

Metal Complex™ Klik Triple Round Pendant with Crystals
Metal Complex™ Klik Large Snap Base with Bezel
Metal Complex™ Klik Small Snap Base with Bezel
ETI Jewelry Resin
Copic® Markers BV01, BV02, BV04
Liquitex® Cadmium Yellow Medium Hue Acrylic Soft Body Paint
DecoArt® DecoPage
May Arts Ribbon

Here’s what I did to create my project:

Stamp images with black ink on white paper and color with markers
Cut out flowers and add a small dot of yellow paint in the the center of each flower
Mix glitters and fragments together
Coat each side of flower with DecoPage to seal it, set aside to dry
Coat bottom of each bezel with a coat of DecoPage and sprinkle on mixture of glitters and fragments
Mix your resin, be sure to pay close attention to directions
Once mixed, start adding resin over glitter and fragments
Gently add in flowers as shown and continue to add resin
Allow resin to cure for a minimum of 24 hours
Once resin has cured, snap bezels to pendant piece and add ribbon

You can see all the wonderful Klik products and tons of ideas for creating with this super fun product in their flippy catalog HERE and you can find a retailer HERE. We’d like to recommend www.resinobsession.com because they carry Stampendous products as well!


To make our wonderful Klik jewelry pieces we used products by Environmental Technology, Inc. (ETI) who generously sent our team some of their wonderful Jewelry Resin. This two part resin is incredibly easy to use and creates fantastic, professional results. We love using it here on the Stampendous Design Team. This great resin is sold at Resin Obsession, but you can also find it at Michaels and other fine craft stores. You can get thousands of ideas for using resin to create your own pieces on the resincrafts blog or on the I Love Resin blog.

Some of you will be sharing your new jewelry soon because there are prizes! Three random winners will receive a prize package that includes Klik Snap Bezel Blanks and jewelry components, a package of ETI Resin and a Stampendous Eclectic Perfectly Clear Stamp Set. To win one of these awesome prize packages, you need to comment on our blog and that of each Stampendous designer in the list provided below. 


Eligible winners are those comments that provide a valid email and indicate a U.S. Mailing address. Here are the Stampendous Official Rules for all contests. Commenting will close Sunday, May 3rd and winners will be announced the afternoon of May 4th, so, be sure to check back Monday to see if you’re a winner!

Thanks for stopping by today!  I have really enjoyed this collaboration and plan to create even more similar pieces in the coming months.  I hope you have a wonderful weekend and I’ll see you again soon!

Hugs,

Lea


Thursday, April 30, 2015

Thank Ewe!

This is a bittersweet post today for Dreamweaver Stencils, it's my last post with the Dream Team under the skillful guidance of Lynell, founder of Dreamweaver Stencils.  If you've been under a rock somewhere and haven't heard, Stampendous Stamps has purchased Dreamweaver Stencils.  Since I'm also on the Stampendous Design Team, I'm lucky enough to get to continue creating with my very favorite stencils, now combined with my very favorite stamps.  I want to "thank ewe," Lynell, for inviting me to become a part of your Dream Team!  It was a privilege and an honor to serve under you for the past two years. Lynell, I wish you and Wayne the best always and I'm sure I'll see you again!  I do hope you enjoy your new-found freedom!

In honor of our last post for the Dreamweaver Stencils Dream Team, I would like to share my first card I posted as part of this wonderful group of gals.  Details can be found here!


And here's my final post for Dreamweaver Stencils as part of the Dream Team:


Here's what I used to create this card:

Dreamweaver Stencils© LL3040 Open Sheep Stencil
Dreamweaver Stencils© DL3040 Open Sheep Die Set
Dreamweaver Stencils© Regular Embossing Paste
Plaid® Baby Pink Acrylic Paint
DecoArt® Americana® Coral Blush Acrylic Paint
Basic Grey® Olivia Paper Pad
Tim Holtz® Distress Ink in Iced Spruce
Coral Cream Cardstock by Bazzill Basics Paper®
Guacamole Cardstock by Bazzill Basics Paper®
May Arts Ribbon®
Zva Creative Crystals®
Beacon Adhesive

Here's what I did to create this card:

Trim a piece of patterned paper and tape reverse side of stencil to paper
Mix paints with paste until you have desired color and paste emboss sheep
Run die cuts through die machine with two different patterned papers
Once paste has dried, attach die cut pieces to paste and pattern paper
Create horizontal A2 card base with a tent fold from green paper
Trim a piece of coral cardstock as a mat for patterned paper and adhere the two
Create a double bow from ribbon and attach tails around back side and adhere entire piece to card base
Add distress ink around edges of sheep
Adhere two small black crystals for eyes

When you have a shower, you need thank you cards to send to your guests that gave you a present.  For a baby shower, there's not much that's sweeter than this adorable lamb.  I think it's perfect!  Plus, I really wanted to thank Lynell for the past two years and the opportunity she gave me to create with her wonderful products.  Here's the rest of the team playing along with our farewell to Lynell:


Thanks for stopping by today.  I appreciate your visits and I always love to read comments you're sweet enough to leave.  Have a wonderful day and I'll see you again soon!

Hugs,
Lea

Thursday, April 2, 2015

Light It Up Blue!


Hello and welcome to the Light It Up Blue For Autism Awareness Blog Hop!  I wanted to participate in this hop in support of my friend, Tenia, and her adorable son, Theo!  

We have so many fantastic sponsors that have shown their support for Autism Awareness and you can see the complete list here!  If you would like a chance to win a prize from one of these fabulous companies leave a comment on this blog, and any of the other blogs participating in today's hop! Winners will be chosen at random and will be announced on Monday April 6.  Now here is the mixed media canvas I created for today's hop:


Here's what I used to create this canvas:

5"x7" Canvas Panel
Americana Acrylic Paints in Sapphire, Hauser Light Green, Cinnamon Drop
Americana Multi-Surface Satin Acrylic Paint in Cottonball
Liquitex Soft Body Acrylic Paint in Cadmium Yellow Medium Hue
Americana Dura Clear Gloss Varnish
Golden Extra Heavy Gel (Matte)
Sharpie White Poster-Paint Pen
Copic Marker B28
Stampendous China Blue Micro Glitter
Kids Puzzle
Automobile Headlight Bulb

Here's a freebie for you from my friend, Amy, owner and creator of Amy Doodles:


 I was so happy to create this little canvas for such an awesome cause!  Thanks for stopping by to check out my project!  Don't forget to comment for a chance to win a prize.  I'll see you again soon!

Hugs,
Lea

Friday, March 13, 2015

I Have a ScrewLoose!

If you don't have a ScrewLoose, or a Sparky, then you need one or more!  They are two of the cutest little robots you will ever find and some of the newest characters at Stampendous!  We've been  celebrating their arrival all week long and today I have a fun little card to share that's perfect for a little boy (or girl!).  ScrewLoose looks a little rusty but that's actually a reflection on the chrome tape!


Here's what I used to create this card:

DecoArt® Americana® Spa Blue Acrylic Paint
DecoArt® Americana® Hauser Light Green Acrylic Paint
DecoArt® Americana® Lemonade Acrylic Paint
DecoArt® Americana® Multi-Surface Satin™ Cottonball Acrylic Paint
StāzOn® Jet Black Ink Pad by Tsukineko®
Faber-Castell® PITT Pens in Black, Cold Grey III, Cold Grey IV, Cold Grey VI
Copic® Markers E07, E08
Neenah® Classic Crest™ Solar White Cover Stock
Limeade Cardstock by Bazzill Basics Paper®
Miscellaneous Items - Gear, Wire, Metal Flashing, Chrome Tape (for HVAC systems)
Beacon® 3-in-1 Advanced Craft Glue

Here's what I did to create this card:

Create A2 horizontal card base with a tent fold from green cardstock
Trim a piece of white cardstock to fit on front of card base
Add light green paint across the bottom of the white cs
Add blue paint on the rest of the white space, set aside to dry
Cut out doghouse shapes from flashing, set aside
Stamp ScrewLoose on chrome tape and cut out
Stamp Sparky on chrome tape and cut out
Add darker green paint with a flat brush in upward strokes to create grass
Using fingertip, create clouds on sky, set aside to dry
Using scrap of paper, create Sparky sign and attach with wire to gear
Adhere doghouse pieces to card front
Adhere Sparky's sign to front of dog house
With Faber-Castell® PITT pens, darken inside of doghouse using lightest grey on bottom and getting  darker as you go up
Adhere Sparky inside doghouse
Adhere ScrewLoose beside doghouse and stamp sentiment on screen
Using Copics®, add color to Sparky and a little "rust" to doghouse and sign

This is such a simple card to create and I think it's perfect for a boy even though it would work for a girl, too.  I just love these little robots and I know you will, too!  Be sure to check out the rest of my teammates projects here:


Thanks so much for stopping by today.  I hope you've found some inspiration to create your own little ScrewLoose and Sparky project.  Have a wonderful weekend ahead and I'll see you again soon!

Hugs,
Lea


Thursday, February 26, 2015

Altered State!

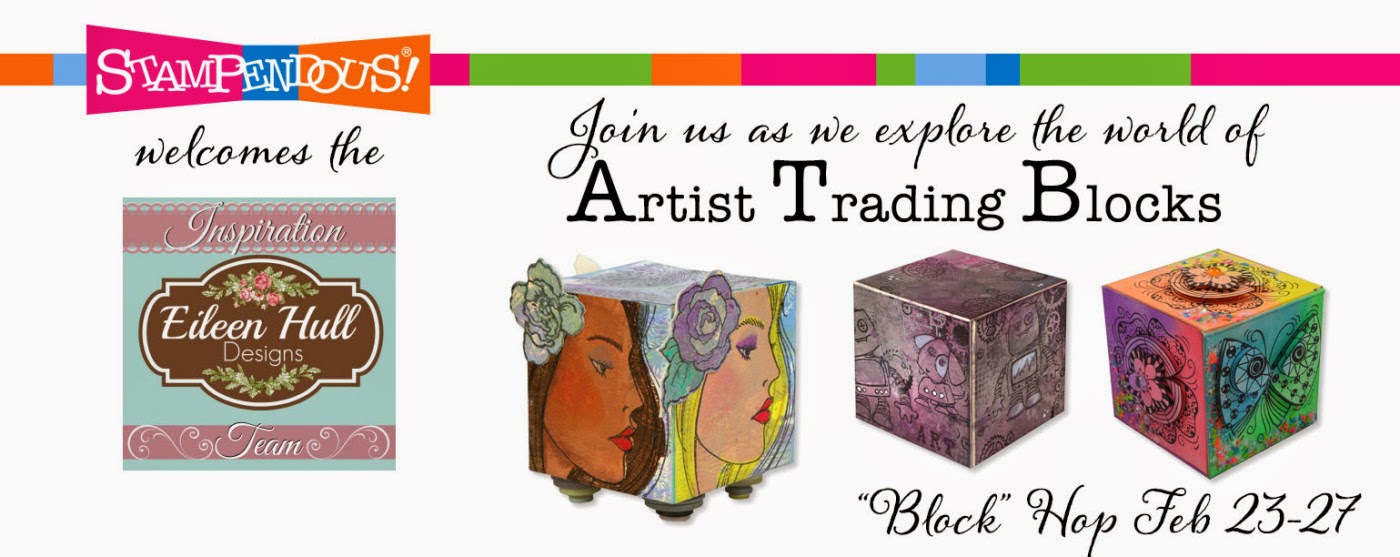
Creativity has many dimensions.  Artist trading blocks provide a multi-dimensional canvas for your artistic expression.  It’s never been easier to create, collect and share your style with Stampendous stamps and Essentials!  Here's what I've created to share with you today:


Here's what I used to create this ATB:


DecoArt® Americana® Multi-Surface Satin™ in Dolphin
DecoArt® Americana® in Grey Sky
Memento™ Tuxedo Black Ink Pad
Archival Ink™ Jet Black Ink Pad
Solid Oak Steampunk™ Gears
BuildURBeads Wooden Beads 
Copic® Markers:  E95, 97, 99; C1, 3, 5, 7
Spellbinders® Labels Two Die Set
Spellbinders® Sprightly Sprockets Die Set
Golden® Extra Heavy Gel Medium - Matte
Acetate, Wire, Bottle Cap from my crafty stash


Here are today’s participating designers:


Lea Kimmel (me)


We know this form of crafting will spark your interest and give your mojo a serious boost! That’s why we have prizes!!!  We’ll choose three winners at random from the comments on all blogs in the hop. Then from those three we’ll randomly pick a GRAND PRIZE winner! Two of the winners will receive Stampendous PenPattern Petal and PenPattern Flutter cling stamps, just like you’ll see on Kristine Reynolds amazing ATB sample. They’ll also receive enough pre-cut, premium matboard from Sizzix to make two boxes of your own, plus some extra pieces for fiddly bits! The Grand Prize winner will receive the stamps as above, a whole package of matboard, AND the Sizzix die to cut your own ATB boxes! Uh, WOW! If that weren’t enough, eligibility for these amazing prize packages has expanded to include our international fans too!

We know you won’t want to miss a single creation in this hop, and the Eileen Hull Designs Inspiration Team has several members that live outside the United States, so it took a while for them to get their products from us. We need to give them time to post and you time to comment, so the comment deadline will be Sunday, March 8th. A whole extra week! We will continue posting links as we receive them from the Inspiration Team, so be sure to keep checking back. You get one entry for every comment, so you don’t want to miss the chance to leave a thoughtful comment on each project. For those who tend to get lost, we’ll post a “cumulative” link list of links so far on Saturday, February 28th and Saturday, March 7th. Then you can check your progress.
Thanks so much for stopping by today!  I hope you've enjoyed my crazy creation!  I've provided you with some handy links below, please be sure to check them out!  See you again tomorrow.  Until then, have a wonderful day!

Hugs,
Lea

*New* Social Media Links

Stampendous Links:
Shop Stampendous 
Eileen Hull Links:  
The Artists on the Block Links:
The Artists on the Block Blog
Follow The Artists on the Block: Facebook * Twitter * Pinterest

Thursday, February 5, 2015

Key to My Heart

Break out the froufrou! For the month of February, the Dream Team is going Frilly and Fabulous! Vintage, retro, or modern, adding extra charm with fun Fran•táge products from Stampendous, ribbons and lace from May Arts, buttons, crystals, charms, or even creating your own dimensional decor! A snippet or a pile, whatever your creative heart desires! Remember to link your creations using the Inlinkz tool on the Dream It Up! blog for a chance to win the stencil of your choice! Bonus points for using Dreamweaver and/or Stampendous product in your work of heart.

Here's what I've been playing with:


Here's what I used to create this card:

Bo Bunny® Love Letters 6x6 Collection
Key Charm from Stampin' Up!®
Miscellaneous Brads

Here's what I did to create this card:

  • Die cut heart from Bo Bunny® paper
  • Add a thin layer of gesso over entire die cut heart
  • Tape stencil in center of heart and paste emboss with silver paste
  • Set aside heart to dry
  • Create 5x5 square card base with a tent fold
  • Trim wood grain paper to fit in background as shown
  • Once paste is almost dry, heat with heat gun allowing some areas to bubble up, this gives a rough, worn look
  • Once paste has cooled, replace stencil over paste and buff on Metallic Lustre™ all over 
  • Using PITT pen, outline the entire pasted design and color the keyhole
  • Punch three holes and add brads
  • Adhere heart to background paper
  • Stamp sentiment on wood grain paper and layer onto green mat as shown
  • Trim ribbon to fit across the front of background paper, wrap ends under each side
  • Loop twine through top of key charm and attach to ribbon as shown with knot on back of ribbon
  • Attach sentiment with foam squares as shown
  • Using PITT pen, ink key to reduce shine and age key slightly

I love the shabby chic feel of my card.  For more frilly fun, visit the rest of the "A" team: 
Thanks for stopping by!  I hope you like my card and found a little inspiration here today.  If so, I would love for you to leave me a comment and tell me what you think.  If you're not one of my followers, I would love for you to consider following my blog.  I love sharing my creations!  As a matter of fact, I'll have another card on my blog tomorrow.  Hope to see you again soon!

Hugs,
Lea
Thursday, December 4, 2014

Countdown to Christmas

In a flurry of a hurry? This month the Dream Team is all about the Quick and Cute...whether that be cards, gifts, wrapping, or tags...we have sleigh-loads of ideas! Play along by posting your creations using the Inlinkz tool on the Dream It Up! blog, for a chance to win the stencil of your choice, and a possible bonus stencil for using Dreamweaver products in your Quick and Cute project! Here's what fun I've been up to this week and I have the pictures to prove it!

 I started out with a plain wooden plaque I've had sitting around for awhile.

 Using DecoArt® Gesso, I covered the entire front of the plaque.

 Once the gesso dried I added two coats of Americana® Navy Blue acrylic paint and two coats of Americana® Multi-Surface Satin™ in Cottonball making sure to leave a little texture in the white.

 Next, I added a small paper mask to keep that area clear of paste and then I pasted my stencil, LG645 Snowman, and additional snowflakes around the snowman with white paste.  Once pasted, I removed the mask and set it aside to dry.  After it dried, I applied a coat of Americana® Clear Chalkboard Coating™ and set it aside to dry one more time.


Once it was dry, using a piece of chalk, I wrote the number 21 and some other "snowflakes" for my countdown to Christmas day!  A fun and easy project, just be sure you have drying time between layers!


I'd love to receive a comment from you before you head on to the rest of the "A" team:
 
 
Thank you for stopping by and taking a look at my project for today.  I hope it has given you a little inspiration for an easy gift you can make for teachers, neighbors, friends or for yourself!  Have a wonderful day!

Hugs,
Lea


Sunday, May 4, 2014

ICE, ICE, BABY!

So, is the song running through your head?  You know the one!  It runs through mine every time I create a project using ICE Resin®.  It drives me nuts!
ICE_Resin_Blog_hop

We're so glad you could join us this weekend for the Stampendous® Stamps, ICE Resin® and Imagine Crafts®/Tsukineko® Blog Hop! We've seen some amazing projects so far, and there is a lot more to come today! If you missed Thursday's post you can find it HERE, Friday's post is HERE, Saturday's post is HERE.   I've created a couple of projects for you.  Here's my first project I've created:


This project uses the medium scrolled heart from RUE ROMANTIQUE!  It's designed to use it as a pendant, however, I've added ribbon that was included with the bezel and added a pin back to it to wear it as a pin.  I love the vintage feel of it.

Here's what I used to create this project:

ICE Resin®
ICE Resin® RUE ROMANTIQUE❤️ Medium Scrolled Heart Bezel
Stampendous® Stamps Vintage Ladies Perfectly Clear Stamps™ Set (Rose)
Stampendous® Stamps Royal Heart Quotes Perfectly Clear Stamps™ Set (Love)
Stampendous® Stamps Fran•táge™Red Crushed Glass Glitter
Imagine Crafts® / Tsukineko® Memento™ Tuxedo Black
Imagine Crafts® / Tsukineko® StazOn™ Jet Black
Copic® Markers - R33, 35, 37, YG93, 95
Neenah® Classic Crest™ Natural White
Beacon Adhesive® Fast Finish™

I also created this this fun keychain (which could easily be transformed into a fun pendant)!  I recently did a canvas and used the larger version of the paintbrush stamp and dripping paint.  I decided to use the smaller version in this heart bezel and drip even more paint.  I love how the paint pooled into the bottom of the heart!  I scattered the fragments around to add more color and stuck to using primary colors.


Here's what I used to create this project:

ICE Resin®
ICE Resin® Mixed Metal Hobnail Heart Bezel, Antique Linen
Stampendous® Stamps Charmed Art Perfect Clear Stamps™ Set
Stampendous® Stamps Royal Heart Quotes Perfectly Clear Stamps™ Set
Stampendous® Stamps Fran•táge™ Color Fragments in Purple
Stampendous® Stamps Fran•táge™ Color Fragments in Canary
Stampendous® Stamps Fran•táge™ Color Fragments in Leaf Green
Stampendous® Stamps Fran•táge™ Color Fragments in Scarlet
Stampendous® Stamps Fran•táge™ Color Fragments in Marine Blue
Imagine Crafts® / Tsukineko® Memento™ Tuxedo Black
Imagine Crafts® / Tsukineko® StazOn™ Jet Black
DecoArt® Paint
Copic® Markers in E23, 25; R35; C0, 1
Neenah® Classic Crest™ Solar White
Beacon Adhesive® Fast Finish™

We know you are going to love making your own jewelry, and to make that easy we're offering a nice prize package this week!  Three lucky winners will receive a package with:

• 2 - Stampendous Perfectly Clear Stamp™ sets with designs sized for jewelry or small project making
• 2 - StazOn™ permanent ink pads by Tsukineko® courtesy of Imagine Crafts® - yummy Ganache and the must-have Jet Black
• 1 - 30ml package of ICE Resin Jeweler's Grade Self-Doming resin
• 1 - pkg Suzan Lenart Kazmer Art Mechanique Silhouettes in Heart Shape
• 1 - pkg Kristen Robinson Rue Romatique bezel(s) (styles vary). WOW!! You'll be crafting some awesome jewelry in no time!

prizepackICE

How to Hop:

Each day we'll post the designers participating in the Blog Hop. Click on each one and check out their project. Leave a comment on their blog that lets them know you really looked at their project. We 'll draw three blogs at random from the four days, then randomly draw one commenter from each blog. You must have a U.S. mailing address to win, but we'd love for everyone to hop and comment! You can check out the Official Rules for all our contests if you have questions. We'll draw winners on Monday, May 5 and announce them Monday or Tuesday, so be sure to come back and check for your name!

So let's get hoppin! Here's who is posting today:

Stampendous

Lea Kimmel (me)

Kristine Reynolds

ICE Resin

Candy Rosenberg

Carol La Valley

Imagine Crafts

Naghma Husain

Baerbel Born

That's it for me today!  I hope you've enjoyed our hop and have commented along the way so you can win!  Thanks for stopping by and I'll see you again soon! 

Hugs,
Lea


***Blog Hop Hint - if you click on a link that takes you to a page saying something like, "Sorry this page cannot be found," just click on the header at the top of the blog (usually a picture, or the blog's name), and it will take you to that blog's most recent post. That post *should* be our hop. If not, you can probably scroll down a short way to find the hop post.