Showing posts with label Queen and Co. Show all posts

Thursday, December 12, 2013

Joyeux Noël!

Merry Christmas for those of you that don't speak French!  Such a beautiful language and a lovely way to say Merry Christmas!  This month at Dreamweaver Stencils©, we're showcasing quick and easy cards, tags, and whatnot because, by now, the time crunch is biting down!  I know it is for me!  Here's my project for today, a very simple Christmas card that can be done in a flash!


Here's a list of what you'll need to create this card:

Dreamweaver Stencils© LM 2017 Joyeux Noël
Dreamweaver Stencils© LJ 907 Damask
Dreamweaver Stencils© Matte Black Embossing Paste
Stampendous® Clear Embossing Powder
ClearSnap® ColorBox® Red Pigment Ink Pad
White Card Stock
Green Card Stock
May Arts Black Silk Ribbon
Queen & Co. Clear Rhinestones
3L® Scrapbook Adhesives® My Stick™ Permanent
Glue Dots

Here's what I did:

Tape Damask stencil to white card stock and brush stencil red ink over entire stencil to create background
Cover inked paper with clear embossing powder and heat emboss
Trim embossed background on all four edges where the stenciling stops
Tape sentiment to white card stock and paste emboss, set piece aside to dry
Create card base from green card stock with a tent fold
Attach embossed background to card base
Create bow and set aside
Once sentiment is completely dry, trim to desired size
Create a mat for the sentiment from the green card stock and adhere the two together
Attach matted sentiment to card base
Attach bow with a glue dot just below the sentiment
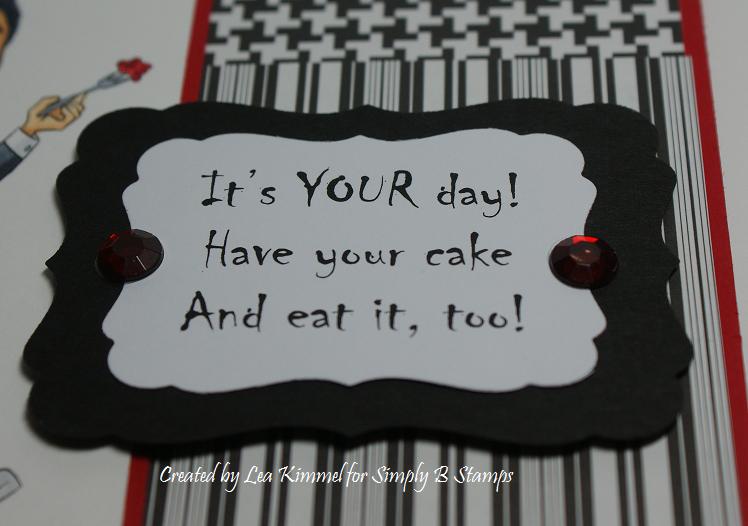
Attach two rhinestones over the "e" in Noël covering the diaeresis (the two dots, see close-up below)


I wanted to use the clear embossing powder over the ink to give it a pretty shine and I can tell you, I'm not disappointed!  It's really so much prettier in real life!  Here's the list of my teammates that are playing along, please check out their creations and it's always nice to leave a little love along the way!

Dream It Up!
Lea Kimmel
Louise Healy
Stacey Rumsby
Terrece Siddoway
Pam Hornschu 


Thanks for stopping by today and would love for you to stop back by tomorrow for my next project as part of a blog hop!  Fun stuff!

Friday, July 26, 2013

Float, Float On...

Are you loving the new additions to the Stampendous family?  We are!  Seriously, I just love these little guys!  They're all adorable and my new favorite changes daily!  Today is Fall Float with Monica and she's just the cutest little critter!  I love her!


Items used for this card:

Fall Float
Gold Encrusted Jewel Kit
Crystal Micro Glitter
Neenah Classic Crest
Bazzill
Echo Park Fall Fever
Memento Tuxedo Black
Copic Markers
May Arts Ribbon
Queen & Co. Pearls


For more samples and inspiration, check out the Stampendous Blog and Jennifer's blog with the links below:

Stampendous Blog
Jennifer Dove

It's fun in the sun time again with another collaboration between Stampendous and Dreamweaver Stencils! We'll be playing together all next week, with a fabulous hop on Friday, August 2nd, featuring a slew of amazing talent from both teams, and of course...prizes!!!

Two prize packages will be given away for the comments left on posts Monday-Thursday, July 29th - August 1st, and one prize will be given away for comments left on the hop day, Friday, August 2nd. Winners will be selected randomly and announced Thursday, August 8th. (Note: USA addresses only, please, due to shipping costs.) Here's what you could win:


Stampendous Surfer and Sandcastle Kiddos • Dreamweaver Hot Air Balloon, Ice Cream Cones, Summer, Mosaic Swirls, Bird Words, and Sandcastle stencils  


I hope you like my little creation!  Don't forget to drop by next week for more stamping and stenciling inspiration.  Thanks for stopping by!

Hugs,
Lea

Monday, November 5, 2012

Happy Birthday!

Last week was Fran Seiford's birthday.  In case you don't know, Fran is the owner and artist behind all those wonderful stamps at Stampendous.  Happy birthday, Fran!  Anyway, some of us made cards to celebrate her special day and this is the card I created.


The top layer of the cake comes out since I made the bottom layer a pocket!  These cute candles are from the Fifteen Candles Perfectly Clear Set.  I also used a selection of Stampendous glitters, each candle is a different color.


And when you untie the top layer and open it up, it's a mini card with in a card!  I used Timeless Twine to tie the card.  There's a method to my madness, I add the twine to keep the top layer from sinking too far into the bottom layer.  I used Beacon's Zip Dry to adhere the Multi Ultra Fine Crystal Glitter to the drippy goo icing!


And here's the inside sentiment!  This stamp is from the Party Invite Perfectly Clear Set, one of my all time favorites!

Other products used:

Bazzill Paper
Bo Bunny Dots
Bella Blvd Sugar Rush
EK Success Daisy Chain Punch
Martha Stewart Drippy Goo Punch
Queen & Co. Pearls

This is a simple but cute card and I do hope you like it!  Thanks for stopping by and sharing in my love for all things Stampendous!  Have a good day and I'll see you back here soon!

Hugs,
Lea

Friday, February 24, 2012

Spring Cleaning has Sprung at SBS!

Spring is almost here, that means it's time to do a little cleaning and make room for our upcoming Halloween, Christmas, Summer, and other fun little releases at Simply B Stamps! I know we're jumping the gun, and it's not even the weekend at the moment when sales usually start, but hey that's what makes us SBS right? We march to the beat of our own kooky drum!

Today through Feb. 29th take 30% off any $25 or more purchase (CANNOT BE APPLIED TO DIGIS)! Won't you help me spread the word and Spring Clean!?? Use Coupon code SpringCleaning!

Here's a little bonus... LIMITED DIGI release! Only 2 days of these Cah-UTE Digis:

The Bettys Series 2

(Please remember the discount of 30% does not apply for digis, to avoid mistakes all digis will be emailed manually and directly from Betty after she receives notification of your digi purchase.)

Left to Right... Scrapbooking Betty, Nurse Betty, UK Betty, Hogwarts Betty, Liberty Betty, Bikini Betty, Morning Betty, and Just Betty

Aren't they the CAH-UTE-EST! You can find them here: The Bettys 2

Grab them while they are digis you digi lovers!!!

Here's a simple little card I did using Bikini Betty.  My image is on Neenah and colored with Copics. My base is Bazzill cut to a 5 1/2" square.  The patterned papers are from an Echo Park Splash 6x6 pad.  My bottom layer is cut to a 5 1/4" square.  I cut a strip of the polka dot paper that's 5 1/4" wide and 3 1/4" high.  I framed my image with a rectangle of the same Bazzill I used for my base.  I pop-dotted the image on and added the three flowers and their bling. 


This is my interpretation of the Scrappy Chick Sunday Sketch Challenge 05 that Cyndi Bundy has posted on her blog.  She has great prizes and would love for you to play along with me!  Thanks for stopping by to take a look and I hope to see you again soon!

Hugs,
Lea

Wednesday, February 22, 2012

Hydrangea Hope

Hello!  Welcome back!  Today I would like to share a card with you that started out with very different intentions.  By that, I mean I intended to do something along the "Fran-tage" line as in the rose card from the previous post.  However, as I started putting my card together, I decided to make it a little more spring-like and a lot cleaner than the shabby chic feel I was originally intending.  I stamped my Stampendous! Cling Jumbo Hydrangea stamp on Neenah Classic Crest with Memento Tuxedo Black ink and colored my image with Copics G0000, G00, B41, V0000, V01, YG61, YG63, and YG67.  Here's how it turned out:


I was pleased with my results and then I started my hunt for paper.  Ordinarily I pick out my papers first and then color.  I'm really not sure why I didn't do that this time but I really couldn't find any papers in my stash that were worthy of such a beautiful image.  (Actually, I couldn't find any that matched!)  That meant having to go to Enchanted Cottage on my lunch break to see what I could find.  Well, I found three papers that I thought would make a lovely combination so I bought them and as soon as I got home from work, I hit my stamp room determined to make another "Fran-tage" beauty.  The more I looked at the pink patterned paper from Creative Imaginations, the more I wanted to use the touching "Hope" message printed there.  I'm a cancer survivor so this is something near and dear to my heart.  I cut out my image and started playing around with the paper but I just couldn't get it configured in a manner I felt was right for "Fran-tage."  I had cut my base to be a 6" square from Bazzill.  I cut my bottom layer of patterned paper from Creative Imaginations in a 5 3/4" square.  I cut two strips of the green Karen Foster patterned paper about an inch wide and I then edged each strip with a Martha Stewart punch.  From my Creative Imaginations "Hope" paper I cut my middle panel to fit the word across the bottom section.  I adhered the punched strips to each side of the top layer and centered both top and bottom layers on my base.  In order to add some texture to my image, I added some of the new fresh green and lavender crushed glass glitters from Stampendous!  I used glossy accents to hold my glitter on and as soon as it was dry enough, I pop-dotted my image onto the card.  I added a little sheer pink ribbon with a pearl as an accent.  I chose the pearl because even with something as small as a grain of sand irritating the oyster, something as beautiful as a pearl can grow.  There are many things in life that irritate us but we can still radiate beauty from within if we choose to.  I would like to think that because of my cancer, I'm now able to see more of the beauty in life around me.  I still tend to rush through my days sometimes but I'm far more aware of my surroundings and of how blessed I am with God's grace to still be here.  So, without further ado, here's my card.  I hope (no pun intended) that you like it.


As I said in the beginning, this isn't exactly what I had in mind when I colored my image but I'm really pleased with the way it all came together.  I'm entering my card in the Stampendous! texture challenge for this month on their blog and if you haven't play along, you should!  Well, folks, that's it for today.  I hope to see you back soon.  Thanks for stopping by!

Hugs,
Lea

Tuesday, February 7, 2012

It's Miller Time!

Miller Munster, that is!  Yes, he is the newest image in Simply B Stamps Teen Scene Birthday Munsters Collection being previewed today.  He is just the cutest little thing and so takes me back to my days of watching the Munsters on TV as a little girl.  I used to love that show!  Shucks, I would still watch it if I could!


I decided to keep him somewhat monochromatic with just a touch of red.  This wasn't the direction I intended to go in initially, but this is where I ended up!  The red and black papers are Bazzill and the patterned papers are from Me and My Big Ideas Black and White Color Basics pack.  My image and sentiment are on Neenah.  My image is colored with Copics and layered on red.  My sentiment is one I created on Microsoft Publisher and printed out.  I used a Spellbinder's Nestie to cut it and the black layer out.  I added the dark red rhinestones for just a little color and bling.  Here's an angled shot to better show the color.


I put all my layers together and, voila!, a cute little card that is just right for one of the guys and not too girlie.  I do hope you will check out the blog, simplybettystamps.blogspot.com and see the other cards created by the design team.  They are awesome!  Thanks for stopping by and please come back tomorrow for another sneaky peek!  'Til then, cheers!

Hugs,
Lea


Thursday, December 8, 2011

My Favorite Things - Flurry of Love

I fell in love with this cute little set the minute I laid eyes on it and had to add it to my ever growing collection of My Favorite Things stamps.  There's just something about this Pure Innocence line that really appeals to me.  This card is definitely in the Cute and Simple (CAS) category of cards.  Some days you just NEED cute and simple!


I stamped my image with Memento's Tuxedo Black ink on Neenah Classic Crest and colored it with my Copics.  Once the image was colored, I went over the "furry" parts of her hat and boots and all of the snowflakes with my Marvy Snow Marker.  Once the "snow" dried, I heated it up with my heat gun to get that nice velvety raised look.  I layered my little cutie on Bazzill and Little Yellow Bicycle papers pop-dotting my image and the green layer right behind her.  I used my MFT snowflake die and cut my three snowflakes out in white and one little one in my blue Bazzill then pop-dotted the snowflakes.  I decided to add just a little bling from Queen & Co. and that really polished the card off without going overboard.  So there you have it!  One CAS card coming right up!  Thanks for stopping by to take a look and if you have time, let me know what you think.

Wednesday, November 30, 2011

Pan Slingin' London


Sizzle, sizzle, sizzle!  Today we are previewing Simply Betty Stamps Pan Slingin' London, fourth in the Teen Scene Kitchen Fun collection.  Isn't she a hottie!?  I thought she looked sassy and certainly too cute to be cookin'!  I thought she kind of had that look like "you want me to do what with what?" 


My image is on Neenah and colored with Copics.  I cut the image out with a Spellbinder's Nestability and inked the edge with Tim Holtz Distress Ink.  The base of my card is Bazzill with layers of Doodlebug Designs and EK Success (the green one) papers.  I added some Prima flowers with Queen & Co. rhinestones.  I typed up my own little sentiment in MS Word, layered it and pop-dotted it on.  She is sizzlin'! 

¡Buen apetito!  (in Spanish)