Showing posts with label Spectrum Noir. Show all posts

Friday, August 7, 2015

Let's Create Fall

Hello there!  For this week, the Stampendous Design Team has been sharing projects made with our new Cling Create Fall set.  This stamp set has a matching set of dies so you can cut out your pieces, however, I decided to do a little no-line coloring for my card today.


Here's what I used to create this card:

Memento™ Tuxedo Black, Cantaloupe, Gray Flannel, Bamboo Leaves and Olive Grove
Orange Cardstock by Bazzill Basics Paper®
Spectrum Noir™ Markers
Copic® Markers
Tim Holtz® Distress Ink in Tumbled Glass and Peeled Paint
May Arts Ribbon® Orange and White Baker's Twine
Zip Dry™ Paper Glue by Beacon Adhesives

Here's what I did to create this card:

Stamp cat with gray ink, add mask over cat and stamp large pumpkin with light orange ink
Add mask over large pumpkin and stamp small pumpkin, stem and vine
Stamp faces inside pumpkins with light orange ink
Color images with markers, using green marker, freehand a few extra vines
Using green ink, stamp grass
Add green and blue distress inks
Stamp sentiment with black ink
Create A2 card base with a tent fold
Adhere image to card base
Wrap twine around inside/top of card and tie ends into a bow

Here's a list of my teammates that are playing along today, take a look and leave them some love:


Thanks so much for stopping by today!  I hope you've enjoyed our versions of Fall this past week.  We've had fun sharing with you!  Have a wonderful weekend!

Hugs,
Lea

Thursday, August 6, 2015

Festive Fall

Hi there!  It's Stampendous Dreamweaver Thursday and this week we're celebrating Fall.  My card today uses The Great Pumpkin stencil, one of my favorite fall Dreamweaver Stencils.  I also used one of my favorite techniques, airbrushing onto a glittered sticky panel.  I'm a complete sucker for anything sparkly and there's nothing with more sparkle than the Multi Fine Crystal Glitter from Stampendous.  I love that glitter in all it's forms, Fine, Ultra Fine, Medium and Micro; it's simply stunning!  Here's my card for this week, I apologize in advance for the slight shadowing on the right side but it's hard to get a good picture with so much sparkle going on.


Here's what I used to create this card:

Bo Bunny Apple Cider Collection
Light Orange Cardstock by Bazzill Basics Paper
May Arts Ribbon
Zip Dry Paper Glue by Beacon Adhesives

Here's what I did to create this card:

Cut a piece of sticky panel to fit the stencil and cover with crystal glitter
Place stencil on panel and airbrush by masking off sections and doing the smaller sections first
Once airbrushing is complete, go back and add detail and shading with markers (you must use quick flicks and strokes as the alcohol can affect the adhesion of the glitter)
Trim other layers of patterned paper as shown
Create a card base and a mat for the stenciled piece from solid cardstock
Adhere layers as shown
Create bow and attach to front of card

Here's a list of my teammates that are playing along today:


That's it for me today.  I hope you enjoy the card I created and hopefully it will inspire you to create a little fall of your own.  I'll see you again tomorrow with some more fun fall inspiration.  Have a wonderful day!

Hugs,
Lea

Friday, March 20, 2015

Easter Cupcake

All week long the Stampendous Team has been sharing projects created with our super cute Easter stamps.  Today I'm sharing a card created with Easter Cupcake:


This is what I used to create this card:

Stampendous® Jumbo Perfectly Clear™Acrylic HandleCardstock by Bazill Basics Paper®Patterned Paper by Doodlebug Design, Inc™Classic Crest™ Solar White Cover Stock by Neenah®Ribbon by May ArtsAction Wobble®Spectrum Noir™ Markers (PP1; BP1, BP2; GB5; OR1; CG1, CG2; IB1, IB2; IG1)3D Foam Squares by Scrapbook Adhesives™Zip Dry™ Paper Glue by Beacon Adhesives

This is what I did to create this card:
  1. Stamp three cupcake images, color and fussy cut each image.
  2. Create A2 card base with a landscape tent fold.
  3. Trim patterned papers as shown.
  4. Create mat for top layer of patterned papers with same Bazzill® paper and adhere to top patterned paper.
  5. Create bow with tails long enough to reach around sides of matted top layers and adhere to back.
  6. Adhere bottom patterned paper to card base.
  7. Adhere top matted pieces to card.
  8. Using foam squares, attach the outer images to the card.
  9. Attach an Action Wobble® to the middle image and then attach to card.
Several of my teammates have projects for your viewing pleasures, so, be sure to check them out:

Amy Hurley-Purdie (2nd project)

Thanks for stopping by today!  I hope you've enjoyed our week of Easter inspiration.  Next week will be a busy one so please check back frequently for more posts.  Have a wonderful day!

Hugs,
Lea

Friday, March 6, 2015

Home Sweet Home

This week Stampendous has been showcasing our cute new house stamps.  I've used the Family Home Perfectly Clear Stamps Set for my card today and it's just an incredibly cute set with great sentiments!  You can see for yourself here!  Here's my card:


Here's what I used to create this card:

Tim Holtz® Distress Ink in Tumbled Glass, Peeled Paint and Shabby Shutters
African Daisy Yellow Cardstock by Bazzill Basics Paper®
Neenah® Classic Crest™ Solar White Cover Stock
May Arts® Black Grosgrain Ribbon
Gelly Roll White Gel Pen
Beacon® 3-in-1 Craft Adhesive
Tombow Mono Adhesive Temporary Adhesive
Scrapbook Adhesives® 3D Foam Mounting Squares

Here's what I did to create this card:

Stamp images, color with markers and trim to fit on an A2 card base
Create a horizontal A2 card base with a tent fold with yellow cs
Stamp an additional set of images, cut out to create a mask for each image
Using temporary adhesive, cover each image and add distress inks for grass and sky
Trim a piece of black ribbon and add white lines to create a "road"
Adhere ribbon across image panel as shown
Stamp sentiment on white cs and trim as shown
Create a mat for sentiment with yellow cs and adhere the two 
Adhere main image to card base
Attach sentiment as shown

I love the clean and simple look of this card and the bright, happy colors.  I'm pretty much in love with my ribbon road, too!  Thanks for stopping by today, I'll see you again soon.  In the meantime, have a wonderful day!

Hugs,
Lea

Friday, September 26, 2014

Got Skulls?

If you don't, Stampendous does!  We've got an amazing assortment of Halloween stamps; there's something for everyone!  This week we're showcasing our awesome selection of skull stamps.  Here's my "ghoulish greeting" that's sure to treat even the scariest of tricksters!


This is what I used to create this card:

BasicGrey® Eerie 6x6 Paper Pad
Bazzill® Cardstock
Neenah® Classic Crest™ Solar White Cover Stock
Spectrum Noir™ Markers - True Black and CG2
May Arts Ribbon®
Tim Holtz® Distress Inks® - Black Soot and Shabby Shutters
Beacon® Adhesive Zip Dry™

This is what I did to create this card:

Using Boss Gloss, ink Skull Stack stamp and stamp onto white cs, add embossing powder and heat
Repeat this process for the Lady and Jack stamp and the sentiment
Inking just a corner of the Skull Stack stamp, repeat above process using Lettuce embossing powder
Add distress inks around edges of sentiment, skull background and fussy cut skulls
Fussy cut Lady and Jack stamp and remove pumpkin
Fussy cut green skulls as shown
Add green ink to dress pieces
Layer sentiment and skulls as shown
Create card base with a tent fold
Trim patterned paper as shown
Trim skull image edges and adhere to patterned paper
Trim away some of the ribbon so that it's somewhat wavy, adhere to patterned paper layers as shown
Adhere all pieces as shown

That's it for me today!  I hope you've enjoyed all the fun skull inspired cards this week.  They're perfect for making the coolest, creepiest Halloween cards ever!  Thanks for stopping by and I'll see you again soon.  Have a blessed day!

Hugs,
Lea


Thursday, September 18, 2014

Frosty the Snowman

Where did the summer go? Kids are back in school, with all the insanity that goes with it, vacations are a not-so-distant memory, and it is once again time to get busy with the important things in life...crafting for the holidays! Yay! All of September the Dream Team will be featuring all the new goodies we have for the "Most wonderful time of the year", the fall and winter holiday season. New stencil designs, new dies, and...brand new embossing folders featuring some of our top-selling designs, all to be found on-line through the Stencil with Style web-site, or your local papercrafting store.
 
Here's my holiday inspiration for this week:


Here's what I used to create this card:

Add A Little Dazzle Wondrous White Metal Sheet
Little Yellow Bicycle® Winter Twig "Ski Sweater"
Bazzill® Cardstock
Crystal Stickles®
May Arts Ribbon® Bakers Twine
Spectrum Noir™ Markers:  OR1, IG8, True Black, CR8, CR11, IB2
Copic® Markers:  E25, E27, BG01
Beacon Adhesives® Zip Dry™
Foam Mounting Squares

Of course, we have our monthly challenge for you to play along, so post your own holiday creations, and use the Inlinkz tool on the Dream It Up! blog, for a chance to win the prize at the end of the month. We also have our fabulous Guest Designer for the month of September, Wendy Price! Here's the list of our "A" Team with their links for the week:


Thanks so much for stopping by today!  I hope you enjoyed my simple little Snowman card.  It's simple but fun and I sure had a good time creating it.  I'll have another Stampendous post tomorrow so please come and check it out.  Have a blessed day!

Hugs,
Lea

Friday, September 12, 2014

I Vant Candy!

Okay, so for the past few days I've been singing "I want candy," but, I've been singing it like The Count on Sesame Street.  "I vant candy!"  Yeah, I'm a dork, but, at least I'm a crafty dork!  LOL!  I absolutely LOVE Halloween!  It is my favorite holiday.  It's so much fun and for a whole day you can be whoever or whatever you want to be.  Now how fun is that?!  It's almost as much fun as this card and these wonderful Stampendous Stamps and Essentials I've used.  Here's my card:


This cute little guy has already been hitting the chocolate, can you tell?  LOL!  I couldn't resist adding a little chocolate-ty goodness around his mouth.

Here's what I've used to create this card:

Memento™ Grape Jelly Dew Drop Ink Pad
Memento™ Tangelo Dew Drop Ink Pad
Spectrum Noir™ Markers:
  • GB1, 2, 3
  • BG2, 3, 4, 5
  • FS1, 3, 4
  • HB1, 3
  • LV2
  • OR1 
  • IG1
  • EB6
  • CT3

Bazzill® - Purple Cardstock
Bazzill® Bling - Orange Cardstock
Neenah® Classic Crest™ Solar White
May Arts Ribbon® Satin String Striped Ribbon
Beacon Adhesives® Zip Dry™

Here's what I did to create this card:

Cover background stamp with embossing ink and stamp onto white cardstock
Add the two embossing powders and embossing enamel over stamped image and heat emboss
Stamp mouse image, color, trim and ink edges
Stamp sentiment, trim and ink edges
Add orange and purple ink to background image
Create card base from purple cardstock
Trim orange cardstock to fit as shown
Adhere all layers as shown
Attach color fragments with glue as shown
Tie ribbon into knot around top of card

It's hard to not have fun when you're creating with such great products!  I do hope you like my card and that it's given you a little fright night inspiration!  Thanks for stopping by and I'll see you again, soon.

Hugs,
Lea

Wednesday, September 10, 2014

Wicked Wednesday and All Dressed Up

Hello there!  It's Wicked Wednesday ATC Challenge Blog time and this week our sponsor is All Dressed Up Stamps with a theme of our favorite color combo.  The little cutie I've used today is called Fairy Magic and I absolutely love her!  Every All Dressed Up image is just as cute as this one.  Here's my ATC:


Here's what I used to create this ATC:

All Dressed Up Stamps Fairy Magic
Making Memories® MM Kids™ Collection - Emma (Green Gingham)
MemoryBox® Viola Collection
Bazzill® Cardstock
EK Success® Scallop Edge Punch
Stampendous® Lavender Micro Glitter
VersaFine™ Onyx Black Ink Pad
Beacon Adhesives® Zip Dry™
Spectrum Noir™ Markers:

  • FS1, 2, 9
  • CR3
  • GB2, 8, 10
  • EB1, 2
  • TB1
  • HB1, 2, 3
  • LV2
  • LG1, 2, 3, 4, 5, 


Here's what I did to create this ATC:

Print digital image and color girl and butterflies
Fussy cut girl and three butterflies
Trim ATC base to size
Trim patterned papers to fit as shown
Edge punch purple paper
Adhere patterned papers as shown
Adhere girl
Attach butterflies leaving one side of wings unglued
Add a trail of glue behind each butterfly and add glitter
Stamp sentiment in lower right corner

I have to say, I loved, loved, LOVED creating this ATC.  It was so much fun to use my favorite colors, too.  You really should play along with us this week and share your favorite color combo, too!

Thanks for stopping by today.  I'll see you again soon.  Have a blessed day!

Hugs,
Lea

Wednesday, September 3, 2014

Wicked Wednesday with Lacy Sunshine Stamps

It's Wicked Wednesday ATC Challenge Blog time and this week our sponsor is Lacy Sunshine Stamps with a Fall Fun theme.  The image I've used is Kenna Wicked Witch.  Here's my ATC:


Here's what I used to create this ATC:

Neenah® Classic Crest® Solar White Cover Stock
Graphic 45® Haunting Halloween
Bazzill® Cardstock
Beacon® Adhesives Zip Dry®

Here's what I did to create this ATC:

Print image, trim to desired size and color
Trim patterned paper and ATC base
Adhere all layers as shown
Stamp sentiment onto image as shown
Attach fragments with glue

That's it for this Wednesday!  Hope you like my cute little image!  Be sure to check in with me on Thursday for my Dreamweaver Stencils post!  Have a blessed day!

Hugs,
Lea


Thursday, August 28, 2014

Wicked Wednesday...mmm...Thursday!

Yes, it's my Wicked Wednesday ATC Challenge Blog post, and, yes, I know it's Thursday!  May I just say that the first week of school has been somewhat hectic and we'll leave it at that!  So, this week our sponsor is DRS Designs and with some beautiful blooms!  I've used Broken Flower Fence for my ATC.  There was just something about this little desert scene that took me back to when I lived in Colorado.  Some of the prettiest skies I've ever seen were there.  I tried to bring the colors from my memory into this little card, from the soft clay color of the dirt to the lavender and blue sky I marveled over most sunrises and sunsets.  I was truly blessed to live there and take in so much natural beauty!


Here's what I used to create this ATC:

Neenah® Classic Crest™ Solar White
Bazzill® Cardstock
May Arts Ribbon® - Natural String Burlap Ribbon
Beacon® Adhesive Zip Dry™

Here's what I did to create this ATC:

Stamp image, color and trim to desired size
Stamp sentiment in upper right corner of image
Trim base to ATC size
Adhere image to base
Wrap ribbon around bottom of card multiple times, trim and tie bow

So, that's my ATC for this week, we would love for you to play along with us.  Let us see your beautiful blooms!  Thanks for stopping by and I'll see you again tomorrow with a Stampendous post! Have a blessed day!

Hugs,
Lea


Thursday, August 21, 2014

August Splendor Canvas

As we are heading towards back-to-school again, it is only appropriate that we break out our dictionary for this month's Dreamweaver challenge..."AUGUST as an ADJECTIVE"! 
Merriam-Webster defines august as, "marked by majestic dignity or grandeur", with synonyms such as, "dignified, distinguished, imposing, portly, solemn, staid, and stately". Now, I don't know just how dignified and stately the Dream Team can become for an entire month, but we are all going to give it a try! How about trying along with us, and linking YOUR creations to the inlinkz tool below for a chance to win the wildest stencil design your little heart is screaming for. 

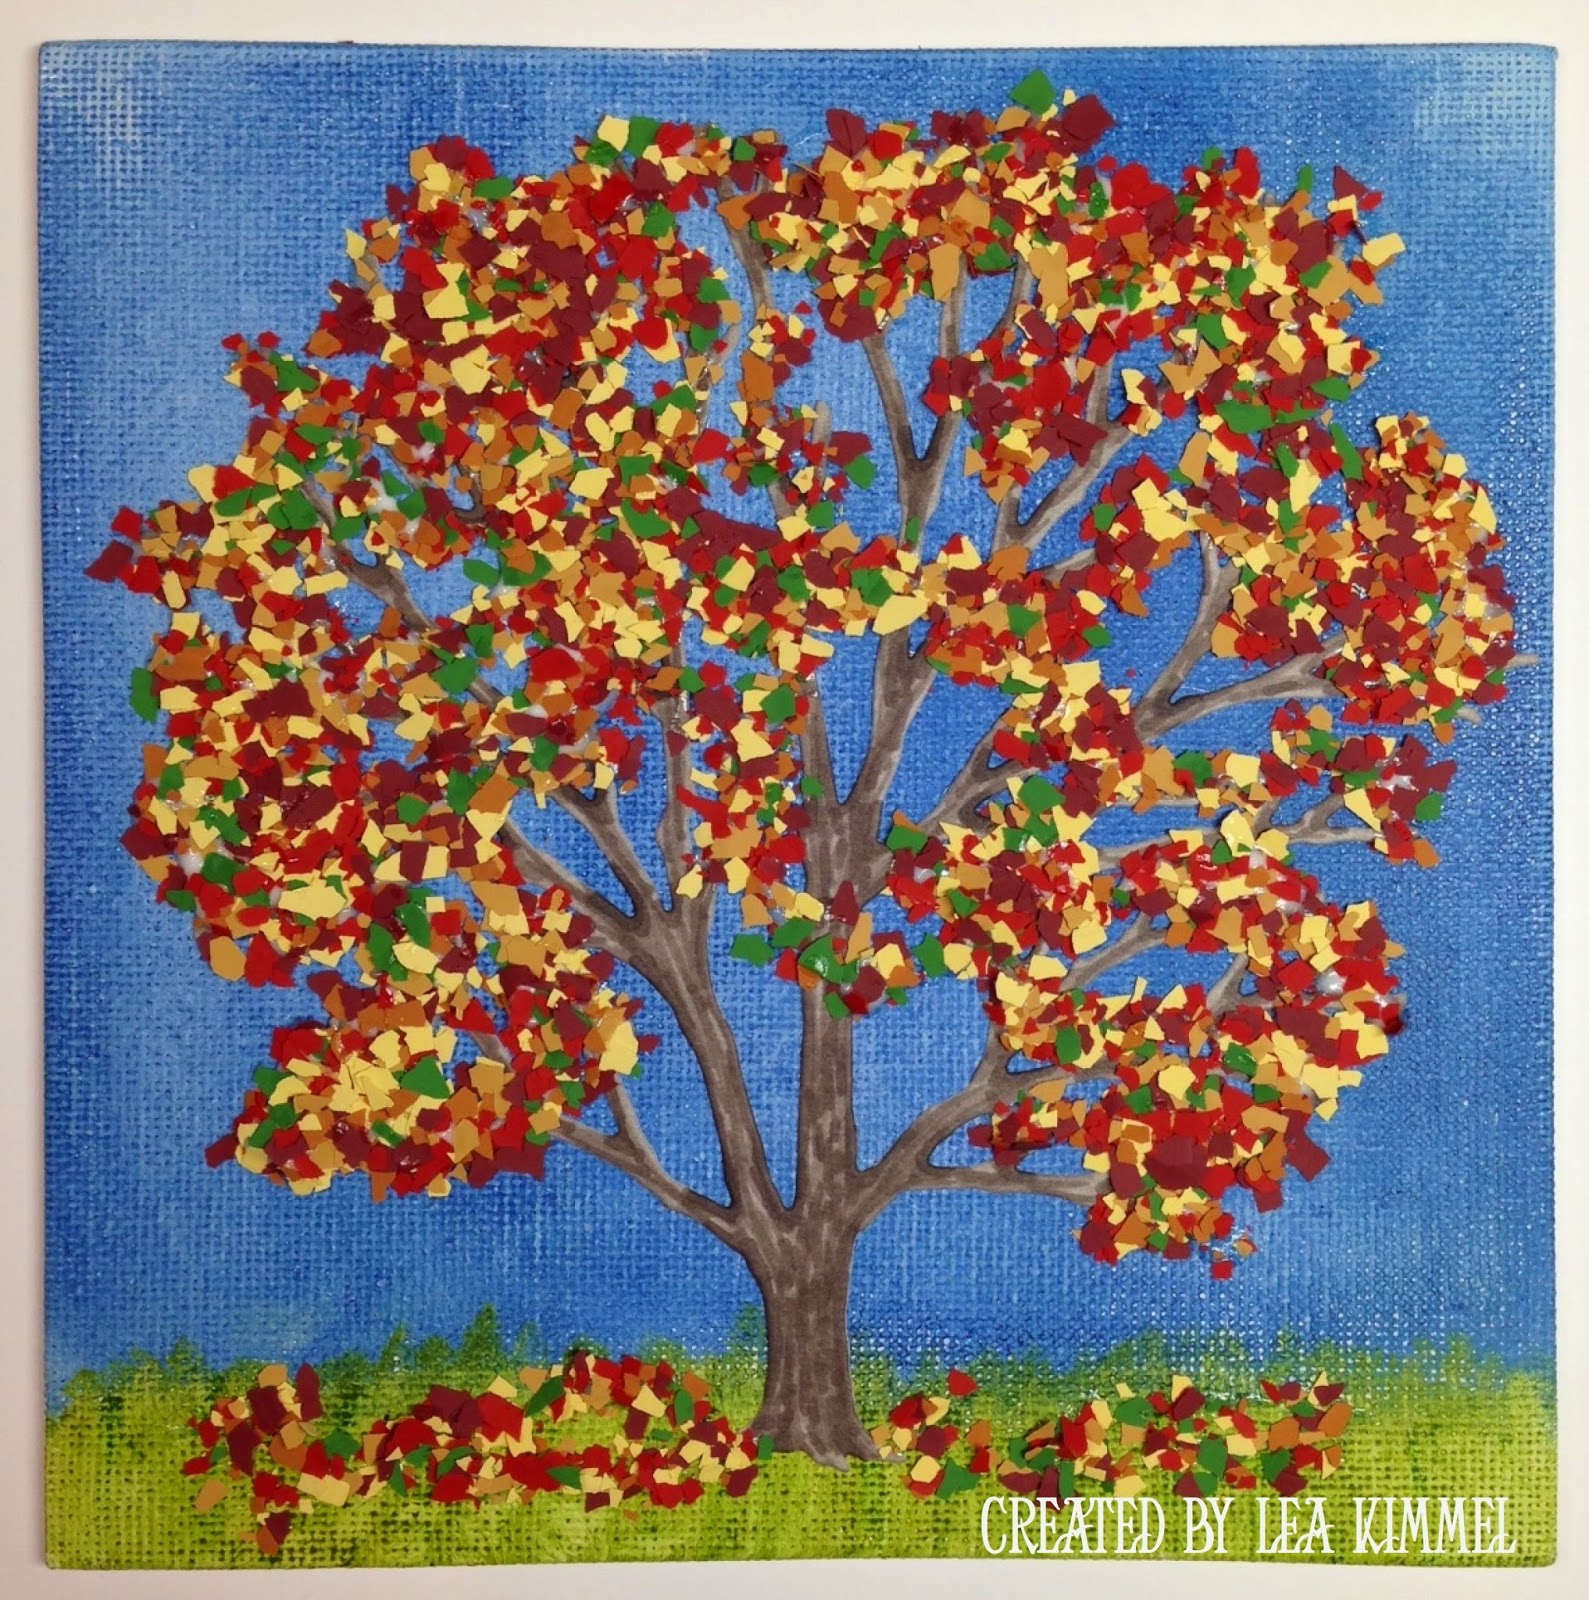
So, my question to you, is there anything more majestic or grand than a huge tree?  I don't believe there is!  Yes, I have a thing for trees, I've confessed that previously!  LOL!  I'm really fascinated with their beauty and resilience.  I've done a Spring and Summer Tree before and, now, here's my Fall:


Here's what I used to create this canvas:

Dreamweaver Stencils© DX 7020 Leafless Tree Die
Dreamweaver Stencils© Memories Mists™ - Stormy Water
Faber-Castell® Gelatos™ in Pistachio and Green Tea
Stampendous® Color Fragments in Leaf Green, Canary, Caramel, Ochre, Burgundy and Scarlet
Bo Bunny® Dots in Gray
Spectrum Noir™ markers BG4, BG5 & BG6
Beacon Adhesive® Gem-Tac™
Beacon Adhesive® Zip Dry™
Artist's Loft™ 6x6 Canvas Board

Here's what I did to create this canvas:

Run gray paper and die through cutter
Add marks to tree with markers
Spritz mist onto canvas and rub in
Add Gelatos™ to bottom and mix with water
Adhere tree to canvas with Zip Dry™
Mix color fragments in a separate container
Add Gem-Tac™ glue to canvas where you want "leaves"
Add fragments to canvas, shake off excess

Here's the rest of the team posting today:


That's it for me today.  Thanks for stopping by and I hope to see you again soon.  Have a blessed day!

Hugs,
Lea

Friday, August 15, 2014

Dreamweaver and Woodware...


Yes! It's that time of year again! The time when we inspire crafters on both sides of the "pond" with a mix of both Dreamweaver and Woodware UK* products for the holidays! Six days, SIX, of beautiful, elegant, merry, cute, artsy, and craftsy projects to have you heading out to your local stores or internet sites to buy these goodies immediately!


Of course, there will be prizes as well. Three prize packages will be given to three commenters during this week's posts on the team's blogs, including five stencils and one nested die set. You can have an opportunity to win these goodies by leaving some holiday sweetness for each team member posting each day, to be one of the three winners for the week. Here are the team members that are inspiring you today:


Here's my creation: 


Here's what I used to create this card:

Memento™ Tuxedo Black Ink Pad
Ranger® Glossy Accents
Neenah® Classic Crest™ Solar White Cover Stock
Red Cardstock
Green Cardstock
May Arts Ribbon®
Beacon Adhesives® Zip Dry™
Scrapbook Adhesives™ 3D Foam Squares™
Spectrum Noir Markers:
  • IG1, 
  • DR6, 
  • CR7, CR9, CR11
  • CG4
  • DG2, DG3
  • JG5
  • FS1, FS2
  • BG1, BG2, BG3, BG4, BG5, BG6, BG7

Here's what I did to create this card:

Stamp image onto white cs by stamping off (stamp once, then stamp again for a lighter image)
Color image with markers and trim, add glossy accents on eye and berries, set aside to dry
Paste emboss stencil and set aside to dry
Create card base and trim red mat for embossed piece
Stamp sentiment and trim mats, adhere together and set aside
Trim ribbon piece to fit across and wrap around red cs, set aside
Once paste has dried, trim to fit and color raised portions with markers as shown
Adhere all layers as shown
Mount bird onto card with foam squares

I did try to keep my little Robin as close in coloring to the real thing as I could, even though the image is very whimsical.  Whimsy is just a cute reflection of real life anyway!  As soon as I saw this adorable little bird, I knew I had to use this stencil with him.  They were just meant to be together!  The Spectrum Noir markers glide right over the pearlescent paste since the finish is so glossy and smooth.  Sure makes it fun to color the stencil and you don't have to worry about ruining the nibs!  Since Spectrum Noir has an awesome nature inspired monthly challenge going, I'm going to submit my card for their challenge as well.  Gives it double duty!

Thanks for stopping by today and having a look!  I hope you'll remember to comment to be eligible to win a prize!  I'll see you again soon.  Have a blessed day!

Hugs,
Lea

*For a stockist near you contact Woodware Craft Collection in the UK and Notions Marketing in the USA.

Stampendous and Authentique Hop

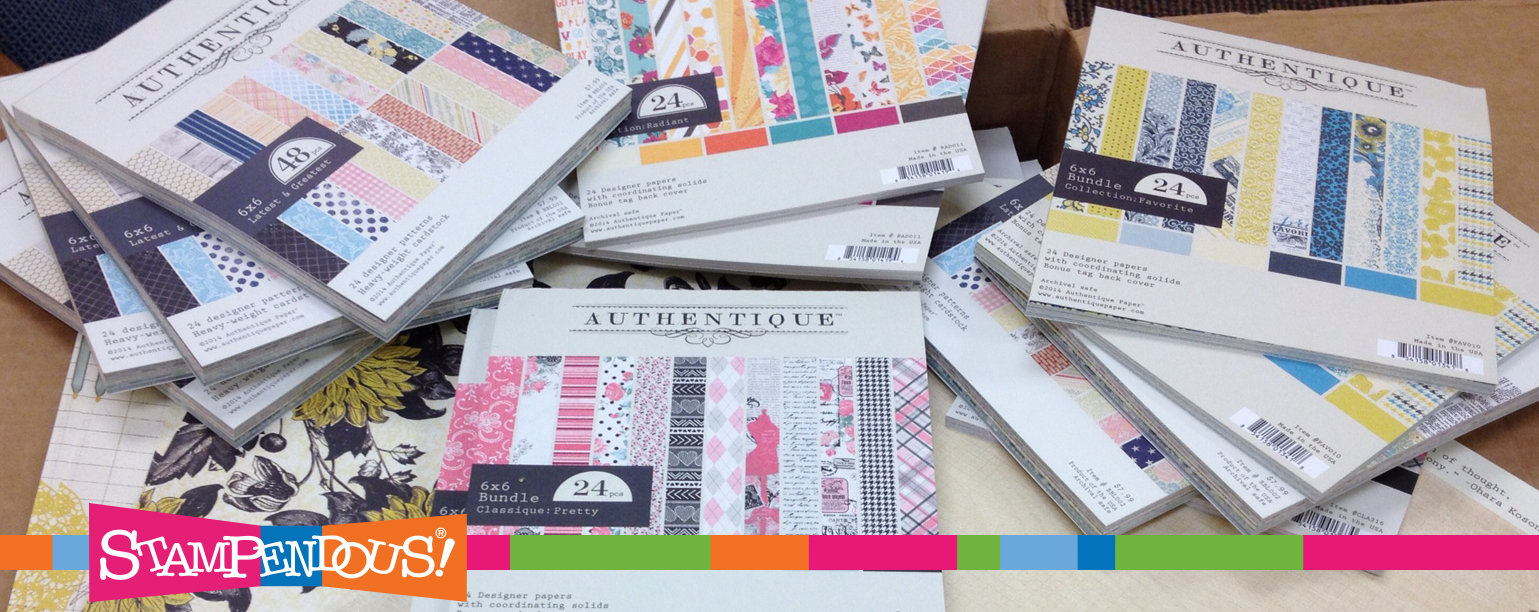
Authentique Stampendous Blog BannerToday several of our Design Team Members have a second project to show you featuring the gorgeous papers sent to us by Authentique™ Paper. These papers were intended for our BIG Blog Hop in October and our team is using them on our October Catalog Samples. But we couldn't resist sharing them just a bit early with some other images. We have a fun prize to give away this week. Only one, but it's a good one! One lucky winner will get some Authentique papers of their own, plus a $20 Stampendous Reward Card. WOW! How? Just comment on the blogs this week! Miss the earlier posts? Here they are: MONDAY, TUESDAY, WEDNESDAY, THURSDAY You have until Sunday night to comment, then Monday we'll choose one winner for the prize! So hop around and leave these hard-working gals some love on their terrific projects! (that means comment on their blogs!)


For my card today, I decided to celebrate fall in all her glory with the help of a friend.  Who, you might ask, well that would be the awesome PenPattern Owl, that's whooo!  Yeah, corny pun intended!  Anyway, here's my card and I do hope you like it!


Here's what I used to create my card:

Stampendous® Embossing Powders - Carnelian PEARLustre, Paprika, Honey
Neenah® Classic Crest™ Solar White
Tim Holtz® Distress Inks® - Antique Linen
May Arts Ribbon
Beacon Adhesive® Zip Dry™
Spectrum Noir Markers:
  • CG1, CG2, CG4
  • GB1, GB4, GB6, GB8, GB9
  • EB1, EB2, EB6, EB7
  • TN2, TN3, TN4, TN6, TN7, TN8, TN9
  • DG3
  • BG4, BG6
Here's what I did to create my card:

Stamp owl image with black ink onto cs and color
Trim image to desired size and ink with distress ink
Create card base with a tent fold
Trim patterned papers (pp) as shown and trim a piece of ribbon to fit across pp
Attach ribbon to pp and adhere pp to card base
Adhere image to pp mat and attach to card
Stamp leaf onto pp and die cut
Using Boss Gloss, add ink in steps while applying embossing powders and heat setting
Attach leaf to card
Mix the three different colors of color fragments and apply as shown with glue

So, that's my card, I hope you like it!  I'm going to enter it in the Spectrum Noir monthly challenge so be sure to check that out and you can enter it with your project, too!  Here are links to the rest of the team showcasing their projects for your inspiration:


Tenia Nelson

Kristine Reynolds

Pam Hornschu

Jamie Martin

Lea Kimmel (me)

Jennifer Dove

Thanks so much for stopping by!  I do hope you will stop by again tomorrow as the Dreamweaver Dream Team is wrapping up our week-long blog collaboration with WoodWare.  Don't forget to comment to win for today's post (and tomorrow's)!  See you then! Have a blessed day!

Hugs,
Lea

Thursday, August 14, 2014

Authentique-ly Wonderful Paper

All this week the Stampendous Design Team has been creating projects using some amazing papers sent to us by Authentique!  I love their papers, the designs, the quality, they're truly superb papers in every way!  Plus, we have a pretty cool prize for one lucky winner!  So, for a chance to win some sheets of this delightful patterned paper and a $20 Stampendous.com reward card, be sure leave each designer some love along the way!

I love Halloween!  It's my favorite holiday of the year!  When I was a kid, I thought it was awesome that I could be anyone I wanted to be for that one day.  I could be a hippie, a princess, whatever struck my fancy.  My love for it has only deepened throughout the years as I've watched my kids become whatever character they wanted to be for that day.  Now, I even have a granddaughter that trick or treats and I love buying her costumes each year.   Anyway, here's my card:


Here's what I used to create my card:

Stampendous® Crow Caw
Stampendous® Halloween Wish
Authentique™ Paper Harmony Collection's Abundance and Song
Stampendous® Aged Black Embossing Enamel
Stampendous® Detail Black Embossing Powder
Neenah® Classic Crest™ Solar White
Neenah® Classic Crest™ Natural White
Tsukineko® VersaMark™ Pad
Tim Holtz® Distress Ink™ - Antique White
Spectrum Noir Markers BG2, Blender
May Arts Ribbon®
Beacon Adhesive® Zip Dry™

Here's what I did to create my card:

Stamp images with VersaMark™ pad and emboss using Aged Black EE and Detail Black EP
Accent around images with additional Aged Black EE
Create a shadow under the bird with the markers
Trim image to desired size and ink with distress ink
Create a mat for image and adhere the two as shown
Create card base as shown with a tent fold
Trim patterned papers as shown
Adhere the two patterned papers together and attach ribbon, adhere this to card base
Using foam mounting squares, attach matted image to card

That's it for today.  I hope you've enjoyed my post and will come back tomorrow for yet another post!  Don't forget to leave me some love if you're interested in winning our prize, you must comment to be eligible.  Have a blessed day!

Hugs,
Lea

PS:  We're currently experiencing web site problems at Stampendous, please bear with us as we try to get things working properly.