Showing posts with label Basic Grey. Show all posts

Thursday, April 30, 2015

Thank Ewe!

This is a bittersweet post today for Dreamweaver Stencils, it's my last post with the Dream Team under the skillful guidance of Lynell, founder of Dreamweaver Stencils.  If you've been under a rock somewhere and haven't heard, Stampendous Stamps has purchased Dreamweaver Stencils.  Since I'm also on the Stampendous Design Team, I'm lucky enough to get to continue creating with my very favorite stencils, now combined with my very favorite stamps.  I want to "thank ewe," Lynell, for inviting me to become a part of your Dream Team!  It was a privilege and an honor to serve under you for the past two years. Lynell, I wish you and Wayne the best always and I'm sure I'll see you again!  I do hope you enjoy your new-found freedom!

In honor of our last post for the Dreamweaver Stencils Dream Team, I would like to share my first card I posted as part of this wonderful group of gals.  Details can be found here!


And here's my final post for Dreamweaver Stencils as part of the Dream Team:


Here's what I used to create this card:

Dreamweaver Stencils© LL3040 Open Sheep Stencil
Dreamweaver Stencils© DL3040 Open Sheep Die Set
Dreamweaver Stencils© Regular Embossing Paste
Plaid® Baby Pink Acrylic Paint
DecoArt® Americana® Coral Blush Acrylic Paint
Basic Grey® Olivia Paper Pad
Tim Holtz® Distress Ink in Iced Spruce
Coral Cream Cardstock by Bazzill Basics Paper®
Guacamole Cardstock by Bazzill Basics Paper®
May Arts Ribbon®
Zva Creative Crystals®
Beacon Adhesive

Here's what I did to create this card:

Trim a piece of patterned paper and tape reverse side of stencil to paper
Mix paints with paste until you have desired color and paste emboss sheep
Run die cuts through die machine with two different patterned papers
Once paste has dried, attach die cut pieces to paste and pattern paper
Create horizontal A2 card base with a tent fold from green paper
Trim a piece of coral cardstock as a mat for patterned paper and adhere the two
Create a double bow from ribbon and attach tails around back side and adhere entire piece to card base
Add distress ink around edges of sheep
Adhere two small black crystals for eyes

When you have a shower, you need thank you cards to send to your guests that gave you a present.  For a baby shower, there's not much that's sweeter than this adorable lamb.  I think it's perfect!  Plus, I really wanted to thank Lynell for the past two years and the opportunity she gave me to create with her wonderful products.  Here's the rest of the team playing along with our farewell to Lynell:


Thanks for stopping by today.  I appreciate your visits and I always love to read comments you're sweet enough to leave.  Have a wonderful day and I'll see you again soon!

Hugs,
Lea

Thursday, July 3, 2014

The Dies Have It!

Welcome to July...the Dreamweaver Stencils© month to DIE for! Yep. All of this month, the Dream Team is featuring our newest toys...our DIES! You'd be surprised at how many we have, and what fun things you can do with them...especially when used in conjunction with many of their stencil counterparts. They are such a simple way to create an effective card. Here's mine for this week:


I didn't use the stencil that corresponds with the Pear Dies, instead I chose to go more of an artsy route and use a totally different stencil to accent my die cut pears.  I really like the final result.

Here's what I used to create this card:

Dreamweaver Stencils© Stencil LJ 927 Floral w/Dots
Dreamweaver Stencils© DL563 Pears Die Set
ColorBox® Chalk Inks from Autumn Pastels and Primary Pastels
Tim Holtz® Distress Ink™ in Vintage Photo and Shabby Shutters
Bazzill® Cardstock
Bo Bunny® Mint Dots paper
Basic Grey® “Picadilly - Farm Fresh Eggs” paper collection
Zip Dry™
Misc. Pop Dots

Here's what I did to create this card:

I cut my pears and stems out first with the dies
I lined up the Floral w/Dots stencil with each die cut pear and ran them through separately to dry emboss the design onto the pears
I lined the stencil back up on each pear and inked it with the various chalk inks
Add distress inks to each pear for shading
Create your card base in a tent fold
Trim patterned papers for layers as shown
Create sentiment on computer and print out, trim down as shown and ink edges
Adhere all layers for card
Using pop dots, attach pears and leaves

I'm sure that our "A" team is just DIE-ing to show you their creations, as well as our Guest Designer for the month of July...

and

Thanks for stopping by today, I'll see you again soon.  Have a blessed day!

Hugs,
Lea

Tuesday, April 1, 2014

Hooray!

I wish I had a stamp that says "Hooray!"  It would have been perfect with Bootsie, the image I've used today from Rick St. Dennis for the Desert Islands Crafters Challenge Blog.  Bootsie is just one of the images available for this period and I fell in love with him the minute I saw him!  He's totally adorable!  We have six cats and of those six, not a single Siamese but I do love them and this one just called out to be colored as such.  Here's my project using #'s 1, 2, 3, 4, 6, 7, & 10:


Here's my project with the semi-hidden tag pulled out:


And just to show you how he dances through the flowers, here's a little short clip:


Here's a list of what I've used to create this project:

Bootsie by Rick St. Dennis
Copic Markers
Bazzill Cardstock
Neenah Cardstock
Basic Grey's "What's Up" 6x6 paper pad
Fiskars Tag Die
May Arts Ribbon and Twine
Zip Dry Adhesive
Action Wobble 

Thanks for stopping by today!  I hope you've enjoyed my little project.  It was a lot of fun to create!  Be sure to stop by tomorrow as I'll have another post for your viewing pleasure!  See you soon!

Hugs,
Lea


Sunday, March 2, 2014

Desert Islands Crafters Challenge Time!

So, I'm a little behind the 8 ball for this one but I hope my card will make up for my tardiness.  Let me just say, it's been a crazy weekend and I'm actually glad it's almost over!  I don't say that very often but I'm looking forward to the week ahead!  Our Desert Islands Crafters Challenge sponsor for this round is Polka Doodles, the image I've used is Dollie Daydream Goes East - Lantern Digi.  I've colored my image with Copics, enhanced her with a little chalk make-up (eye shadow and blush) and chalked the background.  I also used chalk for my lantern glow on the outside of the lantern.  Here's the itinerary for this challenge:

1. Asian Themed
2. Lots of Red
3. Metallics
4. Text (as in, paper or embellishments with text on them)
5. Mythical Creatures
6. Vellum
7. Found Object from Nature
8. Stripes
9. Use Chalk
10. Make it Glow

For my card, I used all but #5.  I just didn't have any mythical creature stamps or embellies that would have worked!  Here's my project:


I really had fun with this one!  If you're wondering where the metallic part of my card is, I used DecoArt's Metallic Lustre in Gold Rush on her dress hooks and trim around the edge.  I also used if for the handle of the lantern.  I punched the flowers out of vellum with a punch from  EK Success and colored them with Copics on the back side.  It was a beautiful spring-like day here in North Carolina so I enjoyed my little walk-about looking for just the right twigs for my "cherry blossoms."  My papers are Bazzill, Neenah Classic Crest Solar White Cover and Basic Grey's "konnichiwa."  The chalks are from Pebbles, Inc.    

We hope you'll play along with the DICC team, you just might win!  Thanks for stopping by!  

Hugs,
Lea


Thursday, November 28, 2013

The Gift of Writing

Happy Thanksgiving!  I hope you're able to spend the day with loved ones while you're counting your many blessings!

Tuesday Morning is one of my favorite places to treasure hunt. I found a gold journal in the stationery section and thought it would be really cool to alter.  I've had it for a couple of months now just waiting for the right idea to pop into my mind and happened to pick it up the other day when I was looking for something else.  Boom, there it was!  I knew what I wanted to do.  I've been suggesting to one of my daughters for a while now that she should keep a journal.  She keeps telling me she doesn't know what to write about and my response is to write about life.  Write about your day-to-day actions, thoughts, feelings, anything! 
 Write about whatever pops into your head whether you think it makes sense or not.  So, with that said, here's what I did for today's Dreamweaver Stencils post:


The lotus flower is used in some religions, especially in India, to represent awakening to the spiritual reality of life.  This fits right in with my daughters way of thinking and is perfect for her!  For starters, I covered the portion of the cover that I wanted to paint with gesso and let it dry.  Once the gesso was dry, I added my Richeson Acrylic paints using violet, crimson red, phthalo blue, and cerulean blue.  I chose these colors because they're her favorites!  Once that layer was dry I added a little interest using LJ 806 Hexagons and phthalo blue paint.  When that layer dried, I paste embossed LG 720 Lotus stencil as shown with white embossing paste. More drying time as the theme to Jeopardy played in my head!  The paste dried and I rubbed some DecoArt® Metallic Lustre™ in Gold Rush over the white paste.  I pulled out my Basic Grey chipboard alphabet set, selected my letters and covered them gesso; they were a bright green but I wanted them to be purple.  Once the letters dried, I added some violet paint and, using Beacon Zip Dry, I attached them to the journal.  Voila!  Now I have a stocking stuffer ready for my daughter!  You'll notice that I arched the paint and Metallic Lustre™ as that mimics the lines on the pages inside the journal.  One of the other things I liked about it was how the lines were arched and not your typical journal with straight lines.  It kinda suits us!

Here's the list of my teammates with projects to share with you today:

 
Thanks for stopping by today and you can find the step-by-step instructions for this project on Paper Craft Planet!  See you again tomorrow with another fun project!

Hugs,
Lea

Thursday, November 14, 2013

Damask Book


Have you played along yet with our new monthly challenge, "Holiday Celebrations?"  For the entire month of November we will be demonstrating ways to use Beacon Adhesives' entire line of products with Dreamweaver to create special projects in home decor and gifts of love.  For today's post, I've created a book that could be used for a variety of purposes.  It could be a mini gratitude journal, a place to write your thoughts or you could add some photos, whatever you choose!


Here's the inside, I've randomly stenciled each page a little differently.

Slightly different view to show the thickness.


To create this book, I painted both sides of my chipboard covers with antique linen distress paint and inked the edges with distress stain in tarnished brass.  Once dry, I stenciled on the forest moss distress ink using LX 7001 Damask stencil.  I stamped my sentiment from Stampendous using just the top half of the stamp and layered it onto my papers with Zip Dry.  Using the distress paints, I painted the metal festive foliage findings and, once dried, adhered them to the cover with Gem-Tac.  I cut my interior pages to size, punched the holes and stenciled them randomly with antique linen distress ink.  I had rings to hold it all together but I wanted to use something different so I threaded tulle through the holes and knotted it off loosely so I can still turn the pages with ease.  I like the girlie look of the tulle!

Here's the list of products used:

Dreamweaver Stencil LX 7001 Damask
Melody Ross® Chipboard Book
Stampendous® Kind Friendship
Beacon® Zip Dry
Beacon® Gem-Tac
Bazzill® French Vanilla
Basic Grey® Blitzen Collection
My Mind's Eye® Lost & Found Two - Breeze
Neenah® Classic Crest in Natural White
Tim Holtz® Idea-ology® Findings - Festive Foliage
Tim Holtz® Distress Paints™:
     Antique Linen
     Forest Moss
     Barn Door
Tim Holtz® Distress Stain™ Tarnished Brass
Tim Holtz® Distress Ink™:
     Forest Moss
     Antique Linen
Memento Tuxedo Black Ink Pad
Antique Gold Metallic Tulle

Check out the rest of the team's creations as well as our guest designer for the month, Linda Neff!

Thanks so much for stopping by today.  Please visit again soon as I'll have more creations to share with you.

Hugs,
Lea

Thursday, October 24, 2013

I'm Batty for Dreamweaver...

...and Halloween!  For this week's creepy cool card, I've used Dreamweaver Stencil LL 525 Bats.  I love this stencil!  It screams Halloween, don't you think!?  Here's my card:


This card was a very simple one but I loved how it came out and the papers I paired it with were perfect for this particular stencil!  To begin, I used Tim Holtz Distress Ink in Milled Lavender and Shabby Shutters and stippled it onto white cardstock with a brush.  Next using matte black embossing paste, I paste embossed the stencil onto the inked area.  Once the paste was dry I trimmed it down to the size I wanted and edged it with Black Soot Distress Ink and then added a smidge of black Stickles for glittery eyes.  I set my embossed piece aside so my Stickles could dry and began creating the rest of the card, which was easy peasy!  My card base is a fun shade of lavender Bazzill that matched my patterned paper to a "t".  I created a standard A-2 card using a tent fold.  My patterned papers are from Basic Grey but I must apologize as I don't remember which collection they're from.  I used two different papers for my background, making each just a little smaller than the base and the bottom paper.  Once I adhered my two patterned papers together, I tied some May Arts Black Sheer ribbon into a double bow with tails long enough to wrap around to the back and adhered it before attaching the whole grouping to the card base.  Next I just added my stenciled piece and voila!, my card was complete!  Super easy!!  Here's a close-up so you can kind of see the eyes.  To be honest, I wish I had done them with orange so they would've shown up better but that's okay, next time!


Here's the list of the other lovely ghouls, I mean girls (Bwahaha!) playing along this week.  Be sure to leave them some love!


I'm sure they've all got something mystical and magical just for you!  Thanks so much for stopping by.  Just so you know, I really, really appreciate all the kind comments you lovely ladies leave me!  Makes me feel good from the tips of my toes to the top of my noggin!  See you again real soon!

Hugs,
Lea


Saturday, August 17, 2013

We're Hopping Across the Pond!


Welcome to the annual Dreamweaver and Woodware Christmas in August extravaganza week! Monday through Saturday we will be knocking your Christmas stockings off with fun and inspirational ideas for the upcoming holidays. All that you need to do is hop back and forth across the "pond" on each day, oohing and aaahhhing as you go, and leaving us plenty of holiday love. In return, you'll be entered to randomly win one prize package for a UK commenter, and a second prize package for a US commenter, featuring products distributed in the UK by Woodware...including Dreamweaver and Stampendous!

Prize includes four stencils, one die, and two stamps, selection may vary.

My card today was created using Dreamweaver Stencil LM143, Chickadees, pasted embossed with white paste on Neenah Classic Crest Natural White cardstock.  Once it was dry, I colored it with Copic markers.  I colored one bird with more vibrancy than the other as the female is generally more subdued in coloration.  I had no idea when I colored these birds that they were Chickadees and almost colored them the natural colors.  If I had used grays instead of blues on the wings and tail feathers, I would have nailed them without even realizing it!  I trimmed the paste embossed piece to the size I wanted and edged it with Tim Holtz distress ink in Gathered Twigs.  I set it aside and created the card base with Bazzill and Basic Grey's Blitzen Collection.  Using Stampendous Stamps CRH287, Scripty Blessings, I stamped my sentiment with Memento Tuxedo Black on more Neenah.  I trimmed the sentiment down to size, edged it with gathered twigs and matted it on patterned paper.  I adhered the embossed piece to my waiting card, pop dotted the sentiment on and for a final touch, I added three little red dew drops.  A simple, yet elegant, card!


Now's the time for you to leave a comment and move on to the next designer for today:


I hope you've found some inspiration along the way this past week.  I've certainly had fun creating projects to share with you.  I would like to extend my thanks to the wonderful Woodware folks, it has been a complete joy collaborating with them.  Be sure to leave lots of love today so you'll be eligible to win one of our great prizes.  Thank you for stopping by and any comments you leave or have left are appreciated greatly.  I'm sorry I've had to add comment moderation but I was getting hit almost daily by spammers and was afraid someone would fall victim to their shameful tactics.Thank you for understanding the necessity of comment moderation.  I'll see you again soon!  Have a blessed day!

Hugs,
Lea

Thursday, July 25, 2013

Dog Days of Summer

That's right!  It is HOT outside and like my little doggies, all I want to do is stay inside in the AC!  Dreamweaver Stencils is celebrating Summertime and all things related.  I consider the Dog Days of Summer to be appropriate, especially now that we have a super cute steel die that matches our LL 3029 Dog Stencil!  Oh my gosh, can I just tell you how much I love the matching dies!!!  They've just released them at CHA Create and Connect and I know they're going to be a huge hit.  So here's my card:


Angled View
Here's a different angle to showcase the dimension.  I used matte black embossing paste with the stencil and paste embossed the dog first.  Once it was dry, I added the die cut pieces over the black paste.  I left the nose, eye and collar black.  I did fill in the eye with Copic marker.  Below is a close-up of the dog that really shows the depth of the paste under the paper pieces.  My papers are Bazzill, Neenah Class Crest CS and Basic Grey's Whiskers and Max 6x6 paper pad.  I also used a little Tim Holtz Distress Ink.


Here's the list of everyone posting today:
Close Up View


I hope you've enjoyed my project today.  Next week we're doing a blog collaboration with Stampendous and Dreamweaver and I'll be posting new projects on four days.  Be sure to check back as there will be prizes!  Who doesn't like prizes!?  Enjoy your day and thanks for stopping by!

Hugs,
Lea


Thursday, May 23, 2013

Rubber Ducky You're The One!

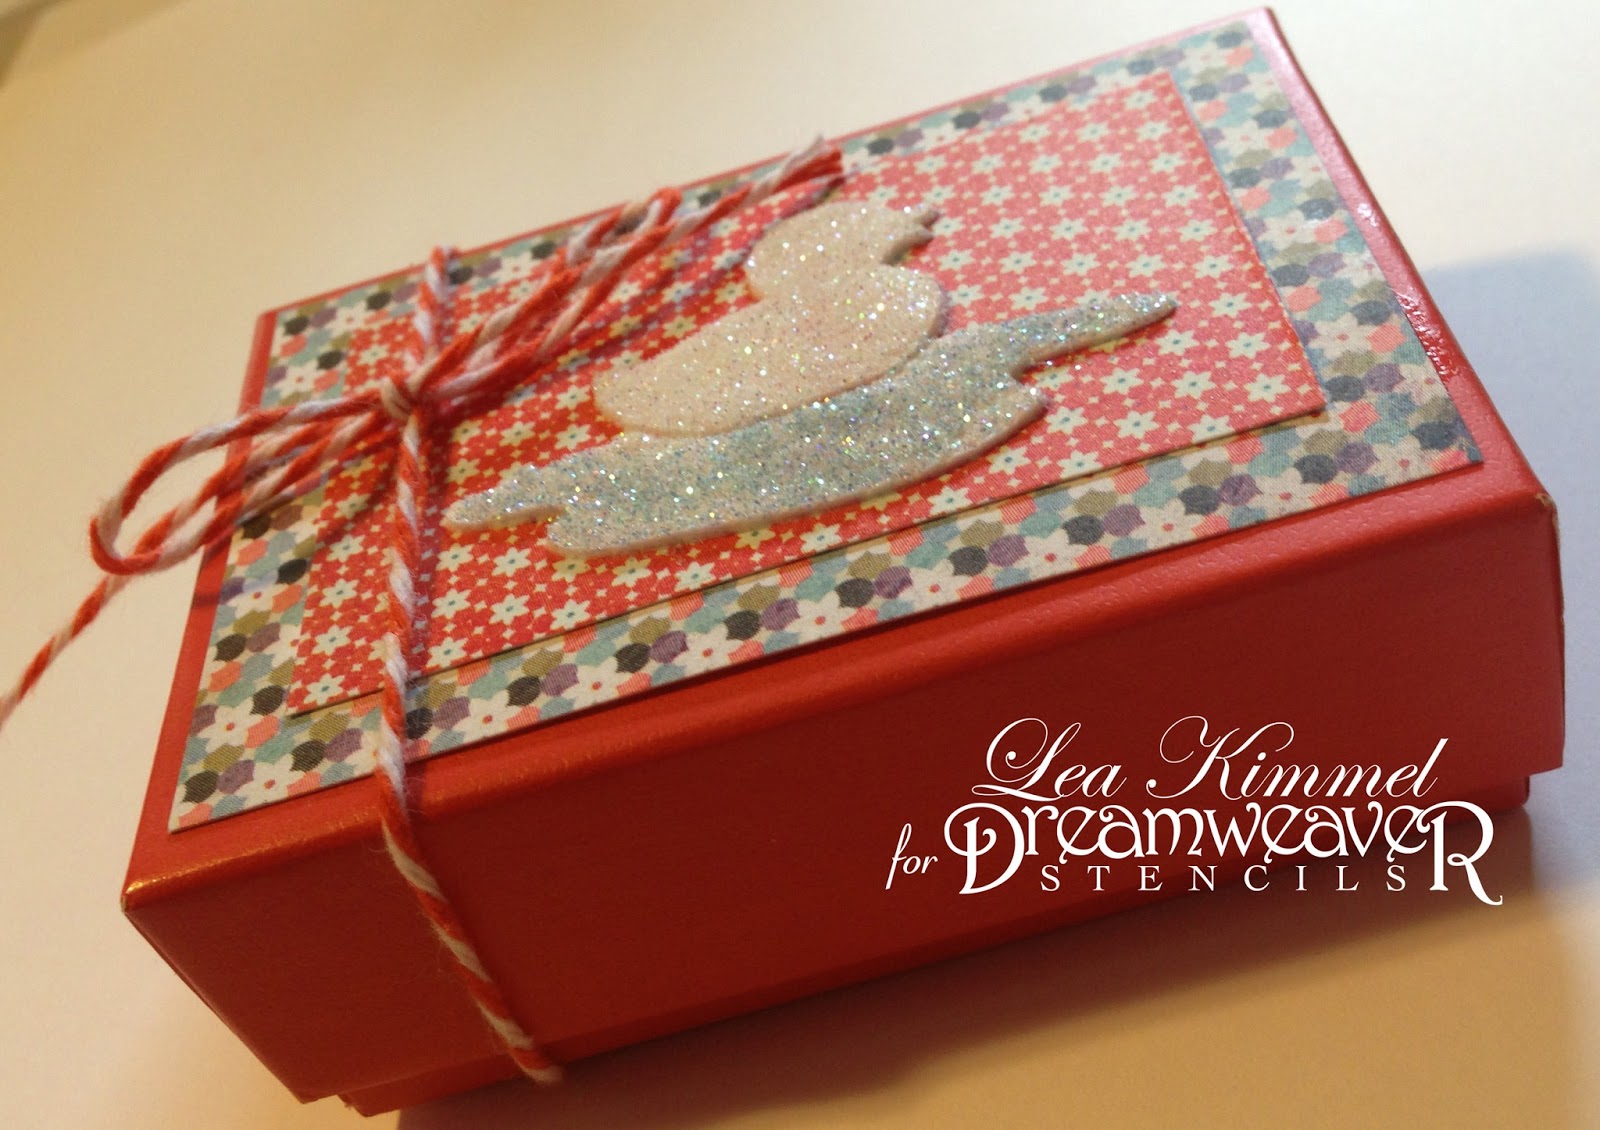
Not only do you make bath time so fun but you make cute little packages look pretty darn cute, too!  This particular package is cool because it's recycled or repurposed, whichever way you wish to call it!  This cute little coral box is from James Avery, some of my favorite jewelry of all time, I love it!


I have several of their empty boxes just sitting in a drawer.  They're such a pretty color, I thought it would be nice to find a way to repurpose some.  Along came this cute little stencil from Dreamweaver Stencils and I knew what I wanted to do!


This paper from Basic Grey's What's Up collection was just right for this little project.  I trimmed down two pieces left over from a previous project and using the rubber duck stencil, I added my white paste.


Once the paste was dry, I drizzled a little Beacon Adhesive Zip Dry on the the puddle and sprinkled on some of the light blue glitter from this kit from Stampendous!  


After the blue glitter dried, I put a drop of  Zip Dry on the duck and added some of the multi crystal (white) glitter on the duck. Once the duck was dry, I adhered both layers to the top of the box.  


Pretty darn cute!  All it needed was a little a little twine to finish it off!


Now I have a cute little box waiting for a small trinket to share!


I hope you like my "Tiny Treat" box!  Here's some more inspiration waiting for you!  

Dream It Up!
Lea Kimmel (That's me!)


Thanks for stopping by and I'll see you again soon!

Hugs, 
Lea

Up, Up and Away...

...in my beautiful, my beautiful balloon! Some of you just might remember that song from The 5th Dimension and some of you aren't old enough.  It's an old favorite of mine and one that I used to love to sing along with!    Speaking of favorites, this week two of my favorite companies have come together to bring you a little creative inspiration, Stampendous! and STAEDTLER.  Pretty cool, huh!?  We've loved playing together and each day this week members from both design teams have posted projects on their blogs to share with you.  If you haven't been checking them out, please go back and take a look, you won't be disappointed.  There's a blog hop on Friday and, of course, there will be prizes!  Yay! for prizes!  More info on that below!  Here's my card:


We're celebrating our newest balloon-inspired stamps this week and here I've used our new Hot Air Trio along with Soaring Sentiments Perfectly Clear Stamps Set.  I have always had a thing for hot air balloons so this stamp is right up my alley.  If you know me, you know I love my Copic markers and that's usually my medium of choice, however, this time I've stepped out of my comfort zone and I colored this image with  STAEDTLER'S ergosoft aquarell (watercolor) pencils.  I love how you can layer the colors to achieve just the right shade!  Because I was using watercolor pencils, I stamped the image and my sentiment with Ranger Archival Ink in Jet Black.  My papers are Bazzill, Strathmore Mixed Media paper and Basic Grey's What's Up 6x6 Paper Pad.  Here's a closer look at the image:

                                                
And here's a close-up of the sentiment, this is one of my favs:


The Stampendous! prize package will include one prize package per day (total of 5 packages) from those folks commenting on Stampendous bloggers that day. The Stampendous package will include SSC1171 Hot Air Scapes Perfectly Clear Stamps and SSC1170 Soaring Sentiments Perfectly Clear Stamps plus a Jumbo acrylic handle for use with them.


STAEDTLER'S prize package will be awarded at the end of the week, one for each of their bloggers from all commenters on that blog that week.
Their prize photo is below. So for best chances folks should comment on every blog every day.
1 Set of 6 Triplus fineliners, pastel assortment
4 blocks of FIMO soft oven-bake clay in vanilla, peach, lilac and mint
1 Mars plastic eraser
1 Double hole metal pencil sharpener
1 Mars Lumograph sketch pencil
1 Pigment liner sketch pen
2 Creative idea brochures

Package includes:


So, here are the designers bringing you a little inspiration today, be sure to leave some love:

Lea Kimmel (Me!) 

Don't forget to leave some love if you want to be eligible to win a prize!  That's it for me today, I'll see you back here again tomorrow for the blog hop!  Thanks for stopping by!

Hugs,
Lea